
Witch Hat Cookies – Easy No‑Bake Halloween Treats for Kids
When it comes to Halloween, sometimes the best treats are the ones that don’t require an oven. Between school events, costume chaos, and last-minute parties, having an easy, no-bake option like Witch Hat Cookies can save time and spark creativity. These cookies are not only quick to prepare, but they also serve as a fun kitchen activity the whole family can enjoy—especially kids.
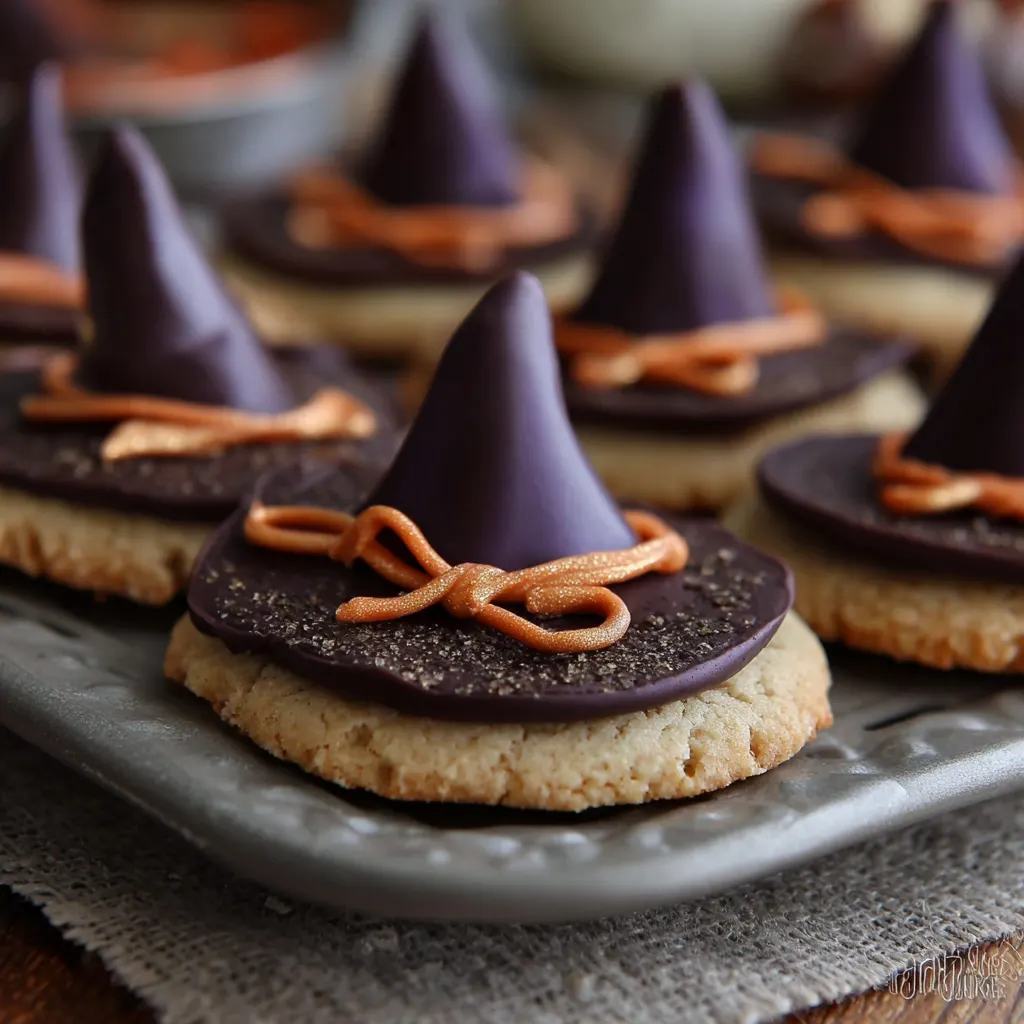
At their core, witch hat cookies are made with simple store-bought ingredients: a fudge-striped cookie or Oreo as the base, a Hershey’s Kiss for the pointy top, a bit of frosting or melted candy to glue them together, and optional extras like sprinkles or mini candies to mimic a “hat band” or buckle. From popular TikTok creators to family food bloggers like Kitchen Divas, The Rebel Chick, and Best Cookie Recipes, this adorable idea has taken off across platforms for a reason—it’s delightfully easy and irresistibly festive.
What truly makes witch hat cookies stand out is their appeal to young helpers. Kids can assemble the cookies, decorate them however they like, and enjoy the reward of their spooky sweet snack in under 30 minutes. No baking, no fuss—just edible fun. Whether you’re prepping for a classroom celebration or hosting a Halloween party at home, these treats are a guaranteed hit.
In this article, we’ll walk you through the step-by-step process of making witch hat cookies, share creative variations, answer common questions, and provide a printable recipe card so you can recreate this no-bake Halloween favorite with ease.
Recipe Variations & Ingredient Options
When it comes to Witch Hat Cookies, flexibility is part of the fun. You can mix and match ingredients based on taste preferences, dietary needs, or whatever you already have in the pantry. Let’s explore some of the most popular options that make these cookies uniquely yours.
No‑Bake Base Options
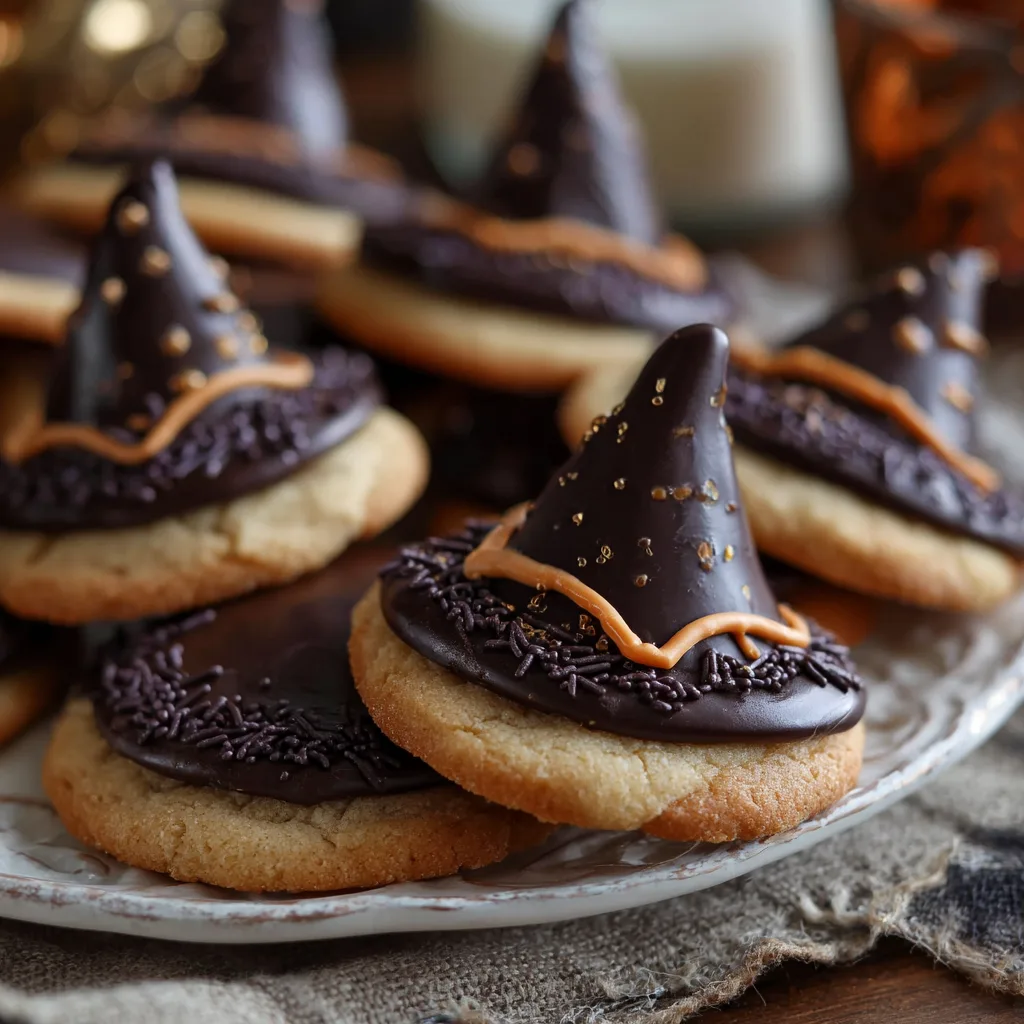
The foundation of the witch hat starts with a flat, round cookie. Most no-bake versions rely on fudge-striped cookies like Keebler’s—simply turned upside down so the chocolate-coated side faces up. This creates a smooth surface for the hat “brim,” which also helps the frosting stick better. Bloggers like Dizzy Busy and Hungry, The Rebel Chick, and Drugstore Divas all agree that this base is the easiest and most kid-friendly.
Looking for variety? Consider dark chocolate Oreos, fudge-covered peanut butter cookies, or even buttery crackers for a sweet-and-salty twist. Kitchen Divas recommends using whatever cookie suits your flavor preferences or dietary needs—so long as it’s round and sturdy enough to hold the Kiss.
Frosting & “Hat Band” Options
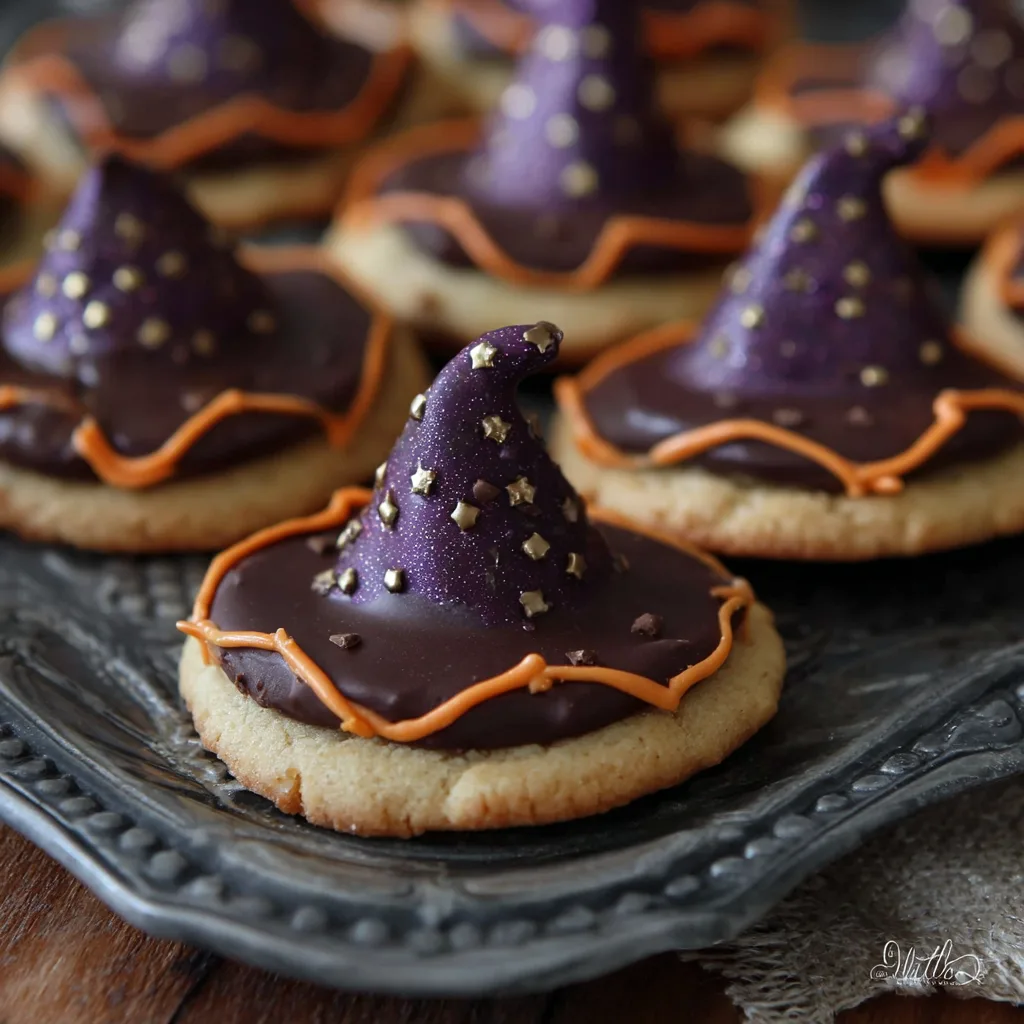
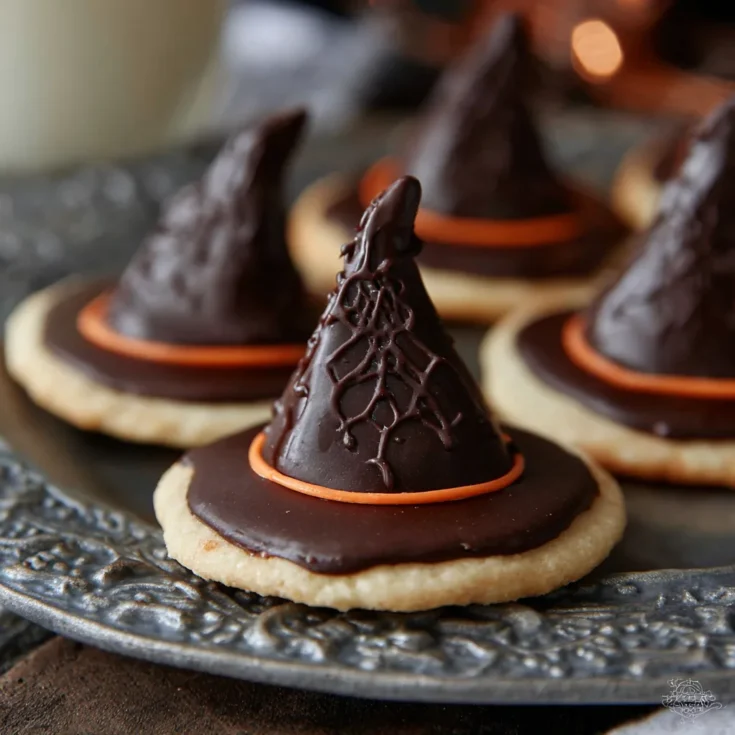
The frosting or “hat band” not only helps attach the chocolate Kiss to the cookie base but adds festive color. Classic orange icing is the go-to for that Halloween look. You can also use pre-colored frosting tubes or melt candy wafers in spooky shades like green, purple, or black for variety.
If You Give a Blonde a Kitchen, The Rebel Chick, and Dizzy Busy and Hungry all suggest using candy melts for a cleaner finish, especially if you want the frosting to harden and hold its shape more easily.
Topper Choices
No witch hat is complete without the iconic point—and that’s where Hershey’s Kisses shine. The original milk chocolate version is classic, but The Farmwife Crafts and cookthestory.com suggest mixing it up with dark chocolate, Hugs, or even cookies & cream Kisses for added flair. Just make sure to unwrap them ahead of time so kids can grab and go during assembly.
Decorations & Buckles
Add character with mini M&Ms as buckles, or use Halloween sprinkles and edible glitter for a little extra magic. You can even pipe candy melt bands or use gel icing for more elaborate designs. Preppy Kitchen recommends mixing textures and colors to create a variety of styles.
Dietary and Customization Notes
Need a vegetarian option? Most standard frosting and Hershey’s Kisses are safe, but double-check labels for gelatin or animal-derived ingredients. For a gluten-free version, simply use gluten-free cookies as your base. You can also swap out candy brands for allergy-friendly alternatives depending on your family’s needs.
Step-by-Step Assembly Guide
Making witch hat cookies is a fun, mess-friendly way to kick off Halloween celebrations—especially with little helpers in the kitchen. Follow this simple guide to create the perfect no-bake treat, step by step.
Prep Steps
Before you begin, gather everything you need. This makes the decorating process smooth and fun:
-
Unwrap all Hershey’s Kisses and place them in a bowl for easy access.
-
Arrange your cookie bases (like fudge stripes or Oreos) upside down on a large tray or baking sheet.
-
Line the tray with parchment paper or wax paper to prevent sticking and make cleanup easier.
-
Prepare your frosting or candy melts. If using candy melts, microwave in 30-second intervals, stirring in between, until smooth.
Tip: If you’re using colored frosting, transfer it into a piping bag or a sandwich bag with the tip snipped off for easier decorating.
How to Assemble
This is where the fun begins! Each cookie becomes a miniature witch’s hat in just a few steps.
-
Add frosting to the base:
Using your piping bag or spoon, place a small ring of frosting or a dot of melted candy in the center of the cookie. This will act as the glue. -
Place the chocolate Kiss:
Press an unwrapped Hershey’s Kiss onto the frosting so it sticks firmly to the cookie base. Don’t press too hard, or the frosting will ooze out the sides. -
Decorate the hat band:
While the frosting is still soft, add a mini M&M to resemble a buckle, or sprinkle on colorful Halloween sprinkles. Some variations use a small piped band of a second frosting color for added effect.
Multiple sources, including Trop Rockin, Dizzy Busy and Hungry, Drugstore Divas, cookthestory.com, and My Heavenly Recipes, highlight how kids love this part most—it’s easy, tactile, and instantly rewarding.
Setting & Serving
Once assembled, allow your cookies to set at room temperature for 15 to 30 minutes. This gives the frosting or candy melts enough time to firm up so the hats stay intact during serving or transport.
The Rebel Chick suggests letting them rest on wax paper and avoiding stacking too soon, as this can damage the decorations.
Planning to serve at a party? Display them on a Halloween-themed platter or cupcake stand for maximum impact. Their vibrant colors and playful design make them a guaranteed conversation starter.
Storage Instructions
To store your witch hat cookies:
-
Place them in an airtight container.
-
Keep them at room temperature for up to 1 week.
-
For longer storage, refrigerate them—but allow them to return to room temp before serving to avoid condensation on the chocolate.
To prevent sticking or smudging, layer cookies with parchment paper between each row.
As Best Cookie Recipes, Bellyfull, and I Heart Naptime all point out, these cookies actually store well, making them a perfect make-ahead option for busy Halloween weekends or school events.
Tips for Involving Kids
This treat is practically made for kid participation. Here are easy ways to involve children of all ages:
-
Toddlers can place Hershey’s Kisses on the frosting.
-
Young children can choose and add decorations like sprinkles or M&Ms.
-
Older kids can help with piping the frosting or even melting candy melts (with adult supervision).
For safety, let an adult handle any melting or cutting of piping bags. Set up a kid-friendly station with their own tray and tools, and expect a little mess—it’s part of the holiday fun!
Witch hat cookies are more than just a treat—they’re a memory in the making.
Variations, Tips & Creative Twists
One of the best things about witch hat cookies is how customizable they are. Whether you want to change up the flavor, color, or structure, there’s plenty of room to get creative—especially if you’re making these with kids or for a themed party. Let’s explore some fun and practical variations.
Flavor or Base Variations
While classic fudge-striped cookies are the go-to base, you can easily enhance flavor by experimenting with other cookie types.
Trop Rockin recommends using peanut butter cookies for a salty-sweet combo that pairs perfectly with chocolate. You can also make your own cake-mix cookies in festive flavors like pumpkin spice, red velvet, or double chocolate.
Want to add depth? Try cocoa cookies or fudge-dipped wafers for a rich twist. Just make sure whatever you use is round, flat, and sturdy enough to support the Hershey’s Kiss topper.
Color Themes & Design Ideas
For Halloween flair, it’s all about color!
Drugstore Divas suggests using colored icing bands in bold orange, green, or purple—the traditional Halloween palette. Piping on spooky sprinkles, like candy eyeballs or bat-shaped sugars, instantly turns a basic treat into something festive.
A sprinkle of edible glitter adds a magical shimmer to each hat, while neon gel icing can create electric effects that glow under party lights. Coordinate your color theme with your party décor for added wow factor.
Advanced Assembly
Looking to level up your cookie game? Try a few advanced decorating ideas from The Rebel Chick and Dizzy Busy and Hungry!.
Instead of a single frosting ring, make multi-striped hat bands by layering candy melts in different colors. You can pipe alternating dots, zigzags, or even wrap thin strands around the base for a more detailed look.
For a rustic or homemade twist, use crackers, thin brownies, or homemade cookies as the base. Just ensure they’re the right shape and thickness to support the toppings.
Troubleshooting Tips
Even with no-bake recipes, things can go sideways. Here are some common issues and simple fixes:
-
Frosting too runny? Bellyfull.net recommends adding a small amount of coconut oil to thicken candy melts for a better set. If using regular icing, chilling it briefly before use can help it hold its shape.
-
Frosting won’t set? Chill the cookies for 10–15 minutes in the refrigerator. Alternatively, switch to candy melts or royal icing, which harden more quickly and cleanly.
Frequently Asked Questions
Can I make witch hat cookies ahead of time?
Absolutely. Witch hat cookies are the perfect make-ahead Halloween treat. According to Preppy Kitchen, Drugstore Divas, and Trop Rockin, you can prepare them a full day in advance without any compromise in texture or taste. Just be sure to store them in an airtight container at room temperature so they stay fresh and festive.
How long will witch hat cookies last?
If stored properly, witch hat cookies can last up to one full week at room temperature. For longer storage, you can refrigerate or even freeze them—just note that condensation may affect decorations slightly when thawing. Both Dizzy Busy and Hungry! and If You Give a Blonde a Kitchen recommend allowing cookies to come to room temperature before serving if chilled or frozen.
What if I don’t have a piping bag?
No piping bag? No problem. Trop Rockin, Drugstore Divas, and Very Best Baking all suggest using a sandwich or freezer bag as a DIY alternative. Simply fill the bag with your icing or melted candy, push it into one corner, and snip a tiny tip off that corner to control your flow.
Can I use different cookies than fudge stripes?
Definitely. While fudge-striped cookies are traditional, other options like Oreos, chocolate wafers, buttery crackers, or even homemade sugar cookies can work just as well. The Rebel Chick, The Farmwife Crafts, and various TikTok creators demonstrate creative uses of all kinds of bases—so don’t hesitate to experiment with your favorite.
Can these be made gluten‑free or vegetarian?
Yes! Simply swap the cookie base for a certified gluten-free option. Most Hershey’s Kisses and basic frostings are already vegetarian, but it’s always best to check ingredient labels—especially for food coloring and candy decorations, which sometimes include animal-derived additives.
Witch Hat Cookies – Easy No-Bake Halloween Treats for Kids
Fun, colorful, no-bake Halloween witch hat cookies that kids can help assemble in under 30 minutes. Perfect for parties, school events, or spooky movie nights.
Ingredients
- 18–24 fudge-covered or striped cookies (e.g., Keebler Stripes, Oreos)
- 18–24 Hershey’s Kisses (any variety: milk, dark, Hugs, or seasonal)
- ¼–½ cup orange (or colored) frosting or candy melts
- 18 mini M&Ms or Halloween sprinkles
- Food coloring (optional, if using white frosting)
Instructions
☐ Line tray or baking sheet with parchment or wax paper
☐ Unwrap all Hershey’s Kisses and place in a bowl
☐ If using white frosting, divide and tint with food coloring
☐ If using candy melts, melt them in 30-second intervals until smooth
☐ Place all cookies fudge-side up (striped side down) on the prepared tray
☐ Pipe a small ring of frosting in the center of each cookie
☐ Press a chocolate Kiss gently into the frosting to form the witch hat tip
☐ Add a mini M&M "buckle" or sprinkle decorations to the frosting ring
☐ Repeat for all cookies
☐ Let cookies set at room temperature for 15–30 minutes before serving
Notes
