
Halloween calls for treats that thrill and delight—and vampire cupcakes deliver just that. These chillingly delicious cupcakes combine eerie dark colors with a shocking twist inside: a hidden “bloody” surprise. Perfect for Halloween parties, they catch eyes and spark conversations, adding a spooky edge to any celebration.
What sets vampire cupcakes apart is their haunting appearance paired with a luscious, sweet filling that bursts out like dripping blood when bitten. The contrast between the rich, black or deep red cake and the bright, gooey center creates an unforgettable experience for both kids and adults. Their theatrical look and surprising flavor make them a Halloween classic that never goes out of style.
In this complete guide, you will discover everything needed to create these scary-good treats. From selecting the right cake base and crafting the perfect filling to decorating with spooky details, plus variations for different diets, this article covers it all. You’ll also find helpful tips and answers to common questions to ensure your vampire cupcakes become the star of your Halloween feast.
The Rise of Themed Halloween Baking: From Fun to Frighteningly Delicious
In recent years, Halloween baking has evolved into an exciting blend of creativity and flavor. Home bakers and professionals alike embrace themed treats that are not just tasty but also visually captivating. Spooky designs, interactive elements, and playful presentations have become staples of Halloween parties. These treats invite both children and adults to join in the festive spirit by engaging their senses beyond taste alone.
Vampire cupcakes emerged as a standout among these festive creations. Inspired by classic Dracula legends, these cupcakes cleverly incorporate the idea of blood with their red or dark fillings. Their “bloody” surprise inside mimics the vampire mythos, adding a playful yet eerie element. This combination of horror and sweetness perfectly suits the Halloween atmosphere, making vampire cupcakes a crowd favorite.
Their popularity also owes much to their interactive nature. Kids love discovering the hidden filling when they take a bite, turning eating into a fun experience. Additionally, their striking appearance makes them highly shareable on social media, boosting their fame among food enthusiasts. This Instagram-ready look ensures vampire cupcakes remain a trending treat during the spooky season.
What Makes Vampire Cupcakes Truly Special: Visuals, Flavors, and Surprises
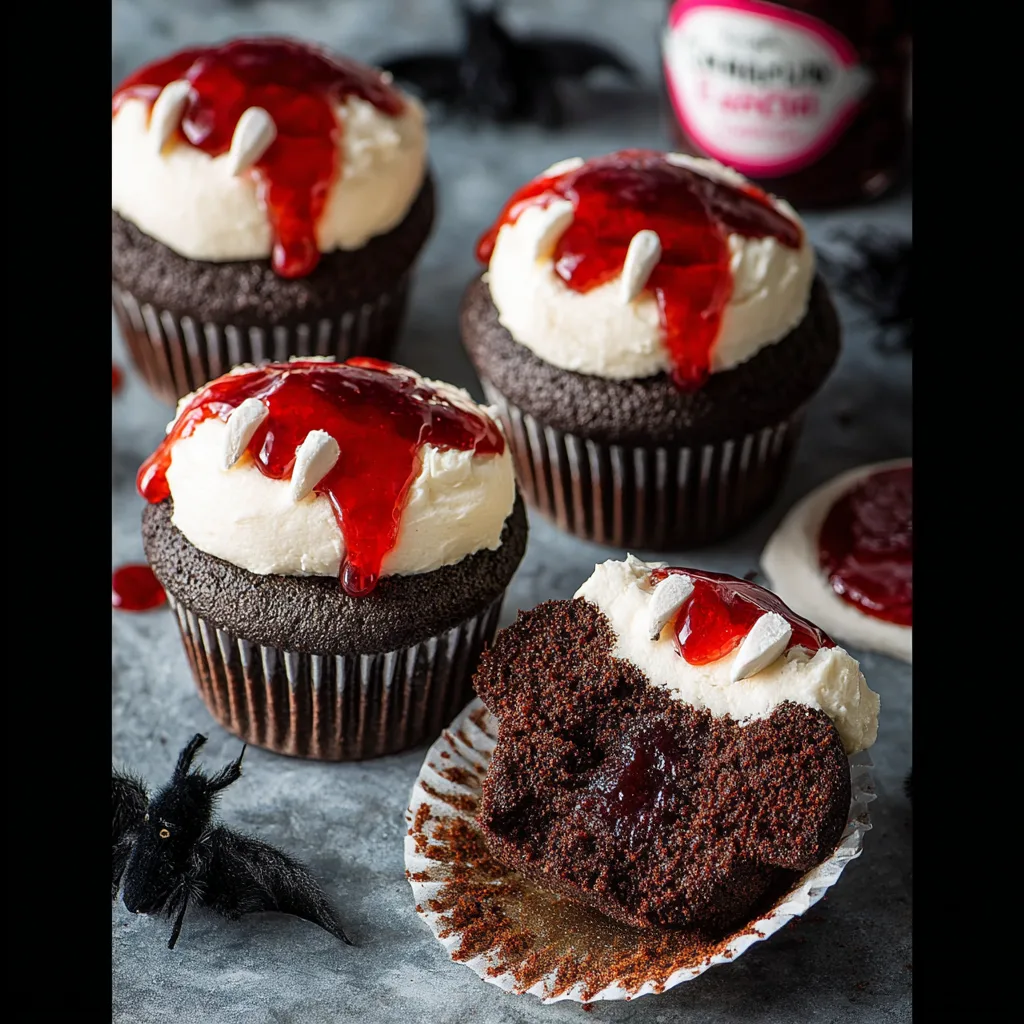
Vampire cupcakes stand out with bold visual features that capture Halloween’s dark spirit. Typically baked with black cocoa or tinted batters, these cupcakes present a mysterious, midnight hue. On top, red “blood” drips—made from jam, ganache, or icing—emphasize the creepy theme. Some versions add vampire faces or bite marks for extra flair, making each cupcake a mini Halloween work of art.
Beyond looks, their flavor profile excites the palate. The deep richness of chocolate or red velvet cake pairs perfectly with a sweet, tangy filling. This contrast keeps every bite interesting and indulgent. The filling’s unexpected burst of color and flavor adds depth, elevating the cupcake from ordinary to unforgettable.
Most importantly, the hidden “blood” center creates a delightful surprise. It turns a simple cupcake into an interactive experience, giving a sense of discovery that guests remember long after the party ends. This combination of visual drama, taste complexity, and playful suspense defines vampire cupcakes’ lasting appeal.
Classic Chocolate and Black Velvet Vampire Cupcakes with Red Ganache Filling
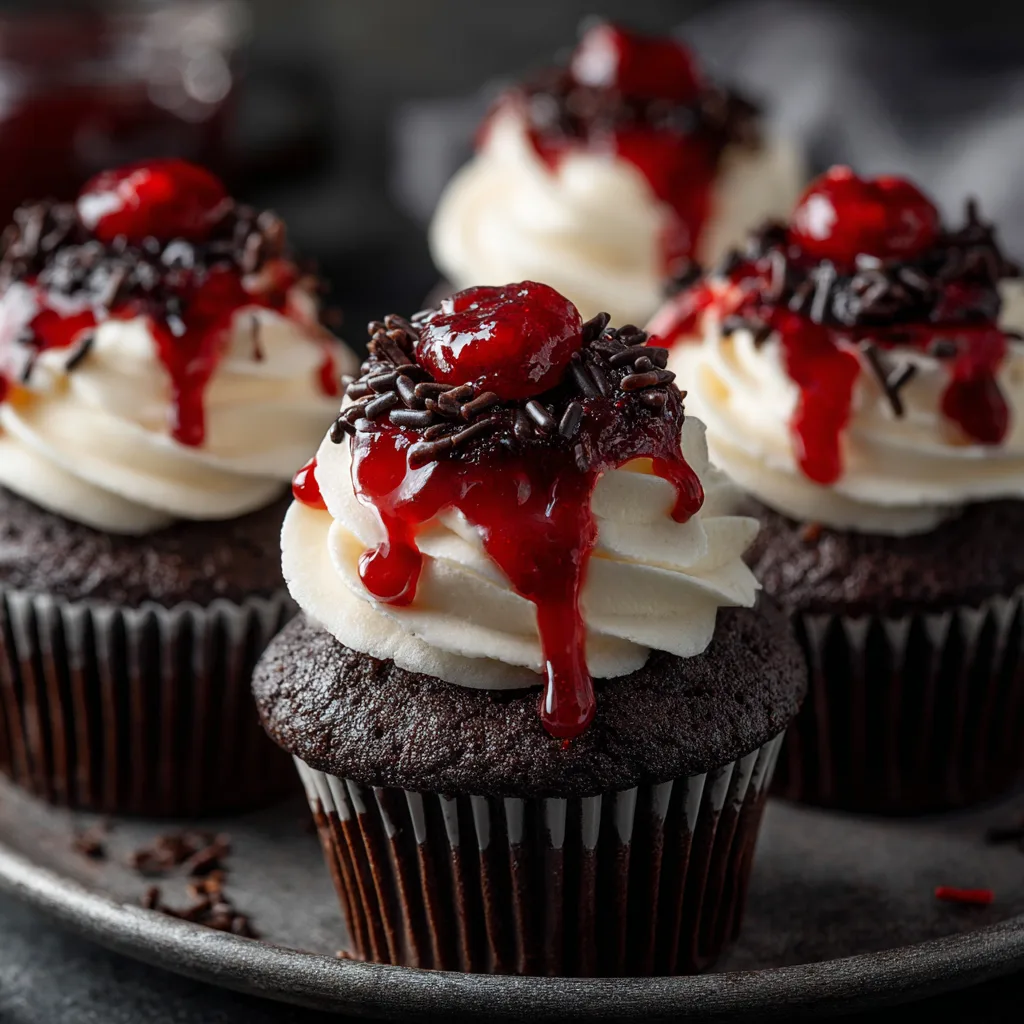
The timeless choice for vampire cupcakes features a dark chocolate or black velvet base paired with a vivid red ganache center. This combination creates a dramatic contrast that embodies Halloween’s eerie vibe. The rich, moist cake provides the perfect canvas for the bright “blood” filling, usually made from white chocolate ganache tinted with red food coloring. This silky ganache oozes from the cupcake’s core, delivering a sweet surprise that complements the deep chocolate flavor.
Bakers inspired by sources like The Seaside Baker and Lights, Camera, BAKE! swear by this version for its balance of taste and theatrical effect. The white chocolate ganache adds a creamy texture and a mild sweetness that contrasts the cake’s bitterness. To enhance the black color of the cupcake, many recommend using black cocoa powder or activated charcoal. These ingredients produce a darker hue without overpowering the flavor.
Tips for success include chilling the ganache before filling to prevent it from leaking and coring the cupcakes carefully to keep the tops intact. Decorating these cupcakes with simple red “blood” drips or more elaborate vampire bite marks elevates their spooky appeal. Overall, this classic style remains a favorite because it perfectly blends haunting aesthetics with delicious flavors.
Red Velvet and Strawberry-Filled Vampire Cupcakes: A Sweet Twist
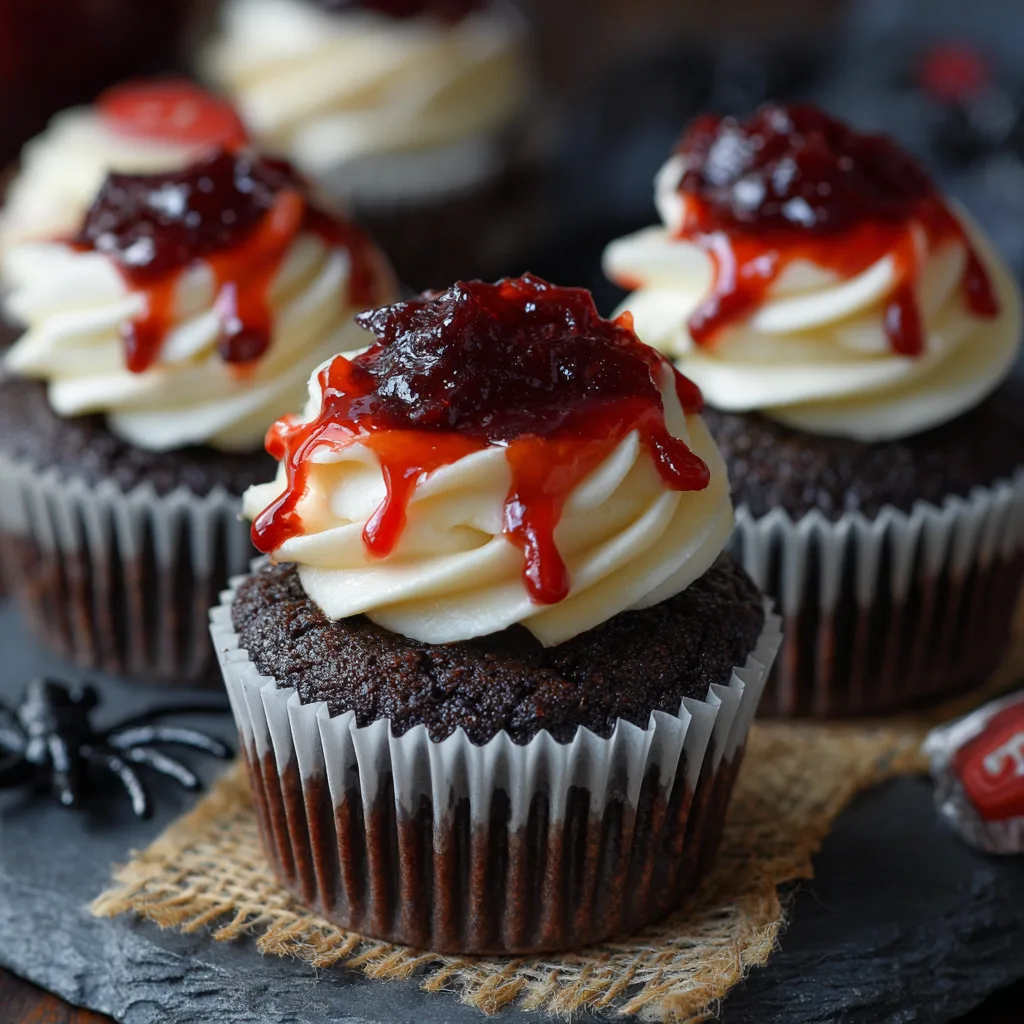
For those who prefer a lighter, fruitier option, red velvet cupcakes filled with strawberry jelly or jam offer a vivid and tasty alternative. The natural red tone of red velvet cake enhances the vampire theme, while the strawberry filling provides a fresh, tangy burst reminiscent of “blood.” This version appeals to people who enjoy fruity flavors paired with a tender crumb.
Popularized by Delish and VNutrition, these cupcakes play with color and texture. The red velvet base is soft and slightly cocoa-flavored, and the jam adds a juicy, sticky center. To intensify the effect, some bakers add extra red food coloring or drizzle strawberry syrup over the frosting, creating a realistic blood-drip effect.
This style allows for creative frosting choices, such as cream cheese frosting dyed pale or bright red to complement the filling. The Rose Table also highlights how a gloss finish on the jam can mimic fresh blood, enhancing the visual impact. Overall, strawberry-filled red velvet cupcakes offer a vibrant and approachable version of the vampire treat.
Dairy-Free and Vegan Vampire Cupcakes: Inclusive and Delicious
Vegan and dairy-free options have gained popularity among health-conscious and allergen-sensitive bakers. Dairy-free vampire cupcakes typically use plant-based milk and egg substitutes like flaxseed or applesauce. For the filling, strawberry jam or jelly provides a simple, vegan-friendly “blood” alternative without the need for heavy cream or white chocolate.
VNutrition offers recipes that maintain the classic vampire cupcake vibe while accommodating dietary restrictions. These versions swap butter for coconut oil or vegan margarine and use gluten-free flour blends when necessary. The filling remains bright and flavorful, and the cake stays moist despite the absence of dairy.
Bakers should pay close attention to ingredient quality to ensure the cupcakes remain rich in flavor and color. Using natural food coloring or beet powder can enhance the red tones without artificial additives. This inclusive approach ensures that everyone can enjoy these festive treats without compromising on taste or theme.
Creative Decorative Toppings and Vampire Faces: Adding Personality to Your Cupcakes
Decoration elevates vampire cupcakes from simple desserts to eye-catching Halloween centerpieces. Using Reese’s white peanut butter cups as vampire mouths, complete with candy fangs, creates charming and playful faces. Hungry Happenings showcases this idea, combining the rich peanut butter flavor with the spooky theme.
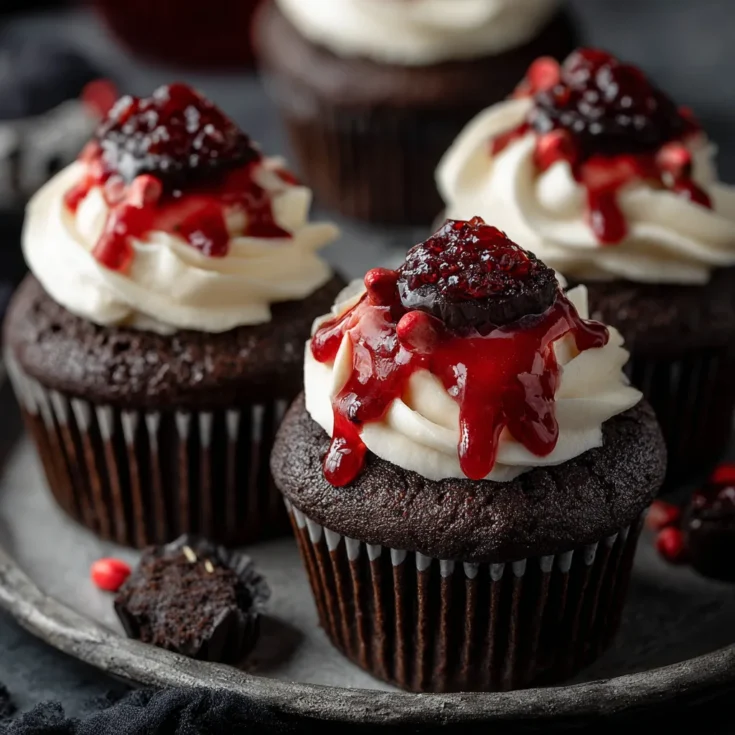
The Seaside Baker suggests incorporating bite marks and dripping edible “blood” using red gel icing or strawberry syrup to simulate fresh wounds. The Rose Table highlights how realistic blood drips add a chilling effect, making the cupcakes appear freshly bitten by a vampire.
Other decorative elements include candy eyes, red sprinkles, or black frosting details to mimic hair or capes. These additions personalize each cupcake and make them fun for children and adults alike. Pinterest offers a wealth of ideas, encouraging bakers to experiment with colors, shapes, and textures to create unique vampire cupcake designs.
Kid-Friendly Baking: Simple Designs and Group Baking Tips for Halloween Fun
Baking vampire cupcakes with kids brings an extra layer of enjoyment to Halloween celebrations. Mum in the Madhouse emphasizes easy recipes and simple decorating steps that children can follow safely. Using pre-made frosting or jam fillings reduces complexity and keeps the process fun.
Group baking tips include assigning tasks based on age and skill level, such as coring cupcakes, spreading frosting, or adding decorations. This teamwork approach fosters creativity and makes baking a memorable group activity.
Choosing bright, simple designs like bite marks and “blood” drips helps kids feel accomplished while keeping the spooky theme intact. Encouraging imagination allows children to personalize their cupcakes with different faces or colors. This hands-on experience adds excitement and helps make vampire cupcakes a beloved tradition every Halloween.
1. Bake the Base: Choosing and Perfecting Your Cupcake Foundation
Start by selecting the right cupcake base to create a striking vampire treat. Popular choices include chocolate, black velvet, or red velvet, each offering a unique flavor and color profile. Chocolate delivers a deep, rich taste that complements sweet fillings. Black velvet, often enhanced with activated charcoal or black cocoa powder, provides a dramatic, nearly black appearance that fits perfectly with the vampire theme. Red velvet adds a subtle cocoa flavor and a natural red hue, amplifying the spooky aesthetic.
Key ingredients like activated charcoal can deepen the cupcake’s color without affecting taste. Gel food coloring ensures vibrant, lasting color, especially useful for red velvet or black cupcakes. When baking, focus on moistness and texture by using oil instead of butter for added softness. Maintain an oven temperature around 350°F (175°C) to bake evenly without drying out. Avoid overmixing the batter; it preserves fluffiness and prevents toughness.
Sources like VNutrition and The Seaside Baker recommend testing your oven temperature beforehand to achieve consistent results. Let the cupcakes cool completely before moving to the next stage to prevent fillings and frostings from melting.
2. Create the “Blood” Filling: Crafting the Hidden Surprise
The “blood” filling is the heart of vampire cupcakes, delivering the signature gooey surprise. One popular method uses white chocolate ganache dyed bright red. This ganache combines heavy cream and melted white chocolate, with red gel coloring added to achieve a vivid blood-like appearance. Lights, Camera, BAKE! and The Seaside Baker highlight how this creamy filling adds both color and a smooth texture that balances the richness of the cake.
Alternatively, strawberry jam or jelly offers a fruity, naturally red filling. This option is simpler to prepare and suits those who prefer fresh fruit flavors. Both Delish and VNutrition suggest warming the jam slightly for easier cupcake filling. For a dairy-free or vegan version, jam fillings remain ideal. The Rose Table also recommends cream cheese–based fillings with added coloring for a tangy and visually striking center.
Whichever filling you choose, chill it adequately before filling to prevent runny centers. The filling should hold its shape when bitten but ooze out enough to surprise and delight.
3. Decorate and Assemble: Bringing Your Vampire Cupcakes to Life
Begin by coring the cooled cupcakes. Use a small knife, melon baller, or specialized cupcake corer to remove a cylindrical piece from the center, creating space for the filling. Delish, The Seaside Baker, and The Rose Table all emphasize careful coring to avoid breaking the cupcake top.
Fill each cavity with your prepared “blood” filling, then replace the removed cupcake piece gently. Press slightly to secure but avoid compacting the cake too much.
Next, frost the cupcakes using buttercream, cream cheese frosting, or marshmallow fluff, depending on your preference. Delish recommends using tinted frostings—black, white, or red—to complement the vampire theme. Smooth or piped frosting styles both work well.
Add design details to complete the look. Popular ideas include vampire faces made from white chocolate Reese’s cups, bite marks using small scissors or knives, and edible “blood” drips crafted with red gel icing or strawberry syrup. Hungry Happenings and The Seaside Baker showcase how these elements enhance the spooky aesthetic and make cupcakes visually engaging.
Tips for Stunning Presentation and Proper Storage
Display your vampire cupcakes on themed serving platters or cake stands to enhance the Halloween vibe. Arrange them with complementary decorations like fake cobwebs, mini pumpkins, or candlelight for added effect. Grouping cupcakes in clusters with varying designs draws attention and invites guests to explore.
Store cupcakes at room temperature if consuming within two days. For longer freshness, refrigerate them covered to prevent drying. The Seaside Baker advises freezing unfrosted cupcakes for up to two months; thaw completely before filling and decorating. The Rose Table and Lights, Camera, BAKE! both stress maintaining chilled ganache fillings during storage to keep the “blood” effect intact.
Following these tips ensures your vampire cupcakes remain moist, visually stunning, and ready to impress throughout your Halloween celebrations.
Frequently Asked Questions About Vampire Cupcakes: Expert Answers
How do you make vampire cupcakes?
Making vampire cupcakes involves three main steps. First, bake a dark base such as chocolate, black velvet, or red velvet cupcake. Next, core the cooled cupcakes and fill the center with a “blood” filling—usually red-colored ganache or strawberry jam. Finally, frost and decorate the cupcakes with spooky designs like vampire faces, bite marks, or edible blood drips to complete the look.
What filling is best for vampire cupcakes?
The best filling depends on your taste and dietary needs. White chocolate ganache dyed red offers a creamy, rich texture and vivid color. Strawberry jam or jelly provides a fruity, natural “blood” alternative that’s simple to prepare. For dairy-free options, fruit-based fillings like jam work best, as they avoid heavy cream or dairy. Each option balances flavor and visual impact differently.
Can I make vampire cupcakes dairy-free or gluten-free?
Yes, you can easily adapt vampire cupcakes to be dairy-free or gluten-free. Substitute regular milk with almond, oat, or soy milk. Use vegan butter or coconut oil instead of dairy butter. For gluten-free, replace all-purpose flour with a gluten-free baking blend. Egg replacements like flax eggs or applesauce work well to keep the texture moist. These swaps ensure everyone can enjoy the spooky treats without missing out.
How do I create the blood effect on vampire cupcakes?
To create a realistic blood effect, use red gel food coloring mixed into white chocolate ganache or cream cheese frosting. Alternatively, warm strawberry jam or raspberry syrup can be drizzled over the frosting to mimic dripping blood. Applying the red liquid around the edges or in streaks enhances the eerie, fresh-bite look. Using a small brush or piping bag helps control the placement for a clean effect.
How should I store vampire cupcakes?
Store vampire cupcakes at room temperature if you plan to eat them within two days. For longer freshness, refrigerate cupcakes in an airtight container for up to one week. Unfrosted cupcakes freeze best and can last up to two months; thaw completely before filling and decorating. Chilled ganache fillings maintain their shape better, so refrigeration is recommended after assembly for optimal “blood” effect and taste.
Vampire Cupcakes (Halloween) – Scary-Good Treats with a Bloody Surprise
Dark, moist cupcakes filled with sweet, blood-red ganache or jam, decorated with creepy vampire faces—perfect for Halloween gatherings.
Ingredients
- 1 cup all-purpose flour (or gluten-free blend)
- ½ cup cocoa powder
- 1 tsp baking powder
- ½ tsp baking soda
- ¼ tsp salt
- ½ cup granulated sugar
- ⅓ cup vegetable oil
- 2 eggs (or flax eggs)
- 1 tsp vanilla extract
- ½ cup milk or non-dairy milk + 1 tsp vinegar
- Black gel food coloring
- For filling:
- 6 oz white chocolate + ½ cup heavy cream (or dairy-free cream), red gel food coloring
- OR ½ cup strawberry jam + red gel food coloring
- For frosting and decoration:
- 1 cup butter
- 4 cups powdered sugar
- 1 tsp vanilla extract
- Food coloring (black, white, or red)
- Optional candies: Reese’s white cups, Pocky sticks, fruit roll, candy eyes
Instructions
Notes
