
Spooky Halloween Cookies: Party Favorites That Will Haunt Your Taste Buds
Halloween is the perfect time to unleash your creativity in the kitchen, and what better way to do that than with spooky cookies? These aren’t just any cookies; they’re edible works of art that will be the highlight of any Halloween party. From delightfully eerie ghosts to creepy crawly spiders, there’s a cookie design for every skill level and fright preference. Get ready to impress your guests (and maybe spook them a little) with these fantastic Halloween cookie ideas.
Getting Started: Essential Tips for Spooky Cookie Success
Before diving into the decorations, you’ll need a solid foundation. Here’s how to prepare for your Halloween cookie adventure:
- Choose Your Cookie Recipe Wisely: A classic sugar cookie recipe is a great starting point. Look for a recipe that holds its shape well during baking and doesn’t spread too much. This will provide a clean canvas for your decorations. You could even venture into gingerbread cookies for a slightly spicy and more robust flavor.
- Invest in Quality Cookie Cutters: Halloween-themed cookie cutters are readily available in various shapes and sizes. Consider classic options like pumpkins, bats, ghosts, and witches’ hats. For a more unique touch, look for spiderwebs, skulls, or even tombstone shapes.
- Master the Art of Royal Icing: Royal icing is the go-to choice for decorating cookies because it dries hard and creates a smooth, professional finish. Experiment with different consistencies – a thicker consistency for outlining and a thinner consistency for flooding. You can easily achieve the right consistency by gradually adding water, a teaspoon at a time.
- Prepare Your Workspace: Clear a large, clean workspace and gather all your ingredients, tools, and decorating supplies. This will help you stay organized and focused on the task at hand. Parchment paper or silicone mats are helpful for preventing cookies from sticking to the baking sheet.
- Bake and Cool Properly: Bake your cookies until they are lightly golden around the edges. Overbaking can lead to dry, brittle cookies that are difficult to decorate. Allow the cookies to cool completely on a wire rack before decorating. This prevents the icing from melting and ensures a smooth surface.
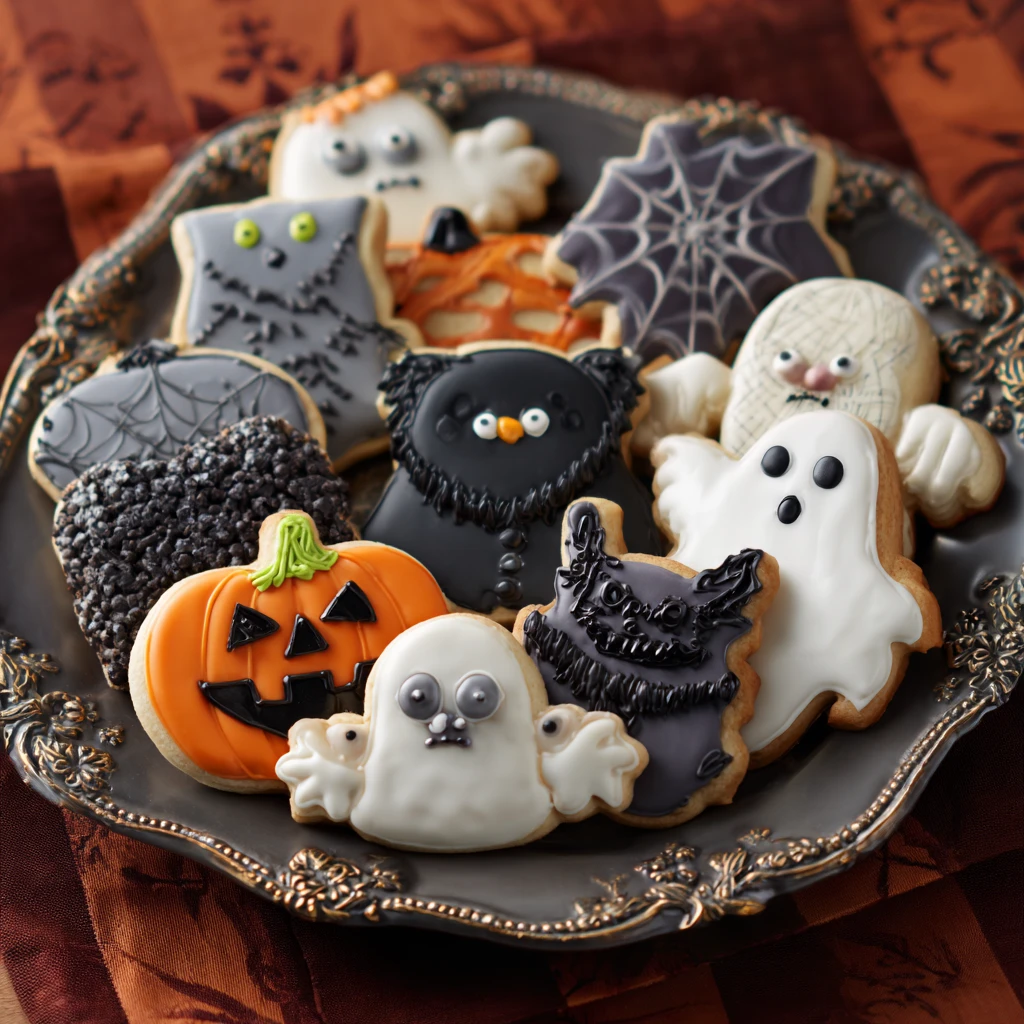
Ghostly Goodness: Simple & Spooky Ghost Cookie Ideas
Ghost cookies are a classic Halloween treat, and they’re incredibly easy to make and decorate. Here are a few ideas to get you started:
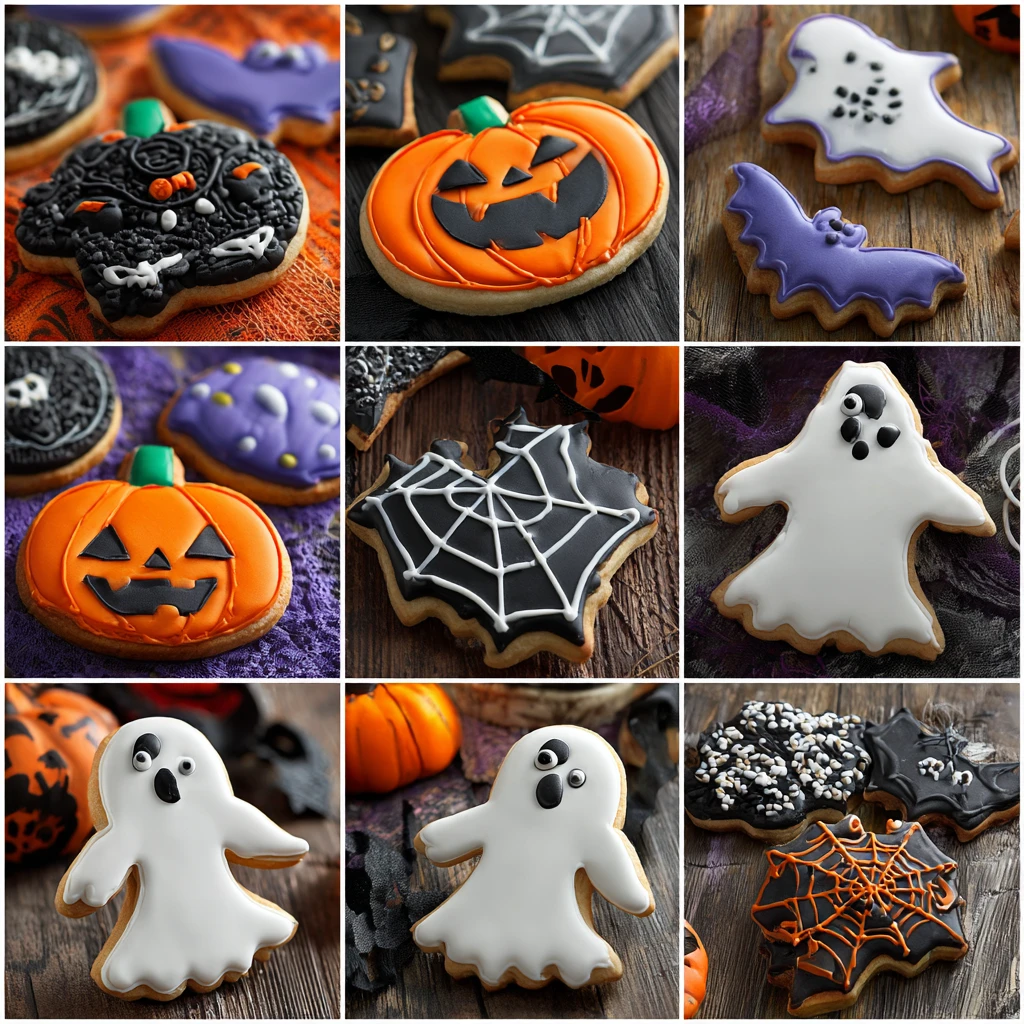
- Classic White Ghosts: Use a ghost-shaped cookie cutter or freehand cut your own ghost shapes from the dough. Flood the entire cookie with white royal icing and let it dry completely. Then, use black royal icing or edible markers to add simple eyes and a mouth. For a cute twist, add a small bow tie or scarf to your ghost.
- Spooky Silhouette Ghosts: Flood the cookies with a dark-colored icing, such as black, purple, or deep blue. Once the base layer is dry, use white royal icing to pipe a ghost silhouette onto the dark background. This creates a dramatic and eye-catching effect.
- Boo-tiful Marbled Ghosts: Create a marbled effect by swirling together white and light gray royal icing on the cookie surface. Before the icing dries, use a toothpick or skewer to create a ghostly swirl pattern. Add eyes and a mouth for a finished look.
- Floating Ghosts: Make your ghosts appear to be floating! Frost the cookie with sky-blue icing, let it dry, then pipe a white ghost shape, leaving a small gap at the bottom. With light gray icing, add shading on the bottom to look like a floating ghost.
Creepy Crawlies: Spider & Insect-Themed Delights
Embrace the creepy side of Halloween with spider and other insect-themed cookies. These are sure to give your guests a little shiver (in a good way!).
- Simple Spiderweb Cookies: Flood round cookies with white icing. While the icing is still wet, pipe concentric circles with black icing. Then, using a toothpick or skewer, drag a line from the center of the cookie outwards through the circles to create a spiderweb effect. Place a small spider candy or piped spider in the center for added creepiness.
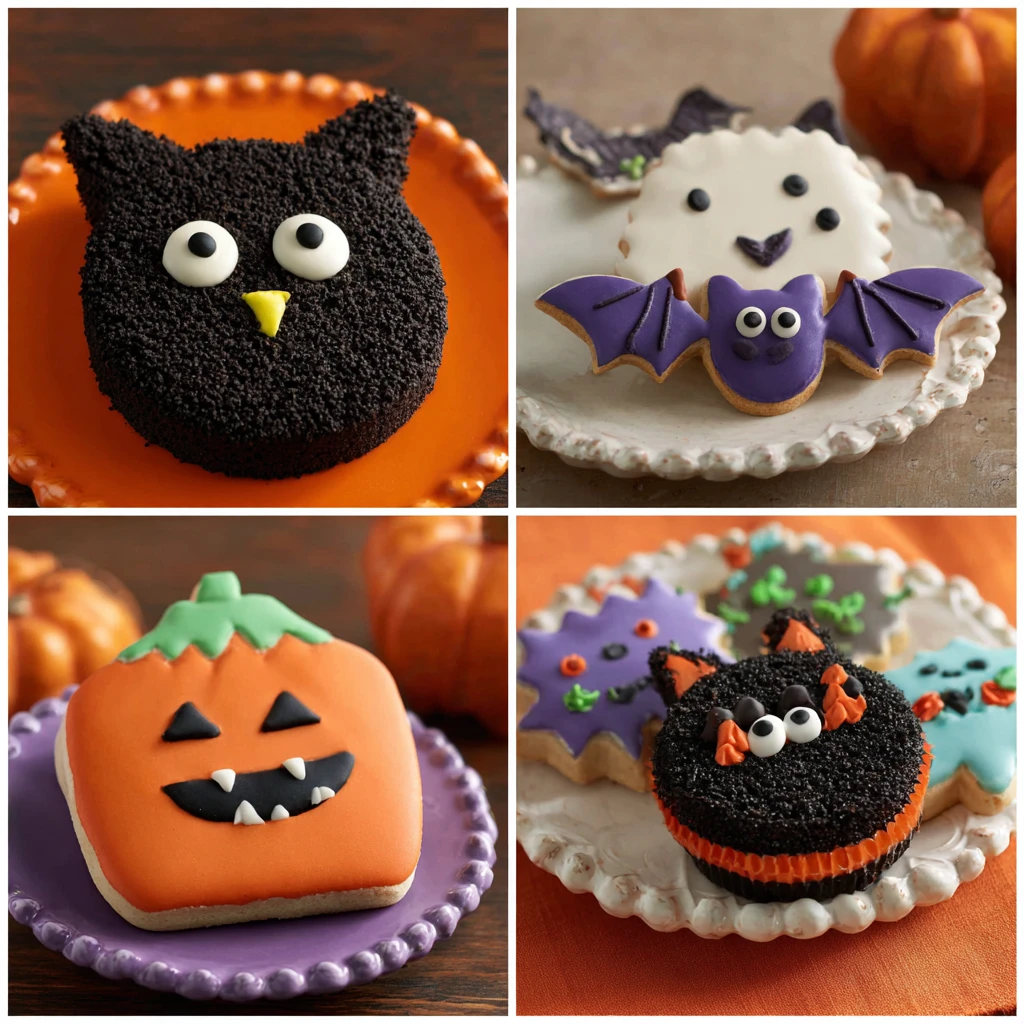
- Hairy Spider Cookies: Use chocolate cookie dough and bake round cookies. Frost with chocolate frosting. While the frosting is wet, press black licorice strings or chocolate sprinkles around the edges to create a hairy spider effect. Add candy eyes and pretzel legs for a complete spider look.
- Edible Bug Jars: Create a jar-shaped cookie and flood it with clear piping gel or a thin layer of melted gelatin. Place gummy worms, candy spiders, and other edible bugs inside the “jar” before the gelatin sets. This creates a fun and visually appealing treat.
- Ant-Infested Cookies: Bake small, round cookies and frost them with chocolate icing. While the icing is wet, sprinkle black sprinkles around the edges to resemble ants crawling on the cookie. This is a simple but effective way to create a creepy effect. You can add candy eyes to the “ants” for a more realistic look.
Monster Mash: Fun and Friendly Monster Cookie Ideas
Not all Halloween cookies need to be scary. Create a batch of friendly monster cookies that are perfect for kids and adults alike.
- One-Eyed Monster Cookies: Bake round cookies and frost them with brightly colored icing, such as green, purple, or blue. Add a single large candy eye in the center of the cookie. Pipe small horns, fangs, or hair using different colors of icing to create unique monster personalities.
- Furry Monster Cookies: Frost cookies with a base color and then use a piping bag fitted with a grass tip to create a furry texture. Use different colors and textures of icing to add dimension and interest. Add candy eyes, a goofy mouth, and maybe even a few sprinkles for extra flair.
- Patchwork Monster Cookies: Frost cookies with a base color and then pipe different shapes and patterns on top using contrasting colors. Add candy sprinkles, chocolate chips, or other edible decorations to create a patchwork effect. This is a great way to use up leftover icing and decorations.
- Bandaged Mummy Cookies: Use a tombstone-shaped cookie cutter or freehand cut mummy shapes from the dough. Frost the cookies with white icing and then use thin strips of white fondant or royal icing to create the bandage effect. Add candy eyes peeking out from under the bandages for a fun and spooky touch.
Advanced Techniques: Taking Your Cookies to the Next Level
Ready to challenge yourself? Try these advanced techniques to create truly spectacular Halloween cookies:
- Airbrushing: Use an airbrush to add shading, highlights, and intricate details to your cookies. This technique can create realistic textures and depth, taking your cookies to a professional level.
- Fondant Decorations: Fondant is a versatile medium that can be used to create intricate shapes, patterns, and embellishments for your cookies. Use fondant cutters, molds, and sculpting tools to create custom decorations.
- Stenciling: Use stencils to create intricate patterns and designs on your cookies. Simply place the stencil over the cookie and dust with powdered sugar, cocoa powder, or edible glitter.
- 3D Cookie Decorations: Create three-dimensional decorations by stacking and layering different cookie shapes. Use royal icing to glue the pieces together and create miniature scenes or characters.
