
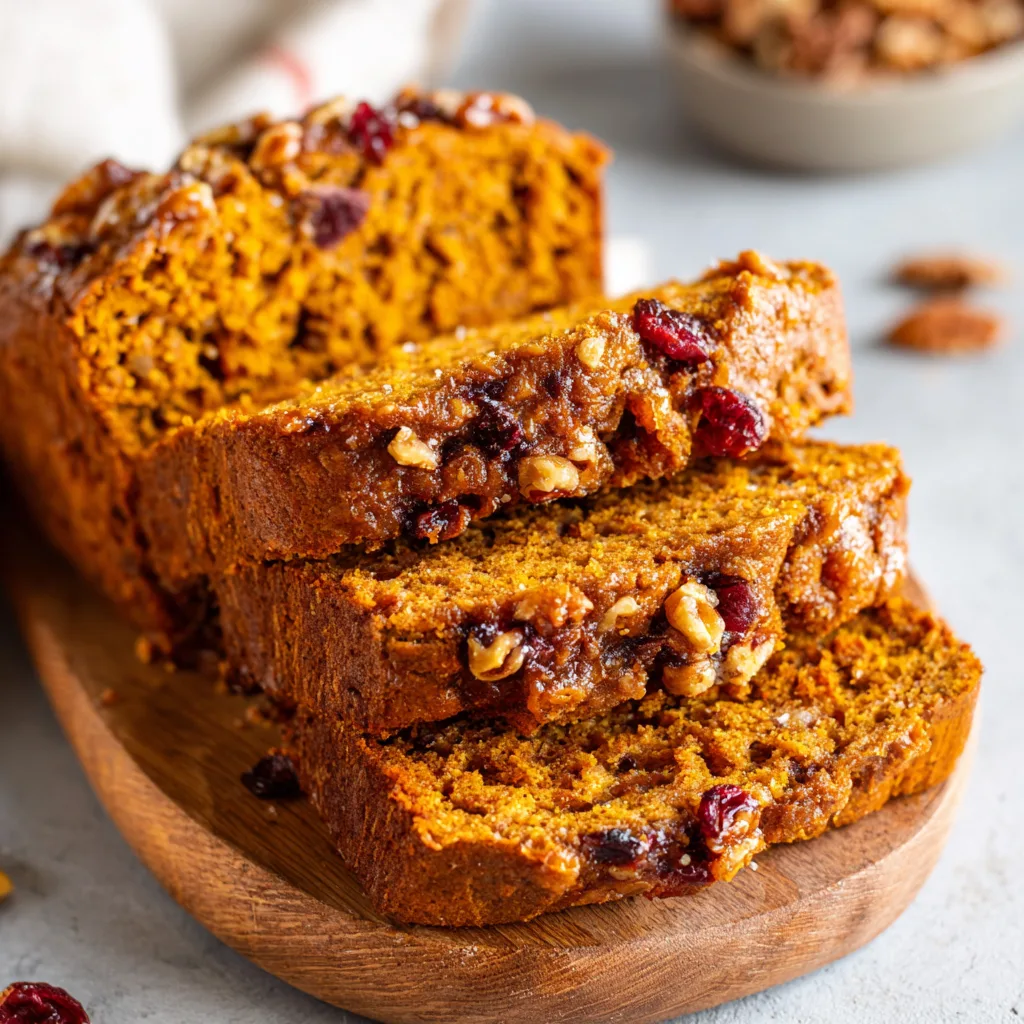
There’s nothing more comforting than the smell of pumpkin bread filling your kitchen on a crisp fall day. Now imagine that same cozy aroma—without ever turning on your oven. This slow cooker gluten-free pumpkin bread offers just that: all the flavor, none of the hassle.
Slow cookers make baking simple, especially for those who follow a gluten-free lifestyle. You get a moist, tender loaf every time, without worrying about overheating the kitchen or constantly checking your oven. Plus, using a gluten-free flour blend makes this recipe safe for those with celiac disease or gluten sensitivities. It’s the perfect marriage of convenience and dietary care.
In this article, you’ll learn exactly how to make this seasonal favorite from scratch. We’ll guide you through the best gluten-free flours to use, which spices to add, and the secret to keeping your bread moist and fluffy in a slow cooker. You’ll also get expert tips for flavor variations, storage, and troubleshooting soggy or undercooked loaves. Whether you’re new to gluten-free baking or just want a hands-off fall treat, this guide covers everything you need. Stick around—we’re about to turn your slow cooker into your new favorite bakery.
Key Ingredients & Essential Equipment for Slow Cooker Pumpkin Bread
Best Gluten-Free Flours for Pumpkin Bread
A reliable gluten-free flour blend is key to achieving the perfect texture. Look for cup-for-cup varieties that mimic traditional flour. Brands like Bob’s Red Mill and King Arthur offer gluten-free all-purpose blends that already contain binders like xanthan gum. These blends keep your bread moist and fluffy without falling apart. Avoid single flours like almond or coconut unless the recipe is adjusted, as they absorb moisture differently and can cause dryness or crumbling.
Pumpkin Puree: Canned vs. Homemade
Pumpkin puree brings moisture, color, and rich autumn flavor. Canned puree is convenient, consistent, and ideal for slow cooker recipes. It provides smooth texture and balanced sweetness. Homemade puree can also work well but may carry more water content. If using fresh pumpkin, drain or blot it first to avoid excess moisture in the batter. Always avoid using pumpkin pie filling, which contains added spices and sugars.
Binders and Leavening Agents
In gluten-free baking, structure and rise depend on more than just flour. Xanthan gum helps bind the ingredients, preventing the bread from crumbling. Baking soda and baking powder create lift and ensure a soft crumb. Double-check that your baking powder is gluten-free, as not all brands are. A combination of these leaveners gives the loaf that classic lightness despite being made without gluten.
Fats and Natural Sweeteners
Healthy fats like vegetable oil, coconut oil, or melted butter make the bread rich and tender. For sweetness, use granulated sugar or swap in maple syrup for added depth and fall flavor. If using syrup, reduce other liquids slightly. The fat and sugar not only flavor the bread—they keep it moist throughout the long, gentle slow cooking process.
Spices and Optional Add-Ins
Pumpkin pie spice is essential. You can also blend cinnamon, nutmeg, ginger, and cloves for a homemade mix. Add-ins like dark chocolate chips or chopped nuts provide texture and richness. These mix-ins make each slice feel like a special fall treat and complement the warm, spiced flavor beautifully.
Tools and Slow Cooker Tips for Gluten-Free Baking Success
Slow Cooker Size and Setup
A 6-quart slow cooker works best for this bread. You can pour the batter directly into a lined insert or place a greased loaf pan inside the cooker. Both methods work, but using a loaf pan gives the bread a traditional shape and makes slicing easier. Make sure there’s enough space around the pan for heat to circulate evenly.
Lining Methods: Clean-Up and Structure Help
Lining your slow cooker is crucial. Use parchment paper for easy removal and clean-up. You can also place the batter in cleaned aluminum cans or a heatproof loaf pan. These methods help the bread hold its shape and prevent burning along the edges. Ginger Lemon Girl recommends placing cans in the cooker with water to create gentle, moist heat.
Controlling Moisture from Condensation
Moisture control makes or breaks slow cooker baking. As the bread cooks, condensation collects on the lid and can drip onto the loaf, ruining the texture. To fix this, place a clean kitchen towel under the lid to catch moisture. Alternatively, rest chopsticks between the lid and the cooker to let steam escape. This simple trick is widely recommended by recipe creators like Iowa Girl Eats and The Magical Slow Cooker.
Step-by-Step Slow Cooker Method for Gluten-Free Pumpkin Bread
Preparing the Batter
Start by preparing two separate bowls: one for dry ingredients and one for wet. In the dry bowl, whisk together your gluten-free flour blend, pumpkin pie spice, baking soda, baking powder, and salt. Whisking helps prevent clumps and distributes the leavening evenly.
In a second bowl, mix the wet ingredients: eggs, pumpkin puree, oil, and sugar or maple syrup. Stir until smooth and well combined. Once both mixtures are ready, slowly fold the wet into the dry using a silicone spatula or wooden spoon.
Avoid overmixing at this stage. Overworking gluten-free batter can lead to dense or gummy bread. Once combined, let the batter rest for 5 to 10 minutes. This short rest allows the flour to hydrate fully and improves the final texture of your loaf. Skipping this step can result in a grainy or uneven crumb.
Filling the Cooker
There are three main ways to set up your slow cooker for baking: using a loaf pan, cleaned metal cans, or pouring the batter directly into a parchment-lined crock.
Loaf Pan Method
Placing a greased loaf pan inside your slow cooker creates a uniform loaf shape and makes slicing easier. The pan also provides more even heat distribution.
Can Method
For mini loaves, pour the batter into cleaned, greased metal cans. This is a fun, portioned option that allows for quicker cooking.
Direct Pour Method
Pouring the batter straight into a parchment-lined slow cooker insert is the simplest. However, this can make it harder to remove the bread cleanly and may result in a softer, less structured loaf.
Choose based on what shape and effort level you prefer. All three methods work well with the right preparation.
Adding Water for Gentle Steaming
When using the can method, Ginger Lemon Girl recommends adding water to the bottom of the slow cooker. This creates a moist, gentle steam environment that surrounds the cans. Add about one to two cups of water to the base, then place the cans on a heat-safe rack or crumpled foil to elevate them slightly.
This trick reduces the chance of burning and promotes a consistent bake, especially for smaller portions. While not necessary for loaf pan or direct-pour methods, it’s great for even cooking when using unconventional containers.
Cooking Times and Doneness Checks
Cooking time varies depending on your setup and slow cooker model. On high, the bread typically cooks in 2 to 3½ hours. On low, it can take 4 to 6 hours. A loaf pan may need more time than cans or direct-pour methods.
Don’t rely on time alone. Start checking after the 2-hour mark when using the high setting. Avoid lifting the lid too often, as this slows cooking by releasing heat.
To check doneness, insert a toothpick or skewer into the center. It should come out clean or with a few moist crumbs, not wet batter. If you want a golden top, cover the cooker insert with foil for the last 30 minutes. This reduces moisture and helps firm up the surface. This trick is recommended by cooks like Ginger Lemon Girl and Crock Pots and Flip Flops.
Cooling and Removal
Once the bread is done, allow it to cool slightly before removing. For loaf pans, use oven mitts to lift the pan out carefully. Let it rest for at least 10–15 minutes before slicing to keep it from crumbling.
If you used the can method, gently shake the cans upside down or tap them on a plate to release the mini loaves. They should slide out easily if well-greased.
For the direct-pour method, lift the bread using the parchment paper, then place it on a wire rack. Allow it to cool completely before slicing to maintain structure. This cooling step is vital, especially for gluten-free breads, as it helps set the crumb and prevents gumminess.
Flavor Variations and Expert Baking Tips for Gluten-Free Pumpkin Bread
Flavor & Ingredient Swaps for More Variety
Want to take your pumpkin bread to the next level? Try mixing in chocolate chips or chopped nuts for extra texture and flavor. Semi-sweet or dark chocolate chips pair beautifully with pumpkin spice, adding rich, melty pockets throughout the loaf. If you prefer crunch, fold in toasted pecans or walnuts. Crock Pots and Flip Flops recommend these additions to make each slice feel like a bakery treat. Just keep add-ins to around ½ cup total to maintain a balanced texture.
Using Natural Sweeteners Like Maple Syrup
If you’re looking for a refined sugar alternative, maple syrup makes a great swap. It blends smoothly into the batter and adds warm, earthy sweetness that complements the pumpkin and spices. To adjust the recipe properly, reduce other liquids slightly to avoid thinning out the batter. The Magical Slow Cooker and My Table of Three both suggest using maple syrup for a more wholesome version without sacrificing flavor. It’s a natural upgrade your taste buds—and your body—will thank you for.
Try a Monkey-Bread Style Pull-Apart Version
Looking for something fun and festive? Turn your batter into a gluten-free, low-carb monkey bread. My Table of Three and Iowa Girl Eats recommend dividing the dough into balls, rolling them in cinnamon sugar, and layering them in the cooker. The result is a sticky, pull-apart version of pumpkin bread that’s perfect for gatherings or brunch. This twist turns a classic loaf into a shareable, cozy dish everyone can enjoy.
Smart Dietary Adaptations
Customizing your pumpkin bread to meet dietary needs is easy. For a dairy-free version, use oil or plant-based butter in place of dairy butter. Coconut oil works especially well and adds subtle flavor. For a low-carb option, consider almond flour with extra binder, though this may require more tweaking. Reduce the sugar or swap it out for unsweetened applesauce, stevia, or monk fruit sweetener if you’re aiming for a low-sugar loaf.
Ginger Lemon Girl and Mom’s Kitchen Handbook both highlight how flexible this recipe can be with a few smart swaps. These changes ensure everyone at the table—regardless of allergies or preferences—can enjoy a slice.
How to Store and Freeze Gluten-Free Pumpkin Bread
Gluten-free breads need careful storage to maintain freshness. Once your loaf has cooled, wrap it tightly in plastic wrap or place it in an airtight container. In the fridge, it will stay moist for up to five days. For longer storage, freeze individual slices or the whole loaf in a zip-top bag. It can be frozen for up to three months.
To serve, thaw at room temperature or warm in the microwave. Freezing is a great option for meal prepping or saving leftovers. Your slow-cooked pumpkin bread will taste just as moist and flavorful after reheating—making it a make-ahead winner for fall.
Frequently Asked Questions About Slow Cooker Gluten-Free Pumpkin Bread
Can you bake pumpkin bread in a slow cooker?
Yes, baking pumpkin bread in a slow cooker is not only possible—it often yields better results. The enclosed, low-heat environment creates a moist and tender loaf with less risk of overbaking. Simply prepare your gluten-free batter, line your cooker or insert a loaf pan, and let it cook slowly on high. Iowa Girl Eats and The Magical Slow Cooker both recommend this method for an easy, hands-off way to enjoy homemade pumpkin bread.
How long to cook slow cooker pumpkin bread?
Cooking times vary depending on your setup and the size of your loaf. On high, expect the bread to bake in 2 to 4 hours. Always begin checking for doneness around the 2-hour mark. Insert a toothpick into the center; if it comes out clean or with a few crumbs, it’s done. To prevent overcooking or soggy tops, cover the insert loosely with foil or place a towel under the lid to catch condensation.
Can I use almond or coconut flour?
You can, but proceed with caution. Almond and coconut flours absorb moisture differently than standard gluten-free flour blends. If used in the same quantity, they may cause dryness or crumbling. These flours are best used in combination with other ingredients or in recipes specifically developed for them. Better Homes & Gardens and Mom’s Kitchen Handbook suggest sticking with a 1:1 gluten-free blend for predictable results unless you’re ready to experiment.
How to prevent soggy bottoms or cracked tops?
Moisture control is key in slow cooker baking. Use parchment paper or a loaf pan to line the insert. Add a kitchen towel under the lid or elevate the lid slightly to let steam escape. Once the bread is done, remove it from the cooker quickly to avoid condensation buildup. These simple steps help ensure even texture and a firm, crack-free top.
Best way to store and freeze gluten-free pumpkin bread?
After cooling, wrap your bread in plastic wrap or seal it in an airtight container. Store it in the fridge for up to five days. To freeze, slice the bread and wrap each piece in plastic, or freeze the whole loaf in a zip-top bag. It will stay fresh in the freezer for up to three months. When ready to eat, thaw at room temperature or gently warm before serving.
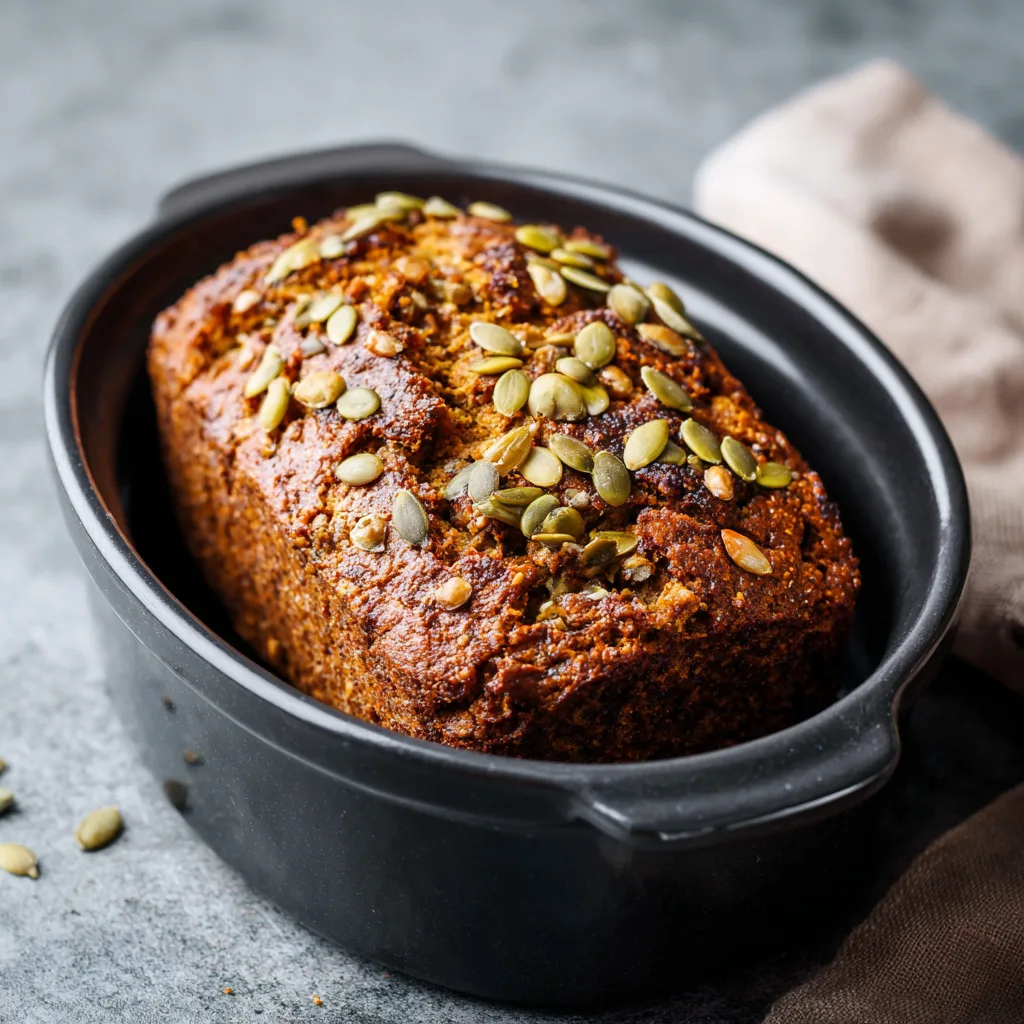
Slow Cooker Gluten-Free Pumpkin Bread – Moist, Easy & Fall-Friendly
A moist, hands-off pumpkin quick-bread made in the slow cooker—delicious warm, perfect for cozy fall breakfasts, snacks, or dessert.
Ingredients
- 2 cups gluten-free 1:1 flour blend
- 2 tsp pumpkin pie spice
- 1 tsp baking soda
- ½ tsp salt
- ¾ cup sugar
- ½ cup oil or melted butter
- 2 large eggs
- 1 cup canned pumpkin puree
- Optional: ½ cup chocolate chips or chopped nuts
Instructions
[ ] Line slow cooker with parchment, a loaf pan, or greased cans
[ ] Whisk flour, spices, baking soda, and salt in a bowl
[ ] In a separate bowl, mix sugar, oil, eggs, and pumpkin
[ ] Combine wet and dry ingredients gently
[ ] Pour batter into the cooker; add 1–2 cups water if using cans
[ ] Cook on high for 2–4 hours, or until a toothpick comes out clean
[ ] Let cool before removing; slice and serve
Notes
