

Light & Fluffy Rhubarb Muffins: Your New Favorite (No Butter, Just Yogurt!)
I remember those crisp, early spring mornings, the kind where the air still has a chill but the sun promises warmth. My grandmother, with her green thumb and endless patience, would always have the first stalks of rhubarb ready from her garden. For me, that meant one thing: the promise of fresh-baked goods. There’s something so comforting about the tartness of rhubarb paired with a hint of sweetness, especially when it’s baked into a soft, pillowy treat. That nostalgic flavor is exactly what inspired these incredible Rhubarb Muffins (without Butter and with Yogurt!).
This recipe isn’t just another muffin recipe; it’s a revelation. It takes everything you love about classic rhubarb muffins – the tangy pockets, the golden-brown tops, the tender crumb – and elevates it with a lighter, healthier twist. By swapping butter for yogurt and a touch of oil, we achieve an unparalleled moistness and a delicate texture that will make these your go-to easy breakfast or afternoon pick-me-up. I’ve tested this recipe countless times, and it’s truly become a family favorite.
Get ready to embrace the vibrant flavors of spring with a recipe that’s guaranteed to bring a smile to your face. These muffins are unbelievably simple to make, yet they taste like a gourmet bakery treat. Let’s get baking and fill your home with the most delightful aroma!
Why You’ll Love This Recipe
❤️ Here’s why these Rhubarb Muffins will become your new obsession:
- Incredibly Moist & Tender: Thanks to the magical properties of yogurt and a touch of oil, these muffins boast a supremely moist crumb that practically melts in your mouth. No dry, crumbly muffins here!
- A Healthier Twist: By replacing butter with yogurt, we significantly reduce the saturated fat while still delivering a rich, satisfying texture. It’s a guilt-free indulgence that doesn’t compromise on flavor or feel.
- Perfect Balance of Sweet & Tart: The vibrant, tangy rhubarb is beautifully complemented by just the right amount of sweetness in the muffin batter. Each bite offers a delightful burst of spring flavor that’s never overpowering.
- Quick & Easy to Make: With simple pantry ingredients and straightforward steps, these muffins come together in no time. They are perfect for a weekend baking project or a spontaneous craving, even for beginner bakers.
- Versatile for Any Occasion: Whether you need a delightful breakfast, a satisfying snack, a lovely dessert, or something special to share with friends, these rhubarb muffins fit the bill perfectly. They’re a crowd-pleaser every time.
- Freezer-Friendly: Bake a big batch and store them for later! These muffins freeze beautifully, meaning you can enjoy a taste of spring even when rhubarb isn’t in season. Just thaw and enjoy for a quick treat.
- A True Taste of Spring: Rhubarb is a seasonal delight, and this recipe highlights its unique flavor profile, making it the ultimate spring baking experience. It’s a wonderful way to celebrate the season’s bounty.
What You Need
You only need a few simple pantry staples for this recipe! Most of these ingredients are likely already in your kitchen, making it super accessible to whip up a batch whenever the craving strikes. The star, of course, is fresh rhubarb, but frozen works beautifully too! Check the full printable recipe card below for detailed measurements.
Expert Tips
💡 To ensure your Rhubarb Muffins turn out absolutely perfect every single time, keep these expert tips in mind:
- Don’t Overmix the Batter: This is perhaps the most crucial rule for tender muffins! Overmixing develops gluten, which can lead to tough, chewy muffins. Mix the wet and dry ingredients only until *just* combined, even if there are still a few lumps. A light hand here ensures a wonderfully soft texture.
- Room Temperature Ingredients: Make sure your egg, yogurt, and milk are at room temperature. This helps them emulsify better with the oil, creating a smoother, more uniform batter and a lighter, fluffier muffin. Plan ahead and take them out of the fridge about 30 minutes before you start.
- Prepare Your Rhubarb Properly: If using fresh rhubarb, wash it thoroughly and chop it into small, even ½-inch pieces. For frozen rhubarb, there’s no need to thaw it – simply toss it directly into the batter. If your rhubarb seems particularly wet, you can lightly dust it with a tablespoon of flour before folding it in; this helps prevent the rhubarb from sinking to the bottom and absorbing too much moisture.
- Achieve the Perfect Muffin Dome: Baking at an initial high temperature (like 400°F/200°C) for the first few minutes creates a burst of steam, which helps the muffins rise quickly and form those beautiful, domed tops. Then, reducing the temperature allows them to bake through without over-browning. Fill your muffin cups about two-thirds full for optimal shape.
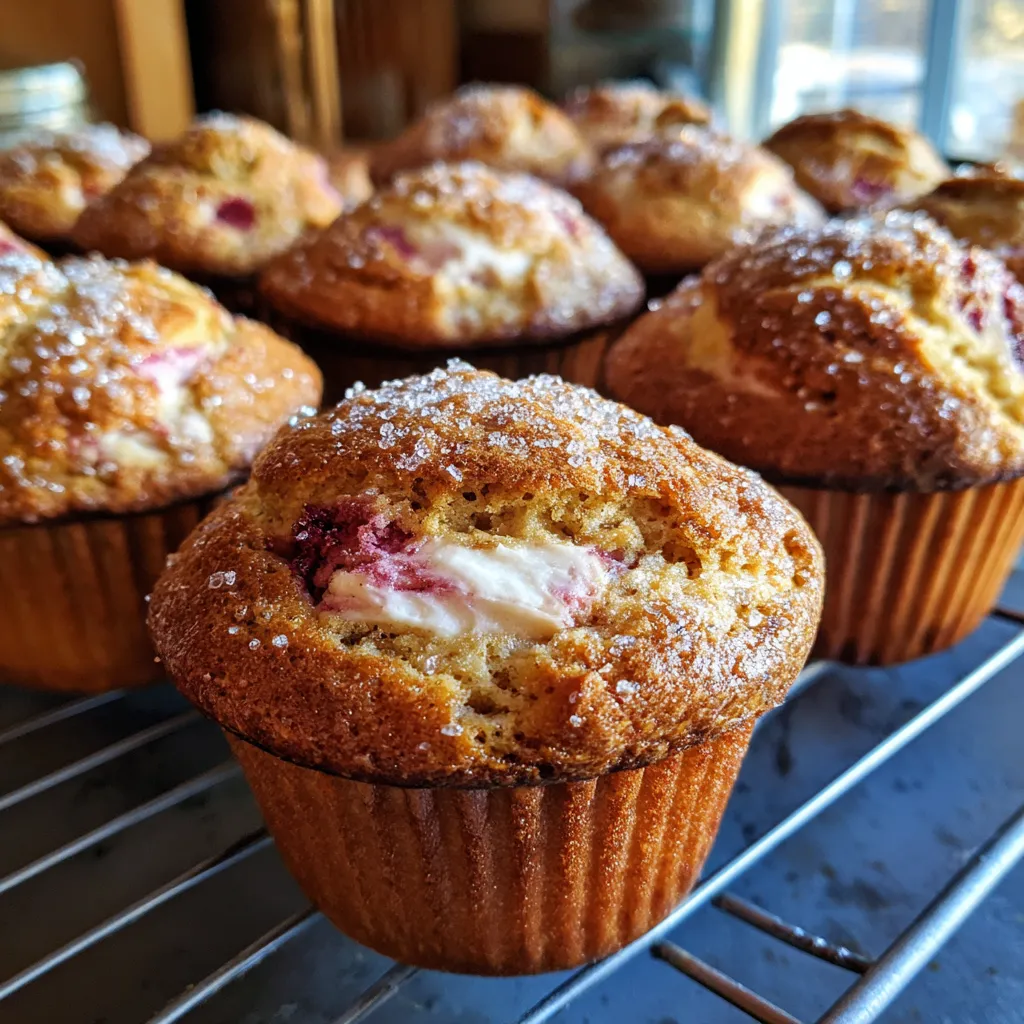
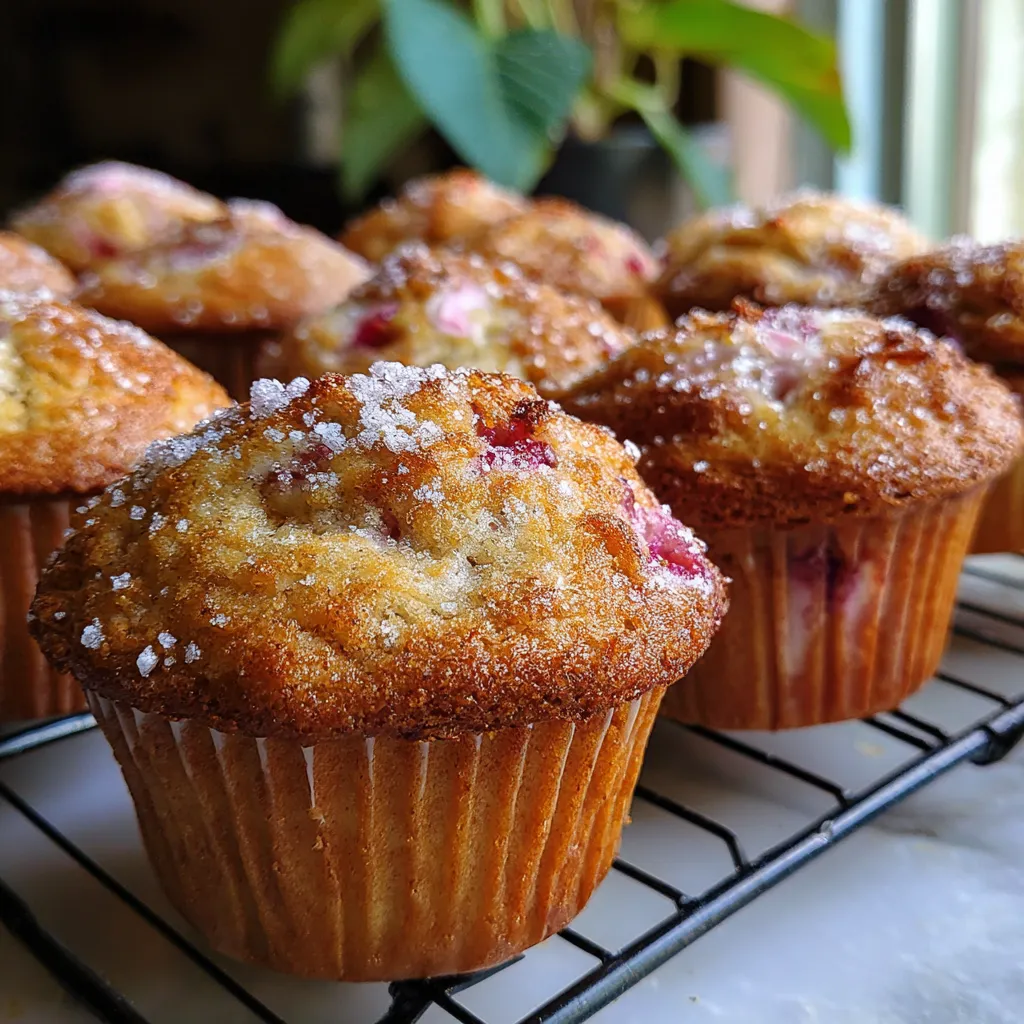
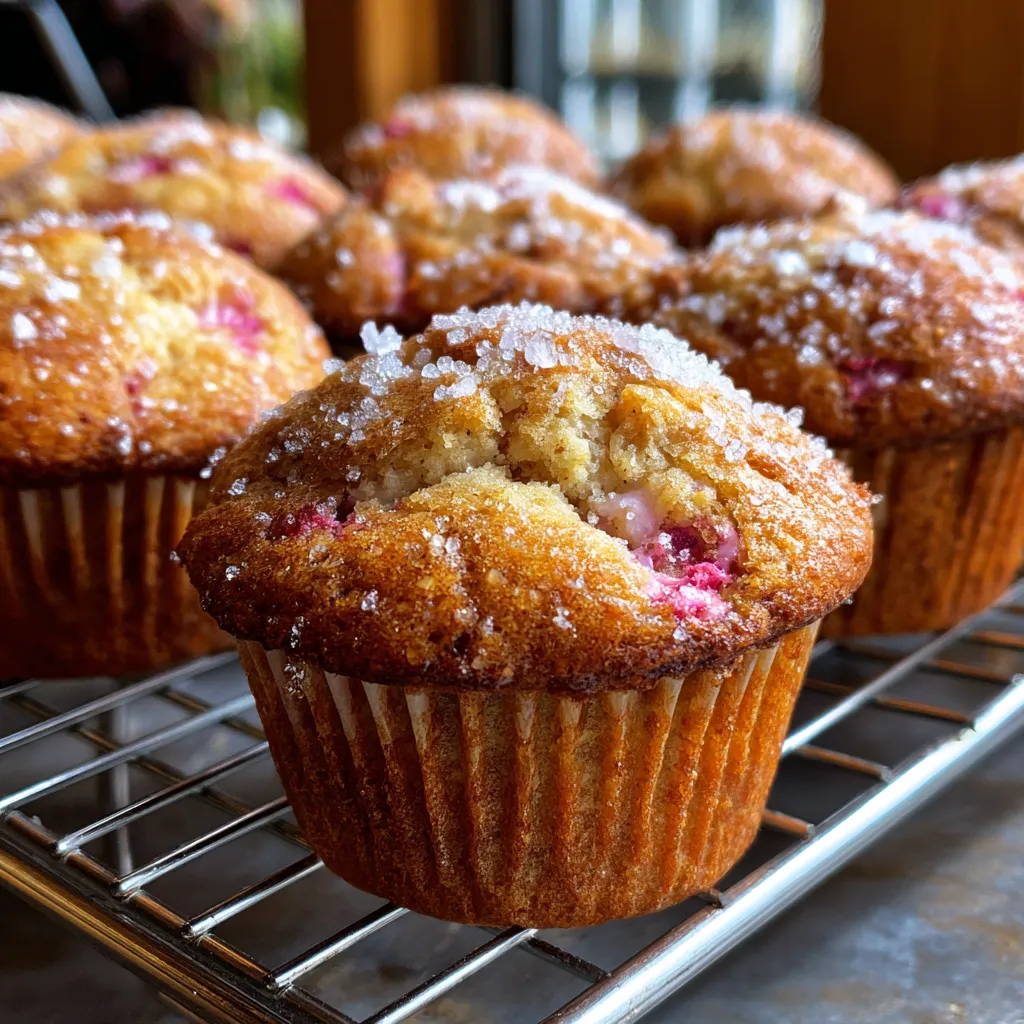
- The Secret Sugar Sprinkles: Don’t skip the extra tablespoon of sugar sprinkled on top before baking! This creates a lovely, slightly crisp, caramelized crust that adds a fantastic textural contrast and a beautiful glistening finish to each muffin.
- Don’t Overbake: Keep a close eye on your muffins as baking times can vary between ovens. Start checking for doneness around the 18-minute mark (after the initial high-temp bake). A toothpick inserted into the center should come out clean or with a few moist crumbs attached, but no wet batter. Overbaked muffins will be dry.
- Cooling is Key: While it’s tempting to dive right in, allow the muffins to cool in the pan for about 5 minutes before transferring them to a wire rack to cool completely. This helps them set and prevents them from becoming soggy on the bottom, ensuring they maintain their structural integrity and perfect texture.
Variations & Substitutions
This recipe is wonderfully versatile! Feel free to customize it based on your dietary needs or what you have on hand.
- Gluten-Free Option: Swap the all-purpose flour for your favorite 1:1 gluten-free baking flour blend. Ensure your blend contains xanthan gum for the best texture.
- Dairy-Free Option: Use a plain, unsweetened dairy-free yogurt (like almond or soy) and a plant-based milk (almond, soy, or oat milk all work well).
- Add a Streusel Topping: For an extra special touch, whip up a simple streusel (flour, sugar, cold butter) and sprinkle it over the batter before baking instead of just sugar.
- Spice It Up: A pinch of cinnamon, nutmeg, or even a tiny amount of ground ginger can beautifully complement the rhubarb flavor.
- Citrus Zest: Add 1-2 teaspoons of orange or lemon zest to the batter for a bright, aromatic lift that pairs wonderfully with rhubarb.
- Mix-Ins: Feel free to add a handful of chopped nuts (walnuts, pecans), white chocolate chips, or even a few raspberries or strawberries alongside the rhubarb for extra flavor and texture.
Storage & Freezing
These muffins are best enjoyed on the day they are baked, but they store well for a few days too!
- Room Temperature: Store cooled muffins in an airtight container at room temperature for up to 2-3 days.
- Refrigerator: For longer freshness, especially in warmer climates, store them in an airtight container in the refrigerator for up to 5 days. Warm them slightly before serving for the best experience.
- Freezing: These muffins freeze beautifully! Once completely cooled, place them in a single layer in a freezer-safe bag or container. They can be frozen for up to 3 months. To enjoy, simply thaw at room temperature or warm gently in the microwave or oven.
FAQ
Why use yogurt instead of butter?
Yogurt is a fantastic secret ingredient in baking! It adds incredible moisture and tenderness to baked goods without needing a lot of fat. The acidity in yogurt also helps activate the baking soda, contributing to a lighter, fluffier texture and a beautiful rise. Plus, it imparts a subtle tangy note that perfectly complements the rhubarb.
Can I use frozen rhubarb?
Absolutely! Frozen rhubarb works just as well as fresh in this recipe. There’s no need to thaw it before adding it to the batter. Just chop it if the pieces are too large and fold it in. Sometimes, frozen rhubarb can release a bit more moisture, so if your batter seems a little thin, you can add an extra tablespoon or two of flour.
How do I prevent the rhubarb from sinking to the bottom?
A common trick is to toss the chopped rhubarb (fresh or frozen) with a tablespoon of the dry flour mixture from the recipe before folding it into the batter. This light coating helps the rhubarb cling to the batter and prevents it from sinking to the bottom during baking, ensuring even distribution of those delicious tangy bits throughout your muffins.
I genuinely hope you love these Light & Fluffy Rhubarb Muffins as much as I do. They are such a delightful way to welcome spring and enjoy the bounty of this unique ingredient. Don’t forget to Pin this recipe for later and share your creations with me!
Rhubarb Muffins: No Butter, Just Yogurt! Light & Fluffy Recipe
Ingredients
- 2 ½ cups (300g) all-purpose flour
- 1 ½ cups (300g) granulated sugar, plus 1 tbsp for sprinkling
- 2 tsp baking powder
- 1 tsp baking soda
- ½ tsp salt
- 1 large egg, room temperature
- 1 cup (240g) plain Greek yogurt (full-fat or low-fat)
- ½ cup (120ml) milk (any kind), room temperature
- ½ cup (120ml) vegetable oil (or other neutral oil like canola)
- 1 tsp pure vanilla extract
- 2 cups (about 250g) chopped fresh or frozen rhubarb (½-inch pieces)
Instructions
- Step 1 1. Preheat your oven to 400°F (200°C) and line a 12-cup muffin tin with paper liners. Lightly spray liners with non-stick spray if desired.
- Step 2 2. In a large bowl, whisk together the flour, granulated sugar, baking powder, baking soda, and salt until well combined.
- Step 3 3. In a separate medium bowl, whisk together the egg, Greek yogurt, milk, vegetable oil, and vanilla extract until smooth.
- Step 4 4. Pour the wet ingredients into the dry ingredients. Mix gently with a spatula or wooden spoon until just combined. Be careful not to overmix; a few lumps are perfectly fine and will lead to tender muffins.
- Step 5 5. Gently fold in the chopped rhubarb. If using frozen rhubarb, do not thaw it first, simply add it directly to the batter.
- Step 6 6. Divide the batter evenly among the 12 muffin cups, filling each about two-thirds full. Sprinkle the remaining 1 tablespoon of sugar over the tops of the muffins.
- Step 7 7. Bake for 5 minutes at 400°F (200°C), then reduce the oven temperature to 375°F (190°C) and continue baking for another 18-22 minutes, or until the muffins are golden brown and a toothpick inserted into the center comes out clean.
- Step 8 8. Let the muffins cool in the tin for 5 minutes before transferring them to a wire rack to cool completely. Enjoy warm or at room temperature!
