
Quick & Easy Mini Baked Chicken Tacos: Your 20-Minute Weeknight Win!
I remember those hectic weeknights when dinner felt like a marathon, not a sprint. The school bags would hit the floor, tiny voices would chatter about their day, and my own energy tank was often running on fumes. Finding a meal that was both delicious and lightning-fast became my culinary quest. That’s when I discovered the magic of Mini Baked Chicken Tacos Ready in 20 Minutes. This recipe swiftly became my secret weapon, a guaranteed way to bring smiles to the dinner table without adding to the evening’s already considerable chaos.
These aren’t just Mini Baked Chicken Tacos; they’re a stress-free solution for busy families yearning for a homemade meal. They’re packed with savory flavors, incredibly simple to assemble, and cook up in a flash, making them the ultimate easy dinner. No more soggy, fried tortillas or complicated layering – just pure, unadulterated taco joy in minutes. This recipe is your new go-to comfort food when you need a quick weeknight meal.
Tested and perfected in my own bustling kitchen over countless evenings, this recipe has been a true family favorite for years. It’s truly the ultimate easy dinner, proving that delicious, wholesome food doesn’t have to mean sacrificing precious time. Get ready to transform your dinner routine with this irresistible recipe!
Why You’ll Love This Recipe
- ❤️ Lightning-Fast & Effortless: Seriously, we’re talking 20 minutes from prep to plate. Perfect for those evenings when you walk in the door craving something delicious but have zero time or energy for an elaborate culinary production. This recipe is designed for maximum flavor with minimal fuss, making it an absolute game-changer for busy schedules.
- ❤️ Irresistibly Family-Friendly: Kids absolutely adore these! The mini size is perfect for little hands, and the customizable toppings mean everyone gets exactly what they want. Say goodbye to dinner-time negotiations and hello to happy, clean plates. Even the pickiest eaters find something to love here.
- ❤️ Baked, Not Fried – Less Mess, More Health!: Forget the greasy splatters and heavy feeling of fried tacos. Baking these little gems means less oil, easier cleanup, and a lighter, healthier meal you can feel good about serving. Plus, the oven gives them an incredible, consistent crispness every single time.
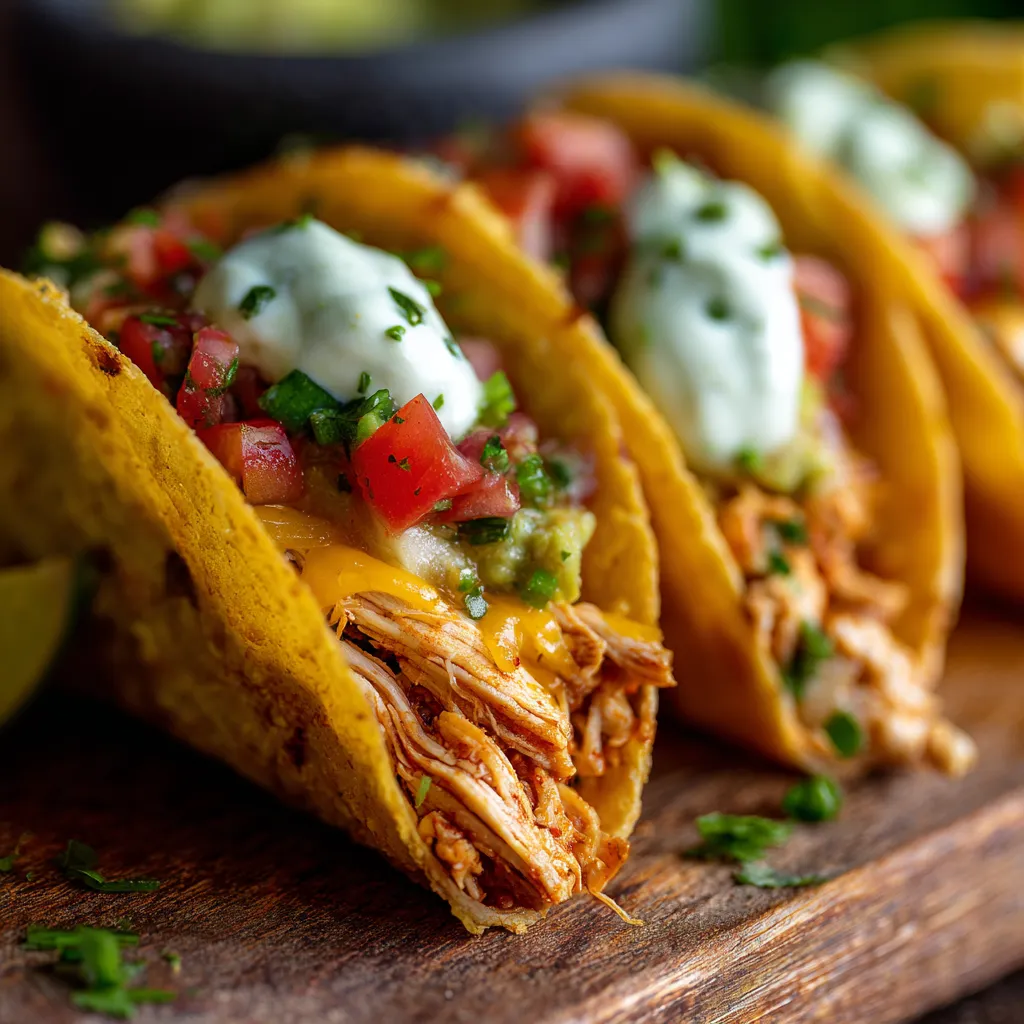
- ❤️ Bursting with Flavor & Fun: Juicy, perfectly seasoned shredded chicken nestled in a crisp tortilla, topped with melted cheese and all your favorite fresh fixings. It’s a fiesta in every bite! Taco night is always a good idea, and these mini versions make it even more enjoyable.
- ❤️ Remarkably Versatile & Adaptable: This recipe is a blank canvas for your culinary creativity. Easily adapt it to dietary needs – think vegetarian with beans, gluten-free with corn tortillas, or even low-carb with lettuce wraps. Got leftover rotisserie chicken? Perfect! Need to use up some pantry staples? This is your recipe.
- ❤️ Budget-Friendly Meal Solution: Uses simple, affordable ingredients that you likely already have on hand or can easily find at any grocery store. No fancy, expensive items required, making it a wallet-friendly option that doesn’t compromise on taste.
- ❤️ Excellent for Meal Prep: The chicken filling can be prepared in advance, making assembly on a busy night even faster. They’re also fantastic as leftovers, though we recommend storing the filling and shells separately for optimal texture when reheating.
- ❤️ The Ultimate Crowd-Pleaser: Planning a casual get-together, a game night, or a kids’ party? These mini tacos are always a hit! They’re easy to make in large batches and are guaranteed to disappear quickly, satisfying every guest.
- ❤️ Nutritious & Wholesome: With lean protein from the chicken and the option to load up on fresh veggies and healthy fats like avocado, these tacos offer a surprisingly balanced and satisfying meal. It’s comfort food that also nourishes.
- ❤️ Crispy Perfection Every Time: The beauty of baking is the consistent, delightful crunch you get with every single taco. The tortillas become beautifully golden and crisp, providing the perfect contrast to the tender, flavorful filling. Say goodbye to soggy or chewy tacos forever!
What You Need
You only need a few simple pantry staples for this recipe! The magic truly lies in combining readily available ingredients for maximum flavor and minimal effort. Check the full printable recipe card below for detailed measurements of each component.
Expert Tips
- 💡 Effortless Chicken Shredding: If you’re using cooked chicken (rotisserie is a lifesaver here!), the quickest way to shred it is with a stand mixer. Place the warm chicken pieces in the bowl and use the paddle attachment on low speed for about 30-60 seconds. Voilà! Perfectly shredded chicken in a flash. A hand mixer works similarly well, or two forks for a more traditional approach.
- 💡 Pliable Tortillas are Key: Cold, stiff tortillas are prone to cracking when folded. Always warm your tortillas slightly before filling. A quick 15-20 second zap in the microwave (stacked between damp paper towels) or a few seconds in a dry skillet on each side will make them pliable and easy to work with, ensuring perfectly shaped tacos.
- 💡 The Art of Filling – Don’t Overstuff! It’s tempting to load them up, but resist the urge! Overfilling can lead to uneven cooking, difficulty in folding, and a soggy mess. About 1-2 tablespoons of filling per mini taco is ideal. This ensures they cook evenly, stay delightfully crispy, and are easy to pick up.
- 💡 For Max Crispy Edges: Want that extra golden, crispy crunch on the outside? Lightly brush the exterior of each folded tortilla with a tiny bit of olive oil or cooking spray before placing them on the baking sheet. This little trick makes a huge difference in texture.
- 💡 Customize Your Spice Level: The beauty of homemade tacos is the ability to adjust the heat. Start with the suggested chili powder and cumin, then taste your chicken mixture. For more kick, add a pinch of cayenne pepper, a dash of your favorite hot sauce, or even some finely diced fresh jalapeños (remove seeds for less heat) to the mix.
- 💡 Batch Cooking for Busy Weeks: This recipe is fantastic for scaling up! Easily double or triple the ingredients for meal prepping, feeding a larger family, or hosting a gathering. Prepare the chicken filling in a big batch, and then assemble and bake as needed throughout the week.
- 💡 Create a Fun Topping Bar: Elevate your taco night experience by setting up a “taco bar.” Lay out small bowls of various toppings like shredded lettuce, diced tomatoes, creamy avocado or guacamole, sour cream or Greek yogurt, fresh cilantro, different salsas (verde, roja, corn salsa), and extra cheese. This allows everyone to customize their tacos to perfection and adds a fun, interactive element to dinner.
- 💡 Prevent Soggy Bottoms with a Rack: For the ultimate crispy texture all around, bake your tacos on a wire rack placed over a baking sheet. This allows air to circulate underneath the tacos, preventing any potential sogginess and ensuring every inch is perfectly crisp.
- 💡 Preheat Your Oven Properly: A hot oven is crucial for achieving that desirable crispy, golden-brown tortilla texture quickly and efficiently. Don’t rush this step! Give your oven ample time to reach the specified temperature.
- 💡 Smart Storage for Best Leftovers: For the best texture, store any leftover chicken filling and baked taco shells separately in airtight containers in the fridge for up to 3 days. This prevents the tortillas from becoming soft from the filling. Reheat the shells in the oven for renewed crispness, and the filling gently in a skillet or microwave.
Variations & Substitutions
- Keto/Low-Carb: For a low-carb option, swap traditional tortillas for low-carb alternatives or create delicious taco “bowls” by serving the filling in crisp lettuce cups.
- Vegetarian/Vegan: Easily make this recipe meat-free! Substitute the chicken with seasoned black beans, refried beans, or a crumbled plant-based meat alternative seasoned with taco spices.
- Gluten-Free: Ensure your tortillas are certified gluten-free. Most corn tortillas are naturally gluten-free, but always check the label to be safe, especially if dealing with sensitivities.
- Cheese Please: Don’t limit yourself to cheddar! Experiment with different cheeses like Monterey Jack, Colby, a spicy Pepper Jack, or a vibrant Mexican blend for varied flavor profiles.
- Spice It Up: For those who love heat, add a pinch of smoked paprika, finely diced jalapeños (seeds removed for moderate heat), or a dash of your favorite hot sauce directly into the chicken mixture.
- Different Meats: This recipe is incredibly versatile. Ground beef, ground turkey, or even seasoned shredded pork can be used in place of chicken, offering a different take on the classic.
- Veggie Boost: Sneak in extra vegetables by stirring finely diced bell peppers, corn, black olives, or even a handful of spinach into the chicken mixture before filling the tacos.
Storage & Freezing
- Refrigeration: Leftover baked tacos are best stored in an airtight container in the fridge for up to 3 days. For optimal crispness, it’s ideal to store the chicken filling and the baked taco shells separately, then combine them just before reheating.
- Reheating: To bring back that glorious crispness, place tacos on a baking sheet and warm in a preheated oven at 350°F (175°C) for 5-7 minutes, or until warmed through and the tortillas are crisp again. Microwaving is an option, but will result in softer tortillas.
- Freezing (Filling): The seasoned chicken filling freezes beautifully! Allow it to cool completely, then transfer it to a freezer-safe bag or airtight container. It can be stored for up to 3 months. Thaw the filling in the refrigerator overnight before reheating and assembling fresh tacos.
- Freezing (Assembled): While you can freeze assembled baked tacos, the tortillas may lose some of their original crispness upon thawing and reheating. If freezing assembled, flash freeze them on a baking sheet until solid, then transfer to a freezer bag. Reheat from frozen in the oven for best results.
FAQ
Q: Can I use raw chicken for this recipe?
A: This recipe is specifically designed for pre-cooked shredded chicken to ensure it truly lives up to its “20-minute” promise. If you use raw chicken, you’ll need to cook and shred it first, which will significantly add to your overall prep and cook time.
Q: What kind of tortillas work best for mini tacos?
A: Small corn tortillas or “street taco” sized flour tortillas are perfect for these mini baked tacos. They crisp up wonderfully in the oven and are the ideal size for a quick, satisfying bite.
Q: My tacos are falling apart when I try to fold them! What am I doing wrong?
A: The most common culprit is cold, stiff tortillas. Make sure you warm your tortillas slightly (as advised in the expert tips) before filling and folding them. This makes them pliable and much less prone to tearing. Also, avoid overfilling them, which can put too much stress on the tortilla.
Q: Can I prepare these Mini Baked Chicken Tacos ahead of time?
A: Absolutely! You can prepare the chicken filling a day or two in advance and store it in an airtight container in the fridge. Then, on a busy night, simply warm the filling, assemble the tacos, and bake them just before serving for the freshest, crispiest results.
Q: What are some good dipping sauces to serve with these tacos?
A: Beyond traditional salsa and sour cream, get creative! Try serving them with fresh guacamole, a creamy cilantro-lime sauce, warm queso, a spicy chipotle ranch dip, or even a refreshing corn and black bean salsa.
Conclusion
So there you have it! Your new favorite speedy supper solution. These Mini Baked Chicken Tacos aren’t just a meal; they’re a moment of calm in a busy week, a burst of flavor that everyone will love. Don’t forget to customize them with your favorite toppings and make them truly your own – they’re endlessly adaptable!
If you try this recipe, be sure to leave a comment and rating below! Your feedback helps other home cooks discover delicious, easy meals. And definitely pin this recipe for later – you’ll thank yourself on your next busy weeknight!
Quick & Easy Mini Baked Chicken Tacos: 20-Min Weeknight Win!
Ingredients
- 2 cups cooked, shredded chicken (from rotisserie or pre-cooked)
- 1 tbsp olive oil
- 1/2 small onion, finely diced
- 2 cloves garlic, minced
- 1 cup salsa (mild or medium, your preference)
- 1 tsp chili powder
- 1/2 tsp ground cumin
- 1/4 tsp salt (or to taste)
- Pinch black pepper
- 12-18 mini corn or flour tortillas (street taco size)
- 1.5 cups shredded cheddar or Mexican blend cheese
- Optional toppings: sour cream, guacamole, fresh cilantro, lime wedges, shredded lettuce, diced tomatoes, hot sauce
Instructions
- Step 1 Preheat your oven to 400°F (200°C). Lightly grease a large baking sheet or line it with parchment paper for easy cleanup.
- Step 2 In a medium skillet, heat the olive oil over medium heat. Add the finely diced onion and sautu00e9 for 3-4 minutes until it becomes softened and translucent. Stir in the minced garlic and cook for another minute until fragrant.
- Step 3 Add the cooked, shredded chicken to the skillet. Stir in the salsa, chili powder, ground cumin, salt, and pepper. Cook for 3-5 minutes, stirring occasionally, until the mixture is heated through and all the flavors are well combined.
- Step 4 While the filling is warm, briefly warm your tortillas to make them pliable. You can microwave them (stacked between damp paper towels) for 15-20 seconds or quickly heat them in a dry skillet for a few seconds per side. This prevents cracking when folding.
- Step 5 Place about 1-2 tablespoons of the chicken mixture and a sprinkle of shredded cheese onto one half of each warmed tortilla. Fold the other half over to create a mini taco shape.
- Step 6 Arrange the folded tacos in a single layer on your prepared baking sheet. If desired, lightly brush the outside of the tortillas with a tiny bit of olive oil for extra crispiness.
- Step 7 Bake for 10-15 minutes, or until the tortillas are golden brown and delightfully crispy, and the cheese is melted and bubbly. Cooking time may vary slightly depending on your oven.
- Step 8 Carefully remove the mini baked chicken tacos from the oven. Serve immediately with your favorite toppings such as sour cream, guacamole, fresh cilantro, a squeeze of lime juice, and any other desired additions. Enjoy your quick and delicious meal!
