
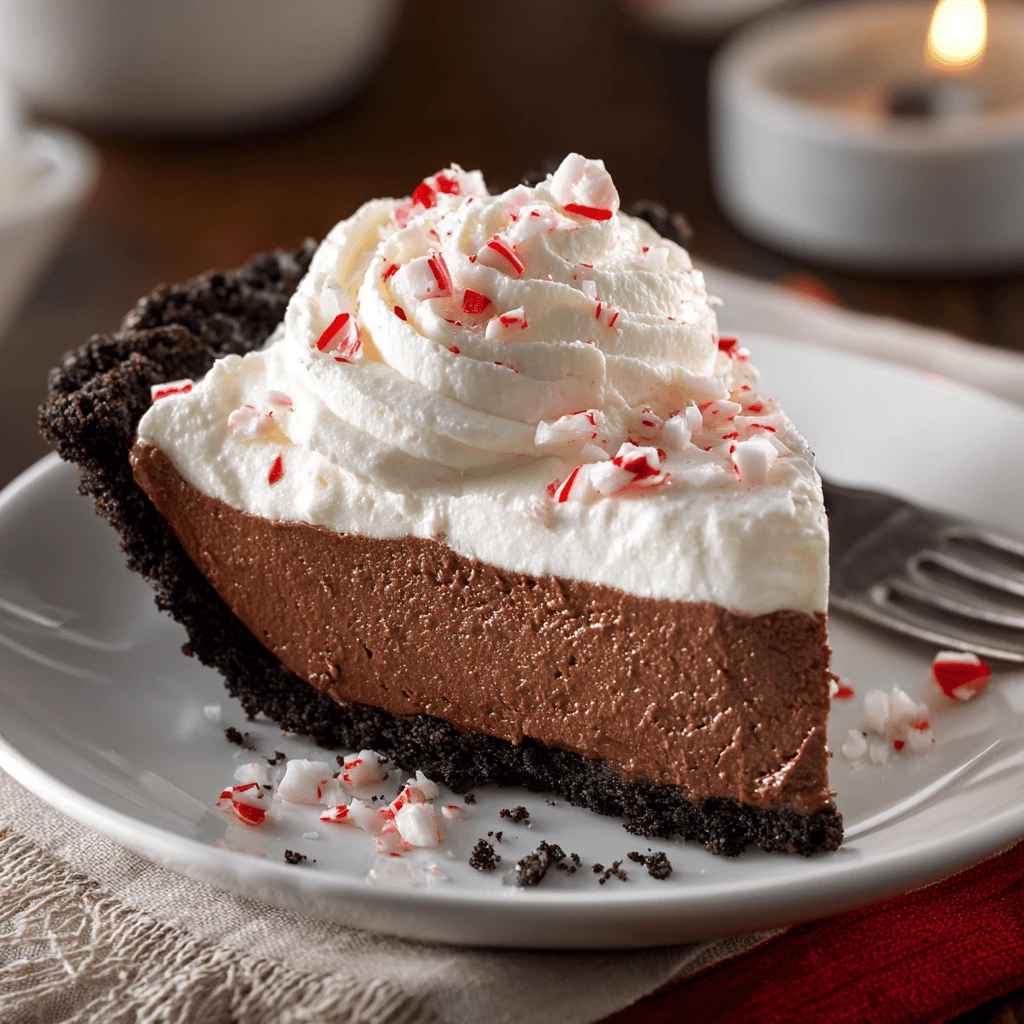
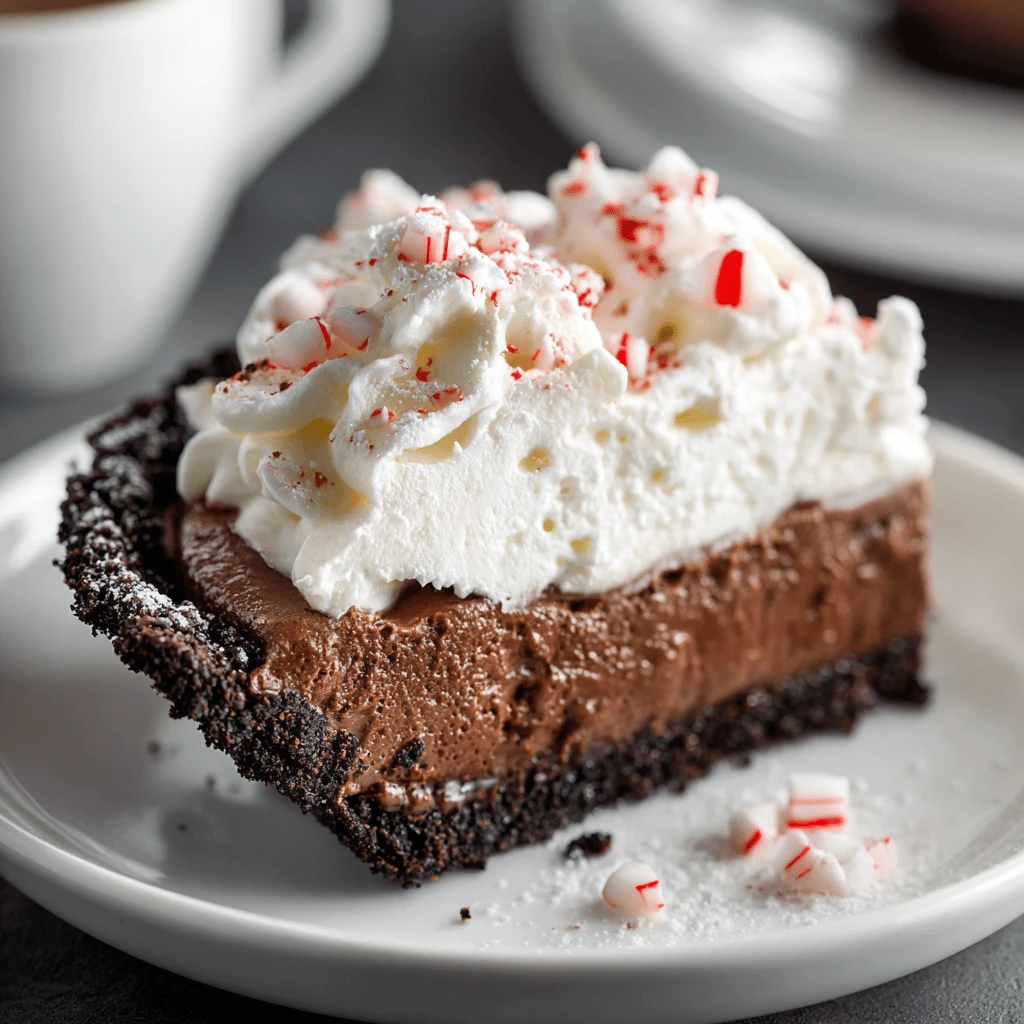
Peppermint Hot Cocoa Cream Pie
Ingredients
For the Chocolate Crust:
- 1 ½ cups chocolate wafer crumbs
- 5 tablespoons unsalted melted butter
- ¼ cup granulated sugar
For the Hot Cocoa Cream Filling:
- 3 cups whole milk
- ¾ cup granulated sugar
- ½ cup unsweetened cocoa powder
- ¼ cup cornstarch
- ¼ teaspoon salt
- 4 large egg yolks, lightly beaten
- 2 tablespoons unsalted butter
- 1 teaspoon vanilla extract
For the Peppermint Whipped Cream Topping:
- 1 ½ cups heavy cream
- ¼ cup powdered sugar
- ½ teaspoon peppermint extract
- Crushed peppermint candies, for garnish
Step-by-Step
1. Prepare the Chocolate Crust: In a medium bowl, combine the chocolate wafer crumbs, melted butter, and granulated sugar. Mix well until evenly moistened.

2. Press the mixture firmly into the bottom and up the sides of a 9-inch pie plate.
3. Bake in a preheated oven at 350°F (175°C) for 8-10 minutes. Let cool completely on a wire rack.
4. Make the Hot Cocoa Cream Filling: In a medium saucepan, whisk together the milk, granulated sugar, cocoa powder, cornstarch, and salt.
5. Place the saucepan over medium heat and cook, whisking constantly, until the mixture begins to thicken and bubble.
6. Reduce the heat to low. Gradually whisk about ½ cup of the hot cocoa mixture into the beaten egg yolks to temper them.
7. Pour the tempered egg yolk mixture back into the saucepan and continue to cook, whisking constantly, for 1-2 minutes, or until the filling is thick and smooth.
8. Remove the saucepan from the heat and stir in the butter and vanilla extract until melted and fully incorporated.
9. Pour the hot cocoa cream filling into the cooled chocolate crust.
10. Cover the surface of the filling with plastic wrap to prevent a skin from forming.
11. Refrigerate for at least 4 hours, or preferably overnight, to allow the filling to set completely.
12. Prepare the Peppermint Whipped Cream Topping: In a large bowl, using an electric mixer, beat the heavy cream and powdered sugar until soft peaks form.
13. Add the peppermint extract and continue to beat until stiff peaks form. Be careful not to overbeat.
14. Spoon or pipe the peppermint whipped cream over the chilled hot cocoa cream pie.
15. Garnish with crushed peppermint candies.
16. Slice and serve immediately. Enjoy!
Diving Deep into the Deliciousness
A Symphony of Flavors and Textures
This Peppermint Hot Cocoa Cream Pie is more than just a dessert.
It’s a culinary experience.
The rich chocolate crust provides a sturdy base.
The creamy hot cocoa filling melts in your mouth.
The cool peppermint whipped cream adds a refreshing counterpoint.
Each component plays a vital role in the overall harmony.
It truly captures the essence of the holiday season.
The Secret to a Perfect Chocolate Crust
A perfect crust is essential for any pie.
For this recipe, we use a chocolate wafer crumb crust.
Using quality chocolate wafers is key.
Ensure the crumbs are finely ground.
The butter acts as a binding agent.
Mix thoroughly to evenly distribute the moisture.
Press firmly into the pie plate.
This ensures a solid foundation.
Blind baking prevents a soggy bottom.
Crafting the Creamy Hot Cocoa Filling
The hot cocoa filling is the heart of this pie.
It’s where the magic truly happens.
Use whole milk for maximum richness.
High-quality cocoa powder is crucial.
It provides a deep, complex chocolate flavor.
Cornstarch acts as a thickening agent.
Tempering the egg yolks prevents curdling.
Constant whisking is essential.
This ensures a smooth, lump-free filling.
Stir in butter for extra richness and shine.
Vanilla extract enhances the overall flavor.
The Art of Peppermint Whipped Cream
The peppermint whipped cream adds a touch of elegance.
It also provides a cooling contrast to the rich filling.
Use cold heavy cream for the best results.
A chilled bowl and beaters help too.
Powdered sugar dissolves easily.
Peppermint extract provides that festive flavor.
Be careful not to overbeat the cream.
Overbeaten cream can become grainy.
Fold in the peppermint extract gently.
Garnish with crushed peppermint candies.
Variations and Creative Twists
This recipe is a great starting point.
Feel free to experiment with different variations.
Try adding a layer of chocolate ganache.
This would add an extra layer of richness.
Use different types of chocolate wafers.
Consider using chocolate graham crackers.
Add a splash of coffee liqueur to the filling.
This will enhance the chocolate flavor.
Top with chocolate shavings or cocoa powder.
Create a decorative design with the whipped cream.
Consider adding a drizzle of chocolate syrup.
Get creative and make it your own.
Troubleshooting Your Pie
Why is my crust soggy?
The most common cause is underbaking. Ensure the crust is fully baked before adding the filling. Blind baking with pie weights can also help.
Why is my filling lumpy?
Lumps can occur if the cornstarch isn’t properly dissolved. Whisk the dry ingredients together thoroughly before adding the milk. Constant whisking during cooking is also crucial.
Why is my whipped cream not stiffening?
The most likely culprit is warm cream. Make sure your heavy cream, bowl, and beaters are all cold before whipping.
Why is my pie cracking?
Rapid temperature changes can cause cracks. Allow the pie to cool gradually at room temperature before refrigerating. Covering the filling with plastic wrap while chilling can also help prevent cracks.
Why is my filling too thin?
Insufficient cornstarch is the likely cause. Make sure you are using the correct amount of cornstarch specified in the recipe. Also, ensure that the filling is cooked long enough for the cornstarch to fully activate and thicken the mixture.
Serving Suggestions and Pairings
This Peppermint Hot Cocoa Cream Pie is a showstopper.
It’s perfect for holiday gatherings and special occasions.
Serve it chilled for the best flavor and texture.
A small slice is usually sufficient.
It’s very rich and decadent.
Pair it with a warm beverage.
A cup of hot cocoa or coffee complements it perfectly.
A glass of milk is also a great choice.
Consider serving it with a scoop of vanilla ice cream.
The cold ice cream adds a nice contrast.
It’s also delicious on its own.
No matter how you serve it, it’s sure to be a hit.
Storage and Make-Ahead Tips
This pie can be made ahead of time.
The crust can be baked up to 2 days in advance.
Store it in an airtight container at room temperature.
The filling can also be made a day ahead.
Store it covered in the refrigerator.
Assemble the pie just before serving.
The whipped cream is best made fresh.
It can be made a few hours in advance.
Store it in the refrigerator in an airtight container.
Leftover pie should be stored in the refrigerator.
Cover it tightly to prevent it from drying out.
It will last for 2-3 days in the refrigerator.
Health Considerations and Substitutions
This pie is a decadent treat.
It’s high in sugar and fat.
Enjoy it in moderation as part of a balanced diet.
Consider making some substitutions to reduce the sugar content.
Use a sugar substitute in the filling and whipped cream.
Reduce the amount of sugar in the crust.
Use dark chocolate wafers.
Dark chocolate has a lower sugar content.
Substitute almond milk for whole milk.
This will reduce the fat content.
Use a lighter whipped topping.
Consider using Greek yogurt instead of whipped cream.
It adds a tangy flavor and reduces the fat content.
FAQ
Can I use a store-bought crust?
Yes, you can use a store-bought chocolate crust. However, homemade crusts generally taste better.
Can I freeze this pie?
Freezing is not recommended. The filling and whipped cream may change texture.
Can I use different extracts?
Yes, feel free to experiment. Vanilla extract works well as an alternative to peppermint.
How long does this pie last?
This pie will last for 2-3 days in the refrigerator.
Can I make this pie gluten-free?
Yes, use gluten-free chocolate wafer crumbs to make a gluten-free version.
