
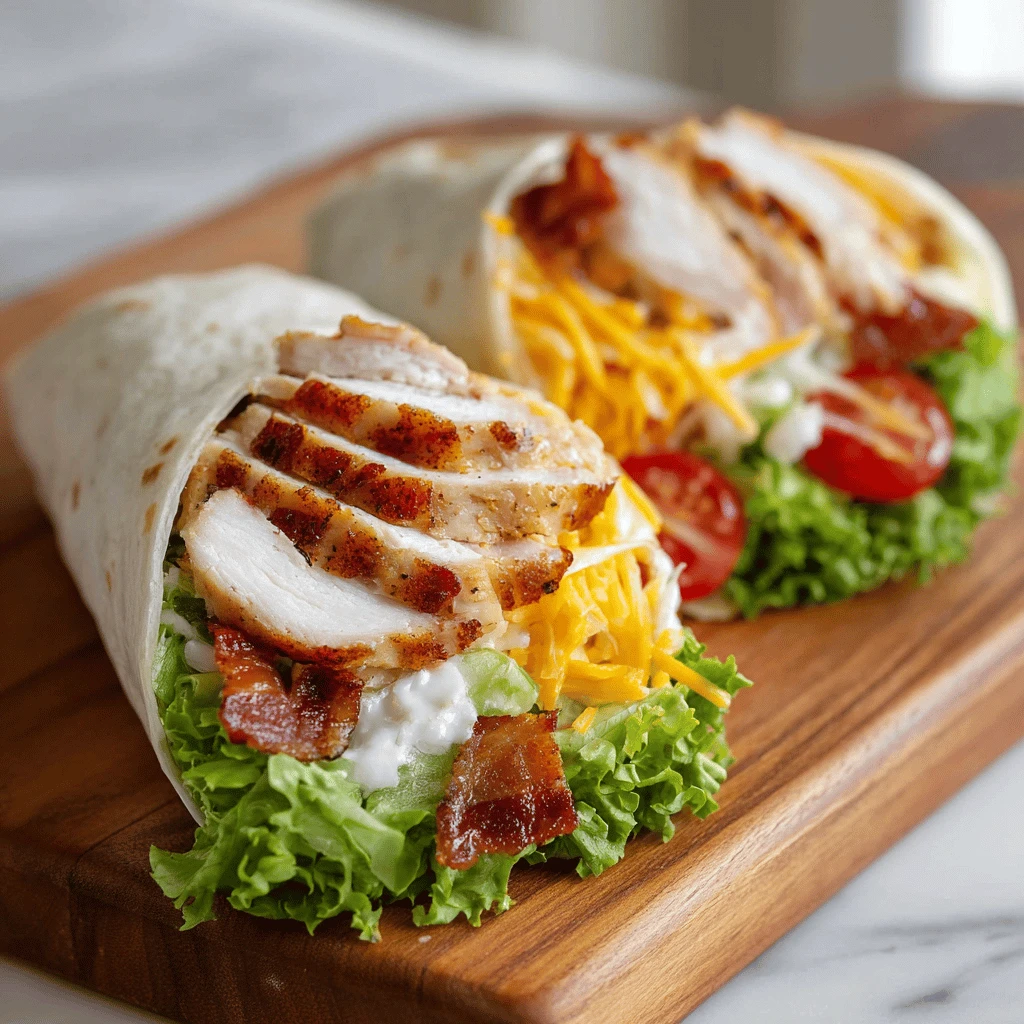
No Oil Instant Pot Chicken Breast Wrap: A Healthy & Flavorful Delight
The Instant Pot has revolutionized cooking, offering quick and convenient ways to prepare healthy meals. This recipe focuses on creating delicious and versatile no-oil Instant Pot chicken breasts, perfect for flavorful wraps. By skipping the oil, we achieve a leaner, healthier meal without sacrificing taste. This guide will walk you through creating perfectly cooked chicken breasts in your Instant Pot and transforming them into mouthwatering wraps.

Mastering No-Oil Instant Pot Chicken Breasts
Achieving juicy, flavorful chicken breasts in the Instant Pot without oil requires a few simple techniques. The key is ensuring sufficient moisture and proper cooking time.
Choosing the Right Chicken
Opt for boneless, skinless chicken breasts that are similar in size for even cooking. Chicken breasts that are too thick may require slightly longer cooking times. If using frozen chicken breasts, extend the cooking time accordingly (we’ll cover that in detail later). Buying organic or free-range chicken is a great way to enjoy a healthier meal.
Essential Ingredients & Equipment
Beyond the chicken itself, you’ll need a few key ingredients:
- Chicken Broth: Use low-sodium chicken broth to add flavor and moisture during cooking. Vegetable broth is a great substitute.
- Seasonings: A blend of your favorite herbs and spices is crucial. Consider garlic powder, onion powder, paprika, dried oregano, dried thyme, salt, and pepper. Feel free to experiment with chili powder, cumin, or Italian seasoning for different flavor profiles.
- Instant Pot: A 6-quart or 8-quart Instant Pot will work perfectly for this recipe.
- Trivet: A trivet is necessary to elevate the chicken breasts above the liquid, preventing them from simmering and ensuring even cooking.
The No-Oil Instant Pot Cooking Process
1. Prepare the Chicken: Pat the chicken breasts dry with paper towels. This helps the seasonings adhere better.
2. Season Generously: In a small bowl, combine your chosen spices. Generously season both sides of each chicken breast with the spice mixture. Don’t be shy – this is where the flavor comes from!
3. Add Broth and Trivet: Pour 1 cup of chicken broth into the Instant Pot. Place the trivet inside.
4. Arrange Chicken: Place the seasoned chicken breasts on top of the trivet in a single layer. Avoid overcrowding the pot.
5. Pressure Cook: Secure the Instant Pot lid and set the valve to the “Sealing” position. Cook on “Manual” or “Pressure Cook” mode for 8-10 minutes, depending on the thickness of the chicken breasts. For frozen chicken breasts, cook for 12-15 minutes.
6. Natural Pressure Release: Allow the Instant Pot to naturally release pressure for 10 minutes. After 10 minutes, manually release any remaining pressure. This natural release helps the chicken retain moisture and prevents it from becoming dry.
7. Check for Doneness: Use a meat thermometer to ensure the internal temperature of the chicken reaches 165°F (74°C). If necessary, close the lid and cook for an additional 1-2 minutes, followed by another natural pressure release.
8. Shred or Slice: Once cooked through, remove the chicken breasts from the Instant Pot. Let them rest for a few minutes before shredding or slicing. This allows the juices to redistribute, resulting in more tender and flavorful chicken.
Crafting the Perfect Chicken Wrap
With your perfectly cooked no-oil Instant Pot chicken breasts ready, it’s time to assemble your wraps. The possibilities are endless when it comes to fillings and flavors.
Selecting Your Wrap Ingredients
-
- Wraps: Choose your favorite type of wrap. Whole wheat tortillas, spinach tortillas, or even lettuce wraps are all great options. Consider the size of your wrap and adjust the amount of filling accordingly.
- Sauce: A flavorful sauce is essential for a delicious wrap. Options include:
Hummus: Provides a creamy and healthy base.
Guacamole: Adds richness and healthy fats.
Greek Yogurt: A tangy and protein-packed option. Mix with herbs and spices for extra flavor.
Salsa: Adds a zesty and spicy kick.
Mustard: Dijon mustard or honey mustard can add a unique flavor.
-
- Vegetables: Load up on your favorite vegetables for added nutrients and crunch. Consider:
Lettuce: Romaine lettuce, spinach, or mixed greens.
Tomatoes: Sliced or diced tomatoes add juiciness and flavor.
Onions: Red onions or green onions provide a pungent bite.
Bell Peppers: Sliced bell peppers add sweetness and color.
Cucumbers: Sliced cucumbers offer a refreshing crunch.
Avocado: Adds creaminess and healthy fats.
Sprouts: Alfalfa sprouts or other sprouts provide a nutrient boost.
- Cheese (Optional): If you’re not avoiding dairy, add a sprinkle of your favorite cheese, such as cheddar, Monterey Jack, or feta.
Assembling the Wrap
1. Warm the Wrap: Gently warm the tortilla in a dry skillet or microwave for a few seconds to make it more pliable and prevent it from tearing.
2. Spread the Sauce: Spread your chosen sauce evenly over the wrap, leaving a small border around the edges.
3. Add Chicken: Arrange the shredded or sliced chicken breast in a line down the center of the wrap.
4. Layer Vegetables: Layer your chosen vegetables on top of the chicken.
5. Add Cheese (Optional): Sprinkle cheese over the vegetables, if desired.
6. Fold the Wrap: Fold in the sides of the wrap, then fold up the bottom and roll tightly.
7. Slice and Serve: Slice the wrap in half, if desired, and serve immediately.
Variations & Flavor Combinations
The beauty of these chicken wraps is their versatility. Experiment with different flavor combinations to create your own signature wrap.
Global Flavors
- Mediterranean Wrap: Use hummus, feta cheese, tomatoes, cucumbers, red onion, and Kalamata olives.
- Mexican Wrap: Use salsa, avocado, black beans, corn, and shredded cheddar cheese. Add a squeeze of lime juice for extra zest.
- Asian-Inspired Wrap: Use a peanut sauce or hoisin sauce, shredded carrots, shredded cabbage, bean sprouts, and chopped peanuts.
- Italian Wrap: Use pesto, mozzarella cheese, roasted red peppers, and spinach.
Dietary Considerations
- Gluten-Free: Use gluten-free tortillas or lettuce wraps.
- Dairy-Free: Omit the cheese or use a dairy-free cheese alternative.
- Low-Carb: Use lettuce wraps or low-carb tortillas. Focus on low-carb vegetables like spinach, bell peppers, and cucumbers.
- Vegetarian: While this recipe focuses on chicken, you can easily substitute it with chickpeas or lentils for a vegetarian option. Season the chickpeas or lentils with similar spices used for the chicken.
Tips for Meal Prep
These chicken breasts and wraps are perfect for meal prepping. Cook a large batch of chicken breasts on Sunday and store them in the refrigerator. You can then assemble wraps throughout the week for quick and healthy lunches or dinners. Store the wraps in airtight containers in the refrigerator. Prepare the vegetables in advance too. Store sauces separately to avoid soggy wraps.
Troubleshooting Common Issues
Even with a foolproof recipe, occasional issues can arise. Here’s how to troubleshoot common problems:

Chicken is Dry
- Natural Pressure Release: Ensure you are allowing the Instant Pot to naturally release pressure for at least 10 minutes.
- Cooking Time: Reduce the cooking time slightly if the chicken is consistently dry.
- Broth: Make sure there is enough broth in the Instant Pot to provide sufficient moisture.
Chicken is Undercooked
- Cooking Time: Increase the cooking time by 1-2 minutes.
- Chicken Thickness: Thicker chicken breasts require longer cooking times.
- Meat Thermometer: Always use a meat thermometer to ensure the internal temperature reaches 165°F (74°C).
Wraps are Soggy
- Sauce: Avoid using too much sauce.
- Pre-Assembly: Do not assemble the wraps too far in advance, as the moisture from the fillings can cause them to become soggy.
- Storage: Store the sauce separately from the other fillings if you are preparing the wraps for meal prep.
Frequently Asked Questions (FAQ)
- Can I use frozen chicken breasts? Yes, you can cook frozen chicken breasts in the Instant Pot. Increase the cooking time to 12-15 minutes, depending on the thickness of the chicken.
- Do I need to thaw the chicken first? No, you don’t need to thaw the chicken first. However, it will take longer to cook.
- Can I use bone-in chicken breasts? While possible, bone-in chicken breasts require longer cooking times and the meat may not be as easy to shred. Boneless, skinless chicken breasts are recommended for this recipe.
- Can I add vegetables to the Instant Pot with the chicken? Yes, you can add vegetables like bell peppers or onions to the Instant Pot with the chicken. Add them on top of the trivet. Be aware that the vegetables will be quite soft.
- How long will the cooked chicken last in the refrigerator? Cooked chicken breasts can be stored in the refrigerator for up to 3-4 days. Make sure to store them in an airtight container.
- Can I freeze the cooked chicken? Yes, you can freeze the cooked chicken. Allow it to cool completely, then store it in a freezer-safe bag or container for up to 2-3 months.
- What if I don’t have a trivet? If you don’t have a trivet, you can use crumpled balls of aluminum foil to elevate the chicken breasts above the liquid.
- Can I use other liquids besides chicken broth? Yes, you can use vegetable broth or even water. However, chicken broth adds more flavor.
- Can I add a marinade to the chicken before cooking? Yes, you can marinate the chicken before cooking it in the Instant Pot. This will add even more flavor.
