
Best Ever Italian Grinder Sliders (Party or Dinner)
There are some recipes that just stick with you, weaving themselves into the fabric of your family’s most cherished memories. For me, these Italian Grinder Sliders (Party or Dinner) are exactly that. I first made them for a casual Sunday football game at our house, and the reaction was instantaneous. My husband, usually reserved with compliments, actually let out a cheer! Since then, they’ve become our go-to for everything from busy weeknight easy dinner solutions to impromptu backyard barbecues.
It’s truly a testament to the power of delicious, unpretentious comfort food. This recipe, a tested family favorite, takes all the incredible flavors of a classic Italian grinder sandwich and transforms them into convenient, shareable sliders. Get ready to impress everyone with minimal effort!
Why You’ll Love This Recipe
❤️ These Italian Grinder Sliders are more than just a meal; they’re an experience! Here’s why they’ll quickly become a staple in your kitchen:
- Effortlessly Delicious: You won’t believe how easy it is to assemble these. They come together in minutes, making them perfect for busy weeknights or unexpected guests.
- Crowd-Pleasing Perfection: Seriously, who doesn’t love a good slider? These are a guaranteed hit at any party, potluck, or game day gathering. The combination of savory meats, melted cheese, and fresh, tangy salad is irresistible.
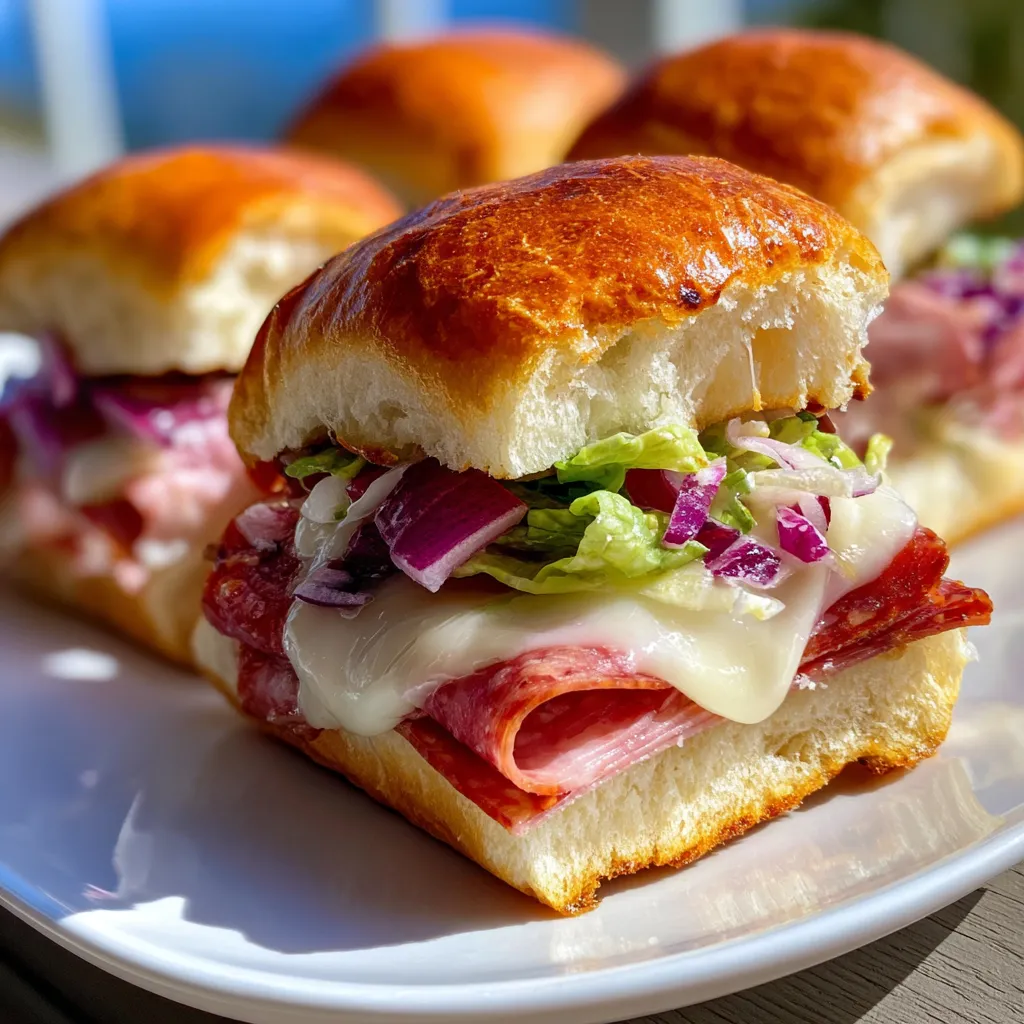
- The Ultimate Flavor Bomb: Each bite delivers a punch of classic Italian deli flavors. The salty ham, spicy pepperoni, and savory salami melt perfectly with the provolone, all cut through by that bright, zesty grinder salad. It’s a symphony of textures and tastes!
- Customizable to Your Heart’s Content: While the classic combination is amazing, these sliders are incredibly versatile. Feel free to swap meats, cheeses, or even add different veggies to make them uniquely yours.
- Perfectly Portable: Sliders are inherently easy to serve and eat, making them ideal for casual get-togethers where forks and plates might be scarce. Just grab and go!
- Make-Ahead Friendly: You can prep the grinder salad and even assemble the sliders ahead of time, then just pop them in the oven when you’re ready to bake. This saves precious time when entertaining or during a busy week.
- Kid-Friendly Favorite: Even the pickiest eaters often gravitate towards these cheesy, meaty little sandwiches. They’re fun to eat and packed with familiar, comforting flavors.
- Elevates Any Occasion: From a simple family dinner to a festive holiday spread, these sliders add a touch of gourmet fun without any of the fuss. They look impressive but are secretly super simple.
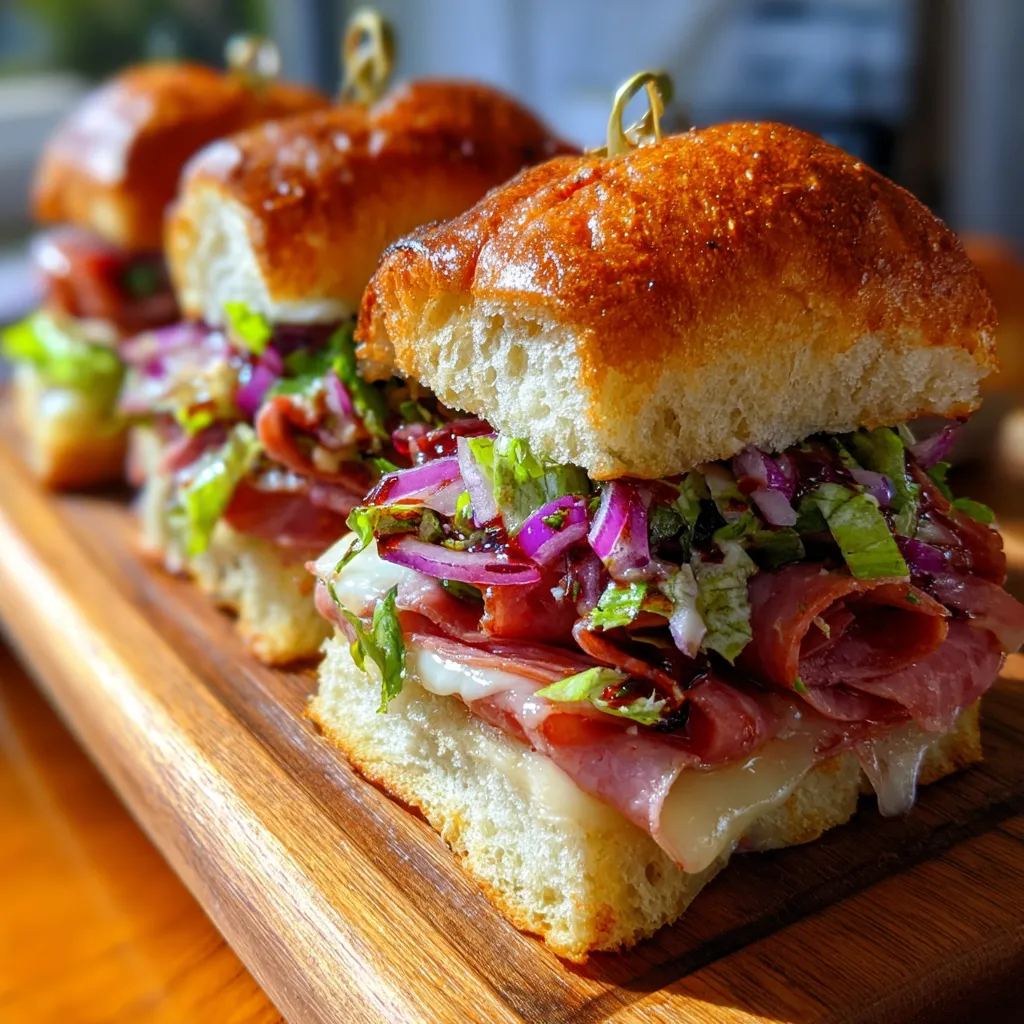
- Textural Harmony: Enjoy the soft, buttery rolls, the slight chew of the deli meats, the gooey melted cheese, and the satisfying crunch of the fresh grinder salad. Every component plays a vital role in creating a truly delightful eating experience.
What You Need
You only need a few simple pantry staples and fresh deli ingredients for this recipe! Check the full printable recipe card below for detailed measurements and specific ingredient notes. Most items you might already have on hand, or they’re easily found at your local grocery store.

Expert Tips
💡 To make sure your Italian Grinder Sliders are absolutely perfect every time, keep these expert tips in mind:
- Quality Deli Meats are Key: This recipe shines with good quality, thinly sliced deli meats. Don’t skimp here! A mix of ham, salami, and pepperoni offers the best flavor profile, but feel free to choose your favorites.
- Don’t Forget the Mayo Barrier: Brushing the bottom of your rolls with mayonnaise before adding the fillings creates a delicious savory barrier. It prevents the rolls from getting soggy and adds an extra layer of flavor.
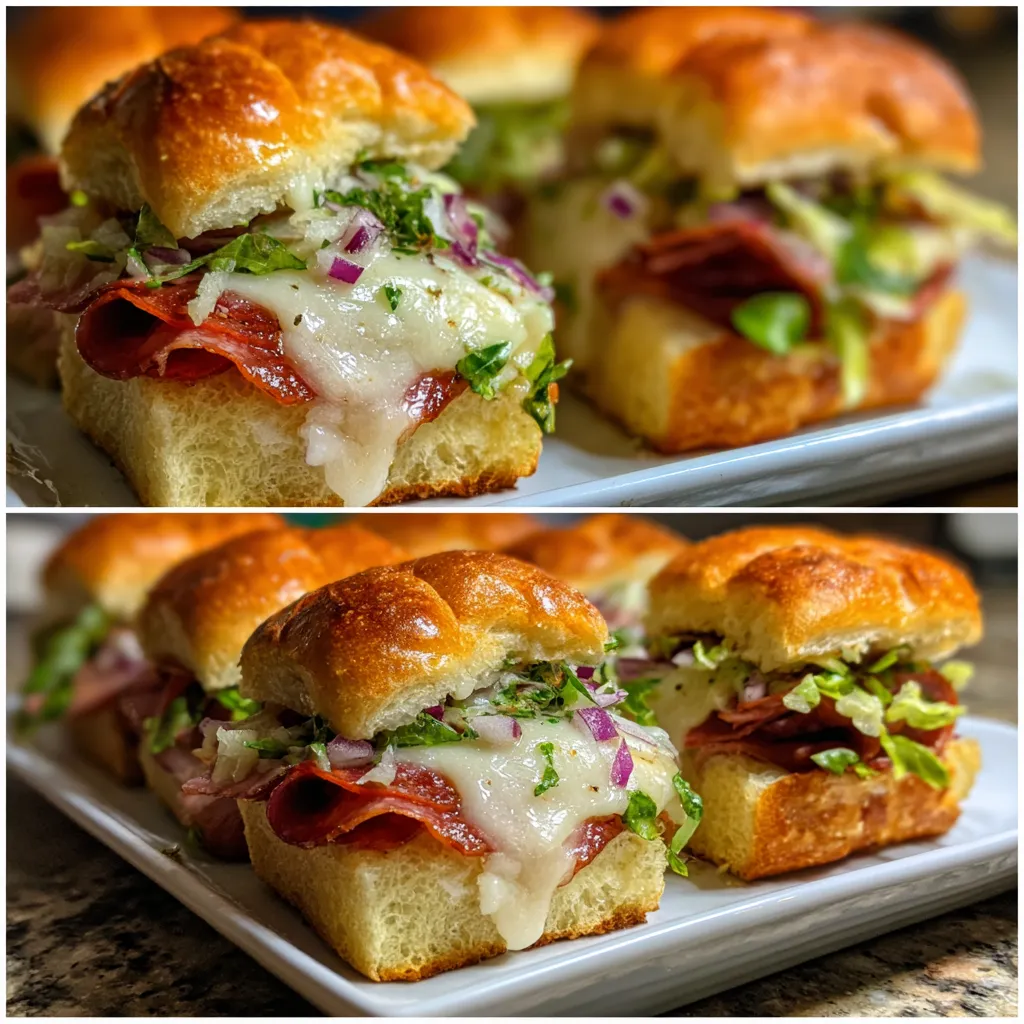
- Layering Matters: When assembling, start with a meat, then cheese, then another meat. This ensures even melting and keeps the sliders stable. The cheese acts like glue!
- Pre-Mixing the Dressing: Whisk your red wine vinegar, olive oil, dried oregano, and garlic powder (if using) together thoroughly before tossing with the lettuce and onion. This ensures a consistent, zesty flavor throughout the grinder salad.
- Chop Your Salad Finely: For the classic grinder experience, chop your iceberg lettuce and red onion very finely. This allows it to meld beautifully with the dressing and prevents large pieces from falling out of the sliders.
- Warm Rolls for Best Results: While you *can* assemble these cold, lightly warming the rolls first (even just 5 minutes in the oven) can make them easier to slice and separate without tearing.
- Press Down Gently: Before baking, press down on the tops of the sliders gently but firmly. This helps to compact the filling and ensures the cheese melts around the meats, holding everything together.
- Golden Brown Tops: Keep an eye on your sliders in the last few minutes of baking. You want the tops to be beautifully golden brown and slightly crispy, indicating perfectly toasted rolls. If they brown too quickly, you can tent them with foil.
- Rest Before Slicing: Let the baked sheet of sliders rest for 5-10 minutes after coming out of the oven. This allows the cheese to set slightly, making them much easier to slice into individual portions without all the delicious filling oozing out.
- Serve the Salad on the Side (Optional): If you’re worried about sogginess for a party that will sit out for a while, you can bake the sliders without the salad, and then offer the freshly dressed grinder salad on the side for guests to add themselves.
Variations & Substitutions
One of the best things about these Italian Grinder Sliders is how adaptable they are! Here are some ideas to make them your own:
- Meat Swaps: Experiment with mortadella, soppressata, or even thinly sliced turkey or roast beef for a different flavor profile.
- Cheese Please: Instead of provolone, try Swiss, white cheddar, or a pepper jack for a little kick.
- Add Some Heat: Incorporate sliced jalapeños, a pinch of red pepper flakes into the dressing, or hot giardiniera for a spicy twist.
- Veggie Boost: Finely diced bell peppers, olives, or even sun-dried tomatoes can be added to the grinder salad for extra texture and flavor.
- Herb Appeal: Fresh basil or parsley can be chopped and added to the grinder salad for a burst of fresh herbiness.
- Garlic Bread Style: Brush the tops of the rolls with melted garlic butter instead of plain butter for an even richer, more aromatic flavor.
- Keto/Low-Carb: You can enjoy the delicious filling as a bowl! Layer the meats and cheese, bake until melted, then serve atop a bed of the grinder salad.
- Gluten-Free: Opt for your favorite gluten-free slider buns or rolls. Ensure all deli meats and sauces are certified GF.
Storage & Freezing
These sliders are best enjoyed fresh from the oven, but leftovers can be stored and reheated:
- Storage: Store any leftover baked sliders (with the salad already added) in an airtight container in the refrigerator for up to 2-3 days. The rolls may soften slightly, but they will still be delicious.
- Reheating: For best results, reheat leftover sliders in a toaster oven or air fryer at 300°F (150°C) until warmed through and slightly crispy. You can also microwave them, but the texture won’t be as good.
- Freezing: I don’t recommend freezing these sliders once assembled and baked, especially with the fresh grinder salad, as the lettuce will become very soggy upon thawing.
- Make-Ahead (Pre-Baked): You can assemble the sliders (without the grinder salad) up to a day in advance. Cover tightly with foil and refrigerate. When ready to bake, follow the baking instructions, adding an extra 5-10 minutes to account for the chill. Prepare the grinder salad just before serving.
FAQ
Can I use different types of bread?
Absolutely! While King’s Hawaiian rolls are fantastic for their sweetness and softness, you can use other slider buns, small potato rolls, or even cut a small baguette into slider-sized pieces. Just adjust baking time if needed.
What kind of cheese is best for Italian Grinder Sliders?
Provolone is a classic choice for its mild, slightly nutty flavor and excellent melting properties. Swiss, mozzarella, or even a mild white cheddar would also work beautifully.
Can I make the grinder salad spicier?
Yes! To add more heat, you can include a pinch of red pepper flakes in the dressing, add thinly sliced hot cherry peppers or jalapeños to the salad, or choose spicy deli meats.
How do I prevent the rolls from getting soggy?
Two key tips: First, brush a thin layer of mayonnaise on the inside of the bottom rolls to create a protective barrier. Second, make sure to add the grinder salad just before serving or directly after baking for optimal freshness and crunch.
Whether you’re hosting a party, looking for a delicious yet easy dinner, or simply craving some serious comfort food, these Italian Grinder Sliders are guaranteed to hit the spot. They’re a recipe you’ll find yourself turning to again and again!
Don’t forget to Pin this recipe for later and share your creations with me on social media!
Italian Grinder Sliders: Your Ultimate Party & Dinner Hit!
Ingredients
- 1 (12-count) package King's Hawaiian sweet rolls
- 1/4 cup mayonnaise
- 8 slices provolone cheese
- 6 oz thinly sliced deli ham
- 6 oz thinly sliced hard salami
- 6 oz thinly sliced pepperoni
- 2 tbsp unsalted butter, melted
- 1 tsp dried oregano (for butter topping)
- For the Grinder Salad:
- 2 cups finely shredded iceberg lettuce
- 1/4 cup finely diced red onion
- 2 tbsp red wine vinegar
- 3 tbsp olive oil
- 1 tsp dried oregano
- 1/2 tsp garlic powder
- Salt and black pepper to taste
- Optional: Thinly sliced banana peppers or chopped pickled jalapeu00f1os
Instructions
- Step 1 Preheat oven to 350°F (175°C). Lightly grease a 9x13 inch baking dish.
- Step 2 Without separating the rolls, slice the entire block of Hawaiian rolls horizontally in half.
- Step 3 Place the bottom half of the rolls in the prepared baking dish. Spread mayonnaise evenly over the cut side of the bottom rolls.
- Step 4 Layer half of the provolone cheese slices over the mayonnaise. Arrange the ham, salami, and pepperoni evenly over the cheese. Top with the remaining provolone cheese slices.
- Step 5 Place the top half of the rolls over the meat and cheese layers.
- Step 6 In a small bowl, whisk together the melted butter and 1 tsp dried oregano. Brush the butter mixture generously over the tops of the rolls.
- Step 7 Cover the baking dish loosely with aluminum foil and bake for 20 minutes.
- Step 8 While sliders bake, prepare the grinder salad: In a medium bowl, combine the shredded iceberg lettuce and diced red onion. In a separate small bowl, whisk together the red wine vinegar, olive oil, 1 tsp dried oregano, garlic powder, salt, and pepper. Pour the dressing over the lettuce and onion, tossing to coat well.
- Step 9 After 20 minutes, remove the foil from the sliders. Bake uncovered for another 5-10 minutes, or until the tops are golden brown and the cheese is bubbly and melted.
- Step 10 Remove from oven and let rest for 5 minutes. Carefully lift the entire block of sliders out of the dish and place on a cutting board. Separate into individual sliders.
- Step 11 Open each slider and generously stuff with the prepared grinder salad. Serve immediately and enjoy!
