
Introduction to Halloween Spiderweb Cookies
Halloween-themed baking brings festive joy to kitchens everywhere. Each year, people eagerly prepare spooky treats that capture the spirit of the holiday. Among these delights, spiderweb cookies stand out for their eye-catching design and delicious taste.
Spiderweb designs hold a special place in Halloween traditions. These intricate patterns mimic real spider webs, evoking the eerie atmosphere of haunted houses and creepy crawlies. Their delicate appearance adds a playful yet spooky touch to any dessert table. Using spiderwebs as decoration connects the food directly to the holiday’s theme, enhancing the overall experience.
Spiderweb cookies have surged in popularity over recent years. Their combination of simple ingredients with striking decoration makes them a favorite for home bakers and professionals alike. Kids and adults find them irresistible because they blend fun artistry with sweet flavors. Whether served at parties or given as gifts, these cookies make Halloween celebrations extra memorable.
This article will explore everything you need to know about Halloween spiderweb cookies, from ingredients and tools to baking and decorating tips. Whether you’re new to baking or a seasoned pro, this guide will help you create stunning spiderweb treats that impress every time. Get ready to bring a spooky yet sweet touch to your Halloween festivities!
Essential Ingredients for Spiderweb Cookies: Basic and Decorative
To create perfect Halloween spiderweb cookies, start with simple, high-quality ingredients. The foundation includes all-purpose flour, granulated sugar, unsalted butter, eggs, and vanilla extract. Flour provides structure, while butter adds richness and tenderness. Sugar sweetens the dough and helps achieve a golden color during baking. Eggs bind everything together, contributing to the cookie’s soft texture. Vanilla extract enhances flavor, making the cookies irresistible.
For decorating your spiderweb cookies, prepare black and white royal icing. Royal icing dries hard, perfect for detailed spiderweb patterns. You can make it from powdered sugar, meringue powder, and water, or buy pre-made versions to save time. Black icing creates the web outlines, while white icing adds contrast and highlights. Optional edible glitter or small candy spiders give your cookies an extra festive, spooky touch. These finishing details turn simple cookies into Halloween showstoppers.
Recommended Tools and Equipment for Baking and Decorating Spiderweb Cookies
Having the right tools ensures smooth baking and decoration. Start with cookie cutters—round shapes work best for spiderweb patterns, but spider-shaped cutters add extra fun. Using uniform shapes helps your cookies bake evenly and look professional.
Piping bags and various icing tips are essential for decorating. A small round tip allows precise control when piping the spiderweb lines. If you don’t have piping bags, use resealable plastic bags and snip a tiny corner for easy icing application.
Cooling racks keep your cookies crisp by allowing air to circulate evenly as they cool. Baking sheets with parchment paper or silicone mats prevent sticking and promote even baking. Using quality equipment helps maintain consistency and makes the entire process more enjoyable, from baking to decorating.
With these essential ingredients and tools, you’ll be well-equipped to create stunning, delicious Halloween spiderweb cookies that impress everyone.
Preparing the Cookie Dough: Mixing Ingredients and Chilling for Best Results
Start by combining your dry ingredients in a medium bowl. Whisk together all-purpose flour, baking powder, and salt to ensure even distribution. In a separate large bowl, cream the softened unsalted butter with granulated sugar until the mixture becomes light and fluffy. This step incorporates air, creating tender cookies. Next, beat in the egg and vanilla extract until fully blended.
Gradually add the dry ingredient mixture to the wet ingredients. Mix on low speed or stir gently with a spatula until the dough comes together. Avoid overmixing to prevent tough cookies. Once the dough forms, cover it tightly with plastic wrap. Chill it in the refrigerator for at least 30 minutes. Chilling firms the dough, making it easier to roll and shape. It also helps the cookies hold their shape better during baking.
Rolling and Cutting the Dough: Achieving the Perfect Thickness and Shape
After chilling, remove the dough from the fridge and let it sit for a few minutes to soften slightly, making it easier to handle. Lightly flour your work surface and rolling pin to prevent sticking. Roll the dough evenly to about 1/4 inch thickness. Maintaining consistent thickness ensures the cookies bake evenly without burning or undercooking.
Use round cookie cutters for the classic spiderweb shape. Press firmly to cut clean edges. Gently transfer the cutouts to baking sheets lined with parchment paper or silicone mats, leaving space between each cookie to allow for slight spreading. If you want to add variety, spider-shaped cutters make great complementary treats.
Baking the Cookies: Temperature, Timing, and Perfect Doneness
Preheat your oven to 350°F (175°C). Bake the cookies on the middle rack for 8 to 10 minutes. Keep an eye on the edges—they should turn a light golden color without browning too much. The centers may look slightly soft but will firm up as the cookies cool.
Avoid overbaking to keep the cookies tender instead of dry and brittle. Baking times may vary slightly depending on your oven, so check the cookies a minute or two before the suggested time. Use a spatula to gently lift a cookie—if it feels firm around the edges but still soft in the center, it’s ready.
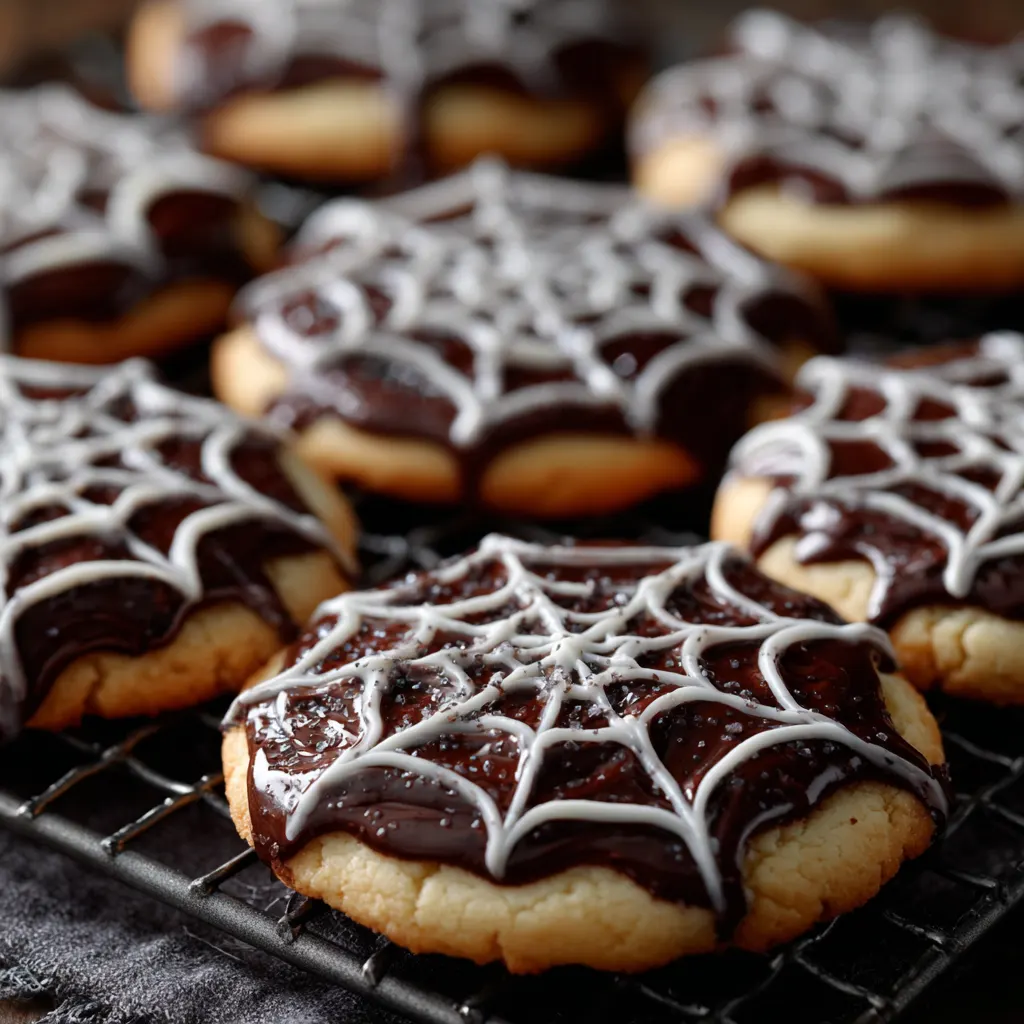
Cooling and Preparing for Decoration: Ensuring Crispness and Clean Workspaces
Once baked, carefully transfer the cookies to a cooling rack. Cooling completely is crucial because warm cookies can cause icing to melt and run. Allow at least 30 minutes for the cookies to cool fully. This step ensures the icing will set properly and your spiderweb designs stay sharp and defined.
Prepare your decorating area by cleaning the surface thoroughly and organizing your icing bags and tools. Keep paper towels and toothpicks handy for quick fixes or adjustments during decorating. A well-organized workspace speeds up the process and reduces mistakes. With cooled cookies and a tidy station, you’re ready to create beautiful, spooky spiderweb patterns that will impress your friends and family.
Preparing the Icing: Homemade Royal Icing and Easy Store-Bought Alternatives
Creating the perfect spiderweb design starts with the right icing. Royal icing is the ideal choice because it dries hard and smooth, making detailed decorations possible. To make royal icing at home, combine powdered sugar, meringue powder, and water in a bowl. Whisk the mixture until it reaches a thick, pipeable consistency. Adjust the water quantity to achieve the right texture—too thin and the icing will run; too thick and it will be hard to pipe.
If you prefer convenience, store-bought royal icing works well too. Choose high-quality options that maintain firmness when dried. Divide the icing into two bowls. Leave one portion white and color the other black using gel food coloring. Gel colors provide vibrant shades without altering icing consistency. Mix thoroughly until the colors are even, ensuring your spiderweb stands out with clear contrast.
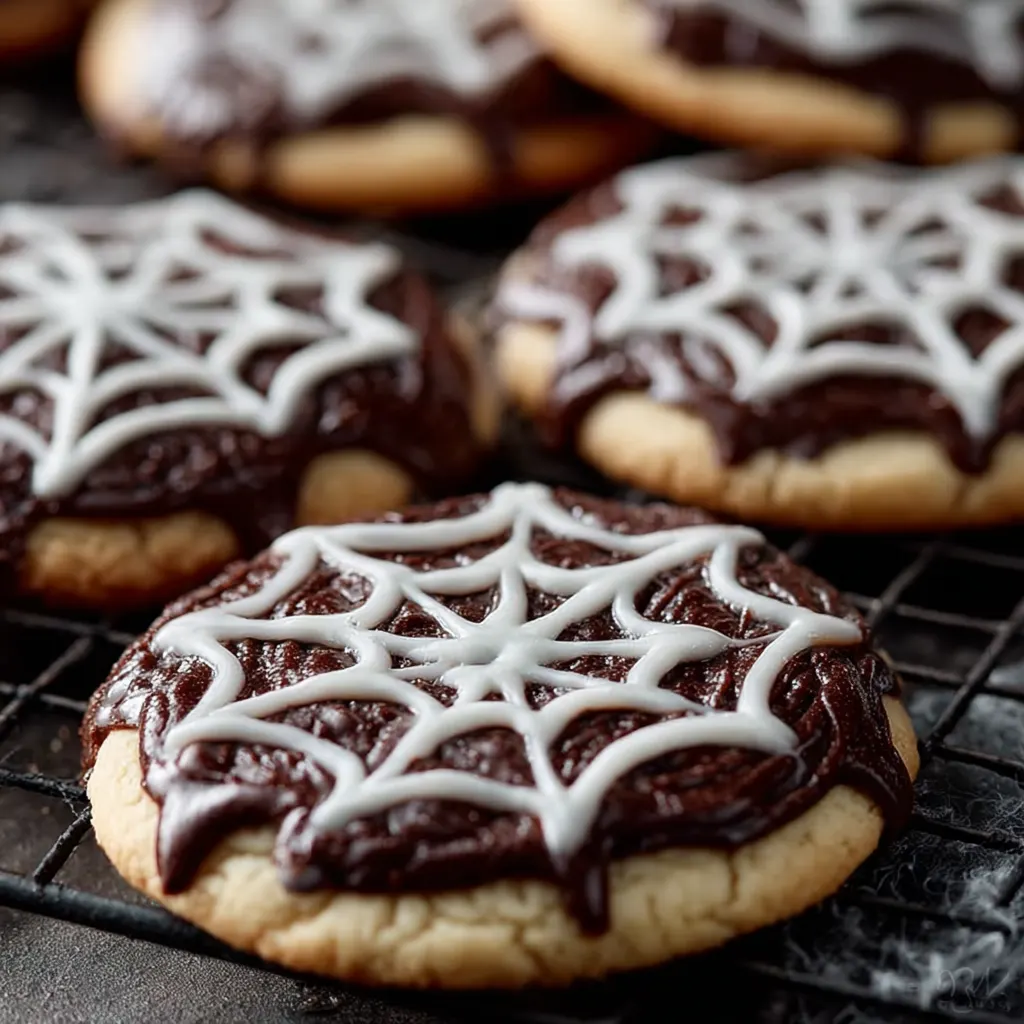
Creating the Spiderweb Design: Step-by-Step Piping for Spooky Elegance
Start by filling a piping bag fitted with a small round tip (size #1 or #2) with black royal icing. Pipe concentric circles on each cooled cookie, starting from the center and working outward. Keep the circles evenly spaced to mimic a real spiderweb’s pattern. Steady hands make this easier; take your time for smooth lines.
Next, fill another piping bag with white icing. Pipe straight lines from the center to the cookie’s edge, crossing the black circles. These radial lines create the web’s structure.
Finally, use a toothpick or skewer to drag through the icing. Begin at the center and pull the toothpick outward across each concentric circle, creating a delicate spiderweb effect. Repeat this for each radial section to complete the pattern. This simple technique transforms plain cookies into spooky, intricate works of art.
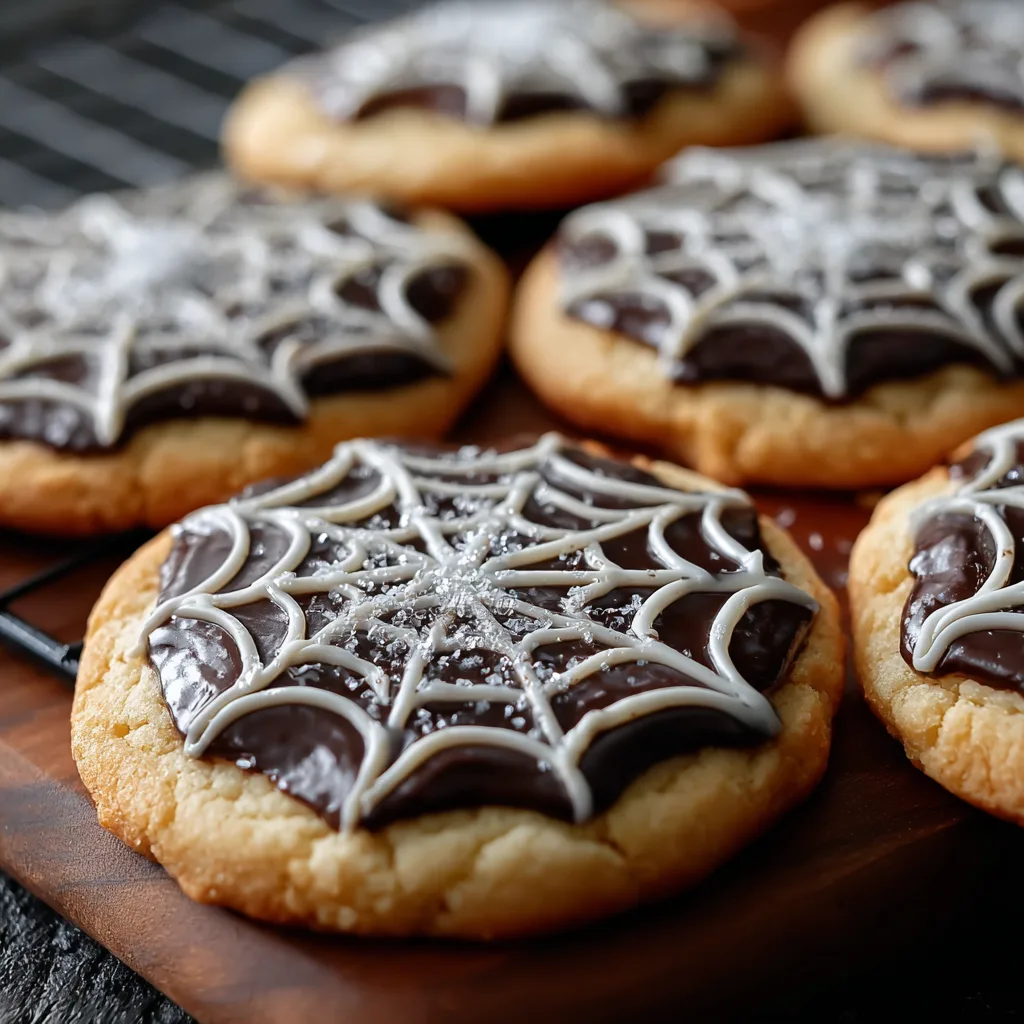
Adding Final Touches: Enhancing Spiderweb Cookies with Festive Decorations
Once your spiderweb design dries, add finishing touches to make the cookies even more festive. Lightly dust edible glitter over the icing for a shimmering effect that catches light. Choose silver or black glitter to maintain the Halloween theme.
Place small candy spiders or Halloween-themed sprinkles strategically on the cookies. Candy spiders add a playful, creepy touch that kids love. Avoid overdecorating to keep the spiderweb pattern the star of the show.
If you want to get creative, use colored icing to add tiny dots or accents around the web’s edge. Alternatively, pipe small spider legs extending from the web’s center for a three-dimensional look.
Let all decorations dry thoroughly before packaging or serving. These final details make your Halloween spiderweb cookies unforgettable treats that steal the spotlight at any spooky celebration.
Flavor Variations: Enhancing Spiderweb Cookies with Spices and Extracts
Elevate your Halloween spiderweb cookies by experimenting with flavors. Adding warm spices like cinnamon or nutmeg brings cozy autumn vibes to the sweet treats. Incorporate a teaspoon of ground cinnamon or a pinch of nutmeg into your cookie dough to create a subtle, festive twist. These spices complement the sugary sweetness and add depth to the flavor.
Besides spices, try using flavored extracts to diversify your cookies. Vanilla extract is classic and enhances the dough’s natural richness. For a more unique profile, almond extract adds a delicate nuttiness that pairs well with the buttery base. Use these extracts sparingly—usually half to one teaspoon—to avoid overpowering the other flavors. Small tweaks like these make your cookies stand out while keeping them approachable for all palates.
Dietary Modifications: Gluten-Free, Vegan, and Sugar-Free Spiderweb Cookies
Making spiderweb cookies accessible to everyone is easier than you might think. For gluten-free options, swap all-purpose flour with a reliable gluten-free baking blend. These blends usually contain a mix of rice flour, tapioca starch, and xanthan gum to mimic traditional flour’s texture. Ensure your baking powder and other ingredients are also gluten-free to avoid cross-contamination.
If you prefer vegan cookies, replace butter with plant-based margarine or coconut oil. Use flaxseed meal or applesauce as an egg substitute—one tablespoon of flaxseed mixed with three tablespoons of water equals one egg. For icing, some royal icing recipes use meringue powder, which isn’t vegan, so opt for vegan-friendly icing recipes or store-bought vegan options.
Sugar-free versions can be made by using natural sweeteners like erythritol or stevia in place of granulated sugar. Some sweeteners require adjustments in quantity or texture, so experiment carefully. Offering these alternatives lets everyone enjoy festive treats without sacrificing taste.
Storage and Shelf Life: Keeping Your Spiderweb Cookies Fresh and Delicious
Proper storage extends the life of your decorated spiderweb cookies. After icing dries completely, place the cookies in an airtight container to prevent moisture from softening the texture. Separate layers with parchment paper to avoid sticking or damage to the delicate designs.
Store the container at room temperature, away from direct sunlight and heat sources. Under these conditions, the cookies stay fresh for up to five days. For longer storage, consider freezing the undecorated cookies before icing. Freeze in a single layer on a baking sheet, then transfer to a sealed container or bag. Thaw completely before decorating.
Avoid refrigerating decorated cookies as humidity can cause icing to soften or become sticky. Following these simple steps helps maintain your cookies’ crunch and decorative appeal, ensuring they look and taste their best throughout your Halloween celebrations
Frequently Asked Questions
Q1: Can I make Halloween Spiderweb Cookies in advance?
A1: Yes, you can bake and decorate the cookies up to 3 days in advance. Store them in an airtight container to maintain freshness.
Q2: How do I achieve a perfect spiderweb design?
A2: Pipe concentric circles of icing and use a toothpick to drag lines from the center to the edge, creating a spiderweb effect.
Q3: Can I use colored icing instead of black and white?
A3: Absolutely! Feel free to use any colors that match your Halloween theme.
Q4: Are these cookies suitable for children?
A4: Yes, the cookies are safe for children. Ensure that any decorations used are edible and appropriate for their age.
Q5: How can I make these cookies gluten-free?
A5: Substitute the all-purpose flour with a gluten-free flour blend and ensure all other ingredients are gluten-free.
Halloween Spiderweb Cookies Recipe – Spooky & Sweet Treats
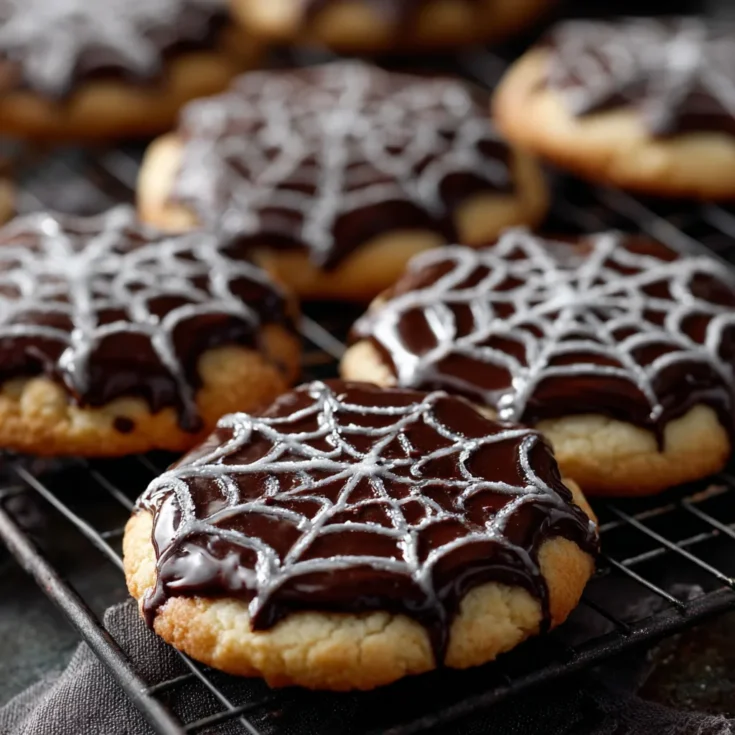
Delicious sugar cookies decorated with intricate spiderweb designs, perfect for Halloween parties and treats.
Ingredients
- 2 ½ cups all-purpose flour
- 1 tsp baking powder
- ½ tsp salt
- 1 cup unsalted butter, softened
- 1 cup granulated sugar
- 1 large egg
- 1 tsp vanilla extract
- Black and white royal icing (or store-bought)
Instructions
Notes
