
Gross Halloween Dips: Crowd-Pleasingly Creepy Creations
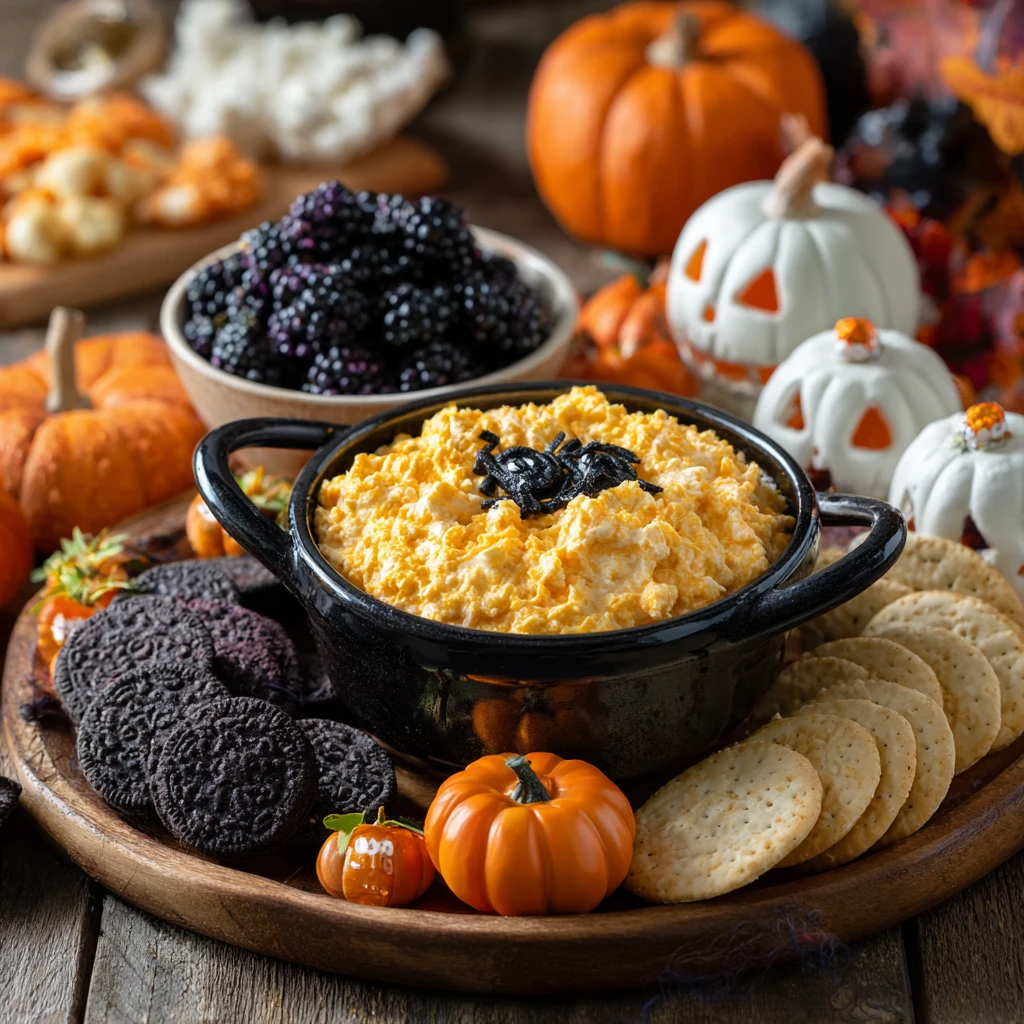
Halloween is the perfect time to get creative in the kitchen, and nothing says “spooky fun” like a collection of deliciously disgusting dips. These recipes are designed to be both visually unsettling and incredibly tasty, making them the perfect centerpiece for your Halloween party spread. From creepy crawlies to eerie eyeballs, we’ve got you covered with dips that will have your guests screaming for more (in a good way!).
Mastering the Art of the Gross-Out Dip
Creating a truly terrifying dip involves more than just flavor; it’s about presentation. Think about textures, colors, and how you can incorporate eerie elements.
Texture is Key
The best gross-out dips play with texture. Consider including chunky elements, creamy bases, and even crunchy toppings. Think about incorporating items such as:
- Chunky Salsa: Forms the base of bloody pools.
- Cream Cheese: Acts as the base for many dips.
- Guacamole: Provides the perfect monster green.
- Sour Cream: Allows you to create veins and other creepy effects.
Color Your World Creepy
Color plays a vital role in setting the mood. While natural food coloring is ideal, you can also use gel food coloring sparingly for more vibrant hues.
- Red: Essential for blood effects. Beet juice or pomegranate juice can provide a natural red color.
- Green: Perfect for monster themes. Spinach or avocado can add a greenish hue.
- Black: Can be achieved with activated charcoal powder or black food coloring. Be cautious, as too much charcoal can affect flavor.
- White: Crucial for creating contrast and adding details like bones or eyes.
Essential Tools for Spooky Dips
Having the right tools can make all the difference in creating a visually stunning dip.
- Piping Bags: Ideal for creating intricate designs, such as veins or spiderwebs.
- Small Spoons and Knives: Perfect for sculpting and arranging dip elements.
- Cookie Cutters: Can be used to create creepy shapes from cheese or vegetables.
- Clear Bowls and Platters: Allow you to showcase the dip’s colors and textures.
The Top 5 Gross Halloween Dips for Your Party
Here are five fantastic dip recipes that are sure to be a hit at your Halloween celebration.
1. Severed Finger Dip
This dip is disturbingly realistic and guaranteed to elicit gasps.
Ingredients:
- 16 ounces cream cheese, softened
- 1 cup sour cream
- 1 packet ranch dressing mix
- 1/2 cup shredded cheddar cheese
- 1/4 cup chopped green onions
- Almond “fingernails” (blanched almonds)
- Paprika or red pepper flakes (for blood)
- Breadsticks or crackers, for serving
Instructions:
1. Mix cream cheese, sour cream, ranch dressing mix, cheddar cheese, and green onions until well combined.
2. Shape the mixture into a finger-like form on a platter.
3. Attach almond “fingernails” to the tip of the finger.
4. Sprinkle paprika or red pepper flakes around the base for a bloodied effect.
5. Serve with breadsticks or crackers.
Tips and Tricks: For extra creepiness, use a sharp knife to create knuckle creases on the finger. A slightly aged cream cheese mixture will give a more realistic, less polished look.
2. Spiderweb Bean Dip
A classic bean dip gets a spooky makeover with a spiderweb design.
Ingredients:
- 16 ounces refried beans
- 1 packet taco seasoning
- 1/2 cup shredded cheddar cheese
- 1/4 cup chopped black olives
- Sour cream
- Black food coloring (optional)
- Tortilla chips, for serving
Instructions:
1. Mix refried beans with taco seasoning. Spread on a platter.
2. Sprinkle cheddar cheese and black olives over the bean mixture.
3. Place sour cream in a piping bag or zip-top bag with a small hole cut in the corner. Create concentric circles on top of the dip.
4. Drag a toothpick from the center of the circle outwards to create a spiderweb effect.
5. (Optional) Mix a small amount of black food coloring with sour cream for a darker spiderweb effect.
6. Serve with tortilla chips.
Tips and Tricks: To make the spiderweb stand out, use a darker base for the dip, such as black bean dip or add a few drops of black food coloring to the refried beans.
3. Monster Eye Guacamole
This vibrant green dip is perfect for those who love guacamole with a twist.
Ingredients:
- 3 ripe avocados
- 1/2 cup chopped red onion
- 1/4 cup chopped cilantro
- 2 tablespoons lime juice
- 1 jalapeño, seeded and minced
- Salt and pepper to taste
- Hard-boiled eggs, sliced
- Black olives, sliced
- Tortilla chips, for serving
Instructions:
1. Mash avocados in a bowl.
2. Add red onion, cilantro, lime juice, jalapeño, salt, and pepper. Mix well.
3. Spread guacamole on a platter.
4. Arrange sliced hard-boiled eggs on top of the guacamole to resemble eyes.
5. Place a black olive slice in the center of each egg slice to create pupils.
6. Serve with tortilla chips.
Tips and Tricks: For a more intense flavor, grill the avocados before mashing. A dash of chili powder can add a fiery kick.
4. Maggot Cheese Ball
Disgustingly delectable! This cheese ball is covered in “maggots” (rice).
Ingredients:
- 8 ounces cream cheese, softened
- 1 cup shredded cheddar cheese
- 1/2 cup crumbled blue cheese
- 1/4 cup chopped walnuts
- 1 tablespoon Worcestershire sauce
- Cooked white rice
- Crackers, for serving
Instructions:
1. Mix cream cheese, cheddar cheese, blue cheese, walnuts, and Worcestershire sauce until well combined.
2. Shape the mixture into a ball.
3. Cover the cheese ball entirely with cooked white rice to resemble maggots.
4. Chill for at least 30 minutes before serving.
5. Serve with crackers.
Tips and Tricks: To make the “maggots” stick better, lightly dampen the cheese ball with water before covering it with rice. Different types of cheese can be used to customize the flavor.
5. Bloody Brain Dip
This visually striking dip looks like a brain and is made with cauliflower and a creamy sauce.
Ingredients:
- 1 head of cauliflower, cooked and cooled
- 8 ounces cream cheese, softened
- 1/2 cup sour cream
- 1/4 cup mayonnaise
- 1 clove garlic, minced
- Salt and pepper to taste
- Red food coloring
- Crackers or vegetables, for serving
Instructions:
1. Pulse the cooked cauliflower in a food processor until it resembles a coarse mash.
2. Mix the cauliflower with cream cheese, sour cream, mayonnaise, garlic, salt, and pepper.
3. Shape the mixture into a brain-like form on a platter.
4. Use a knife to create fissures and wrinkles in the brain.
5. Mix a few drops of red food coloring with a small amount of the dip and use a brush to paint “blood” on the brain.
6. Serve with crackers or vegetables.
Tips and Tricks: For a more realistic look, use multiple shades of red food coloring to create depth and variation. The cauliflower should be cooked until tender but not mushy to maintain its texture.
Elevating Your Halloween Dip Presentation
Presentation is half the battle when it comes to gross Halloween dips. Consider these tips for creating a truly spooky atmosphere.
Creative Serving Dishes
Instead of ordinary bowls, think about using creative serving dishes that enhance the theme.
- Skulls: Serve dips out of decorative skulls.
- Cauldrons: Small cauldrons are perfect for individual servings.
- Laboratory Beakers: Use beakers and test tubes for a mad scientist vibe.
- Gourd Bowls: Hollow out small gourds to create natural, rustic bowls.
Adding Eerie Decorations
Incorporating decorations around your dip station can elevate the overall look.
- Fake Cobwebs: Drape fake cobwebs around the serving area.
- Plastic Spiders: Scatter plastic spiders around the dips.
- Glow Sticks: Place glow sticks around the dips for an eerie glow.
- Dry Ice: Use dry ice to create a spooky fog effect.
Themed Garnishes
Garnishes can add an extra touch of realism to your dips.
- Plastic Eyeballs: Add plastic eyeballs to your guacamole or salsa.
- Gummy Worms: Place gummy worms on top of your cheese dip.
- Pretzel Bones: Arrange pretzel sticks to resemble bones.
- Edible Glitter: Sprinkle edible glitter on your dips for a magical, spooky effect.
Adapting Dips for Dietary Needs
Ensure everyone can enjoy your spooky spread by offering variations for different dietary needs.
Gluten-Free Options
- Gluten-Free Crackers and Chips: Provide a selection of gluten-free crackers and tortilla chips.
- Vegetable Sticks: Offer an array of vegetable sticks, such as carrots, celery, and bell peppers.
- Gluten-Free Taco Seasoning: Use gluten-free taco seasoning for your bean dip.
Vegetarian and Vegan Options
- Vegan Cream Cheese: Use vegan cream cheese for cream-based dips.
- Vegan Sour Cream: Opt for vegan sour cream to maintain the creamy texture.
- Plant-Based Meats: Incorporate plant-based meats into your dips for added flavor and protein.
- Nutritional Yeast: Add nutritional yeast to vegan cheese dips for a cheesy flavor.
Allergy Considerations
- Nut-Free Dips: Avoid using nuts or nut-based ingredients.
- Dairy-Free Dips: Opt for dairy-free alternatives like coconut milk or cashew cream.
- Clearly Label Dips: Ensure all dips are clearly labeled with allergen information.
Frequently Asked Questions (FAQs)
Here are some common questions about making gross Halloween dips, inspired by Google’s “People also ask” section.
Q: How do I make my dips look more realistic?
A: Use natural food colorings, play with textures, and incorporate themed garnishes such as plastic eyeballs or gummy worms.
Q: What are some easy Halloween dip ideas?
A: Severed Finger Dip, Spiderweb Bean Dip, and Monster Eye Guacamole are all relatively easy to make and visually striking.
Q: How can I make my dips gluten-free or vegan?
A: Use gluten-free crackers and chips, vegan cream cheese, vegan sour cream, and plant-based meats.
Q: What are some good serving dishes for Halloween dips?
A: Skulls, cauldrons, laboratory beakers, and hollowed-out gourds are great options.
Q: How do I keep my dips from drying out at a party?
A: Cover the dips with plastic wrap when not serving, or use a dip chiller with an ice pack underneath.
Q: Can I prepare these dips in advance?
A: Many of these dips can be prepared a day in advance. Just be sure to store them properly in the refrigerator and add garnishes just before serving.
