

Best Ever Grandma’s Rhubarb Crisp Recipe – Made Without Strawberries
There are some smells that instantly transport you back in time, aren’t there? For me, it’s the sweet-tart aroma of rhubarb baking in the oven. I can still vividly recall those cozy Sunday afternoons at my grandmother’s house, the kitchen filled with laughter and the irresistible scent of her famous desserts. This particular Grandma’s Rhubarb Crisp Recipe – Made Without Strawberries, was always a highlight, a true beacon of comfort food after a hearty family meal.
Grandma, with her flour-dusted apron and twinkling eyes, believed that the simplest ingredients often yielded the most magical results. She taught me that sometimes, letting one star ingredient truly shine is the secret to an unforgettable dish. This easy baking recipe, passed down through generations, is proof of that philosophy. It’s perfectly balanced, deliciously tart, and features a crumble topping so golden and buttery, you’ll want to eat it by the spoonful.
This recipe has been thoroughly tested and loved by my own family for years. It’s a comforting treat that brings a piece of that nostalgic warmth into your home, without the distraction of strawberries. Get ready to create new memories with this classic dessert that truly celebrates the vibrant flavor of fresh rhubarb!
Why You’ll Love This Recipe
❤️ This Grandma’s Rhubarb Crisp isn’t just a dessert; it’s a hug in a bowl! Here’s why it’s destined to become your new favorite:
- Pure Rhubarb Bliss: This recipe truly lets the unique, tart flavor of rhubarb take center stage. Without strawberries, its vibrant taste shines through, offering a delightful balance of sweet and tangy that true rhubarb lovers adore.
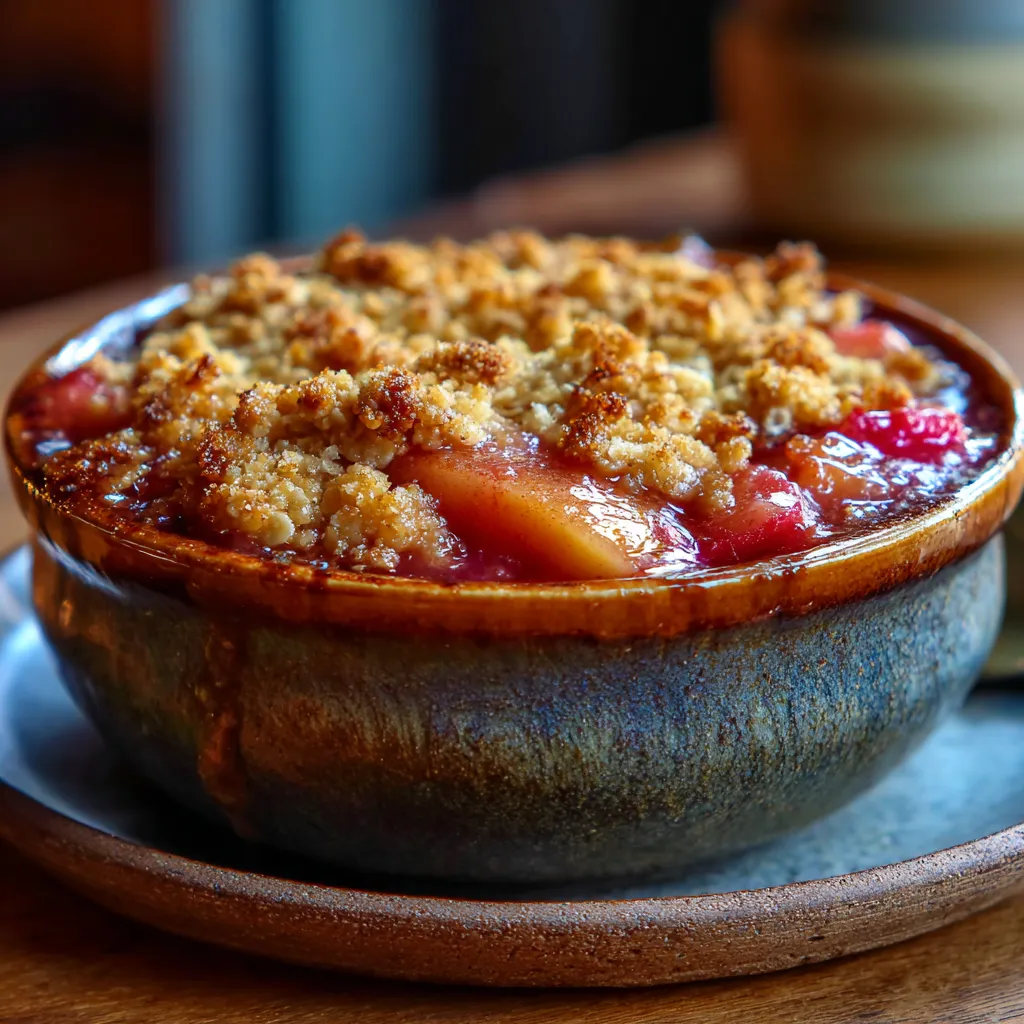
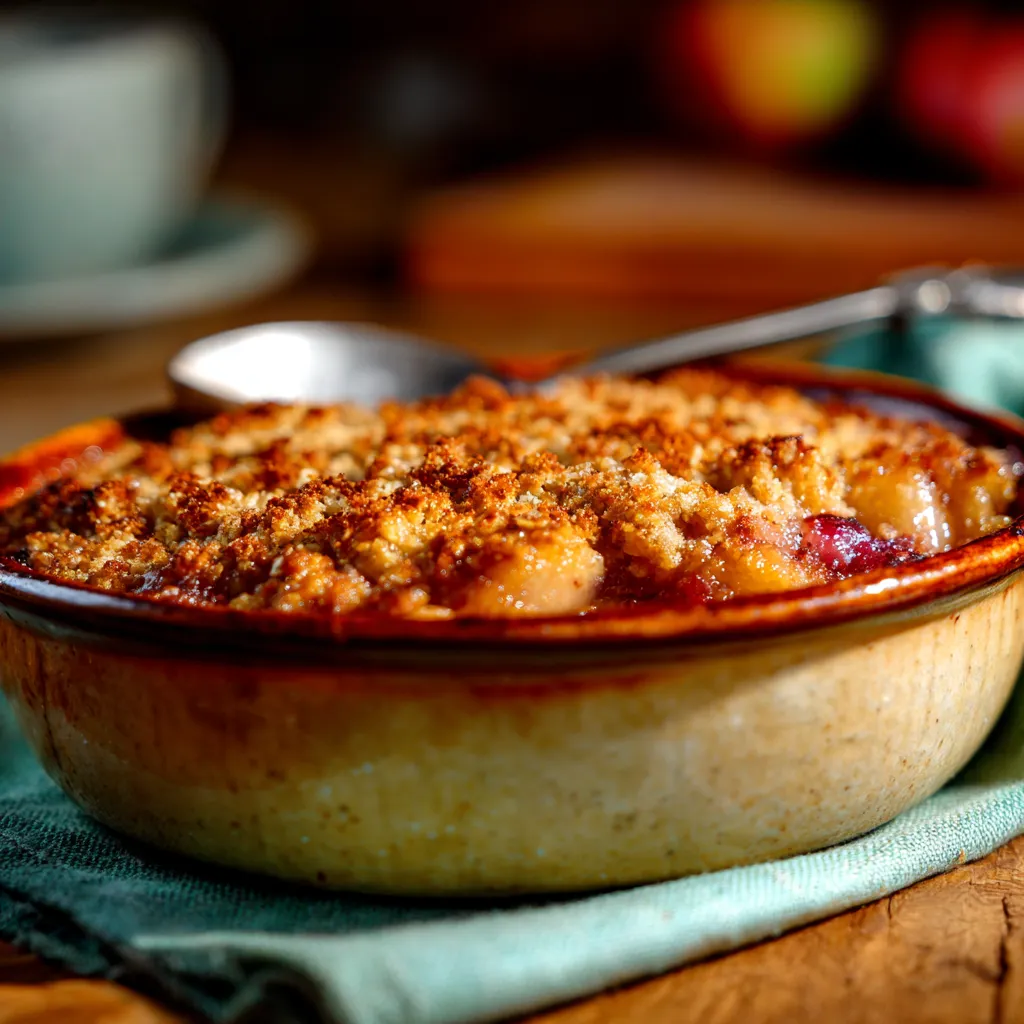
- Irresistible Buttery Crumble: The topping is a masterpiece of texture. Golden brown, crunchy oats and flour mix with sweet brown sugar and cold butter to create a crisp, crumbly layer that perfectly complements the soft, gooey fruit filling.
- Simple & Straightforward: Don’t let its impressive taste fool you – this crisp is incredibly easy to prepare! Using common pantry staples and minimal fuss, you can whip this up for a weeknight treat or a special gathering.
- Nostalgic Comfort: It tastes just like grandma used to make! There’s a timeless, comforting quality to this crisp that evokes warm memories and creates new ones with every single bite. It’s the ultimate cozy dessert.
- Perfect Texture Contrast: You’ll love how the tender, bursting rhubarb underneath contrasts with the glorious, crunchy topping. It’s a textural dream come true, offering a satisfying mouthfeel in every spoonful.
- Versatile & Crowd-Pleasing: This crisp is a guaranteed hit at any gathering. It’s wonderful warm with a scoop of vanilla ice cream, or even slightly cooled with a dollop of whipped cream. Everyone will ask for the recipe!
- No-Fuss Ingredients: You won’t need any fancy equipment or exotic ingredients. Just fresh rhubarb, a few baking basics, and a little love are all it takes to bring this culinary delight to life.
What You Need
You only need a few simple pantry staples for this recipe! Fresh, vibrant rhubarb is the star, complemented by basic baking ingredients like flour, sugar, and butter. Check the full printable recipe card below for detailed measurements of both the fruit filling and the irresistible oat crumble topping.

Expert Tips
💡 Master this rhubarb crisp with these expert baking secrets:
- Choose Your Rhubarb Wisely: Look for firm, crisp stalks that are bright pink or reddish-green. Avoid any limp or bruised rhubarb. While garden-fresh is best, frozen rhubarb (thawed and drained well) can be used in a pinch, just be sure to pat it very dry to prevent a watery crisp.
- Uniform Rhubarb Chunks: Cut your rhubarb stalks into pieces about 1/2 to 3/4 inch thick. This ensures even cooking and prevents some pieces from becoming mushy while others are still too firm. Consistency is key for the perfect texture.
- Balance the Sweet & Tart: Rhubarb is naturally very tart. The sugar amounts in the recipe are carefully balanced, but feel free to adjust slightly to your preference or the tartness of your specific rhubarb batch. A little lemon zest in the filling can also brighten the flavors beautifully.
- Cold Butter is Crucial for Crumble: For that perfectly crumbly, golden topping, use very cold butter, cut into small cubes. This prevents the butter from melting too quickly when mixing and creates steam pockets during baking, resulting in a lighter, crispier topping.
- Don’t Overmix the Topping: Mix the crumble ingredients until just combined and large crumbs form. Overmixing will develop the gluten in the flour too much, leading to a tough, bready topping instead of a delicate crisp.
- Use a Proper Baking Dish: A 9×13 inch baking dish is ideal, but a 9×9 inch square dish or an equivalent oven-safe dish will also work. Just be mindful that a deeper dish might require a few extra minutes of baking time for the fruit to bubble through properly.
- Signs of Doneness: The crisp is ready when the topping is deeply golden brown and the rhubarb filling is visibly bubbling around the edges. This bubbling indicates that the fruit has cooked down and released its juices, thickening into a delicious sauce.
- Allow Cooling Time: It’s tempting to dig in right away, but letting the crisp cool for at least 20-30 minutes allows the filling to set up properly. This results in a cleaner scoop and prevents it from being too runny.
- Serve Warm for Best Experience: While delicious at any temperature, rhubarb crisp is truly magical when served warm. Pair it with a scoop of premium vanilla bean ice cream or a dollop of freshly whipped cream for an indulgent treat.
- Altitude Adjustments: If you live at a high altitude, you might need to slightly increase liquids (a tablespoon or two of water with the rhubarb) and decrease sugar, or even slightly increase oven temperature. Keep an eye on your crisp as it bakes.
Variations & Substitutions
Want to mix things up? This recipe is wonderfully adaptable:
- Gluten-Free: Swap out the all-purpose flour in both the filling and the topping for a 1:1 gluten-free baking blend (ensure it contains xanthan gum) or use a combination of oat flour and almond flour for the topping.
- Vegan-Friendly: Replace the butter with your favorite plant-based butter alternative. Most will work beautifully in this recipe, maintaining that rich, buttery flavor and crisp texture.
- Nutty Topping: Add 1/2 cup of chopped pecans, walnuts, or almonds to the crisp topping mixture for an extra layer of flavor and crunch. Toasting the nuts beforehand can intensify their taste.
- Spice It Up: Enhance the warm notes by adding a pinch of nutmeg or cardamom along with the cinnamon in the topping. A touch of ginger can also beautifully complement the rhubarb.
- Add Other Fruits (Carefully!): While this recipe celebrates rhubarb alone, if you must add another fruit, try a small amount of raspberries or blueberries for a different flavor profile. Just remember the star is still rhubarb!
- Lower Sugar: For a less sweet crisp, you can reduce the amount of granulated sugar in the rhubarb filling by 1/4 cup. Taste the rhubarb first to judge its tartness.
Storage & Freezing
This crisp is best enjoyed fresh, but here’s how to keep it delicious:
- Room Temperature: Store any leftover crisp loosely covered with foil or plastic wrap at room temperature for up to 2 days.
- Refrigerator: For longer storage, transfer the crisp to an airtight container and refrigerate for up to 4-5 days. The topping may soften slightly.
- Freezing Baked Crisp: Allow the crisp to cool completely. Cover it tightly with plastic wrap and then aluminum foil. It can be frozen for up to 3 months. Thaw in the refrigerator overnight.
- Reheating: To reheat, place the crisp (covered loosely with foil to prevent over-browning) in a preheated oven at 350°F (175°C) for 15-20 minutes, or until warmed through and the topping is re-crisped. Individual servings can be microwaved, but the topping won’t be as crisp.
FAQ
Can I use frozen rhubarb?
Yes, you can! If using frozen rhubarb, make sure to thaw it completely first and drain off any excess liquid. Pat it very dry with paper towels before mixing it with the sugar and flour. This prevents your crisp from becoming watery.
How do I know when the crisp is done baking?
Your rhubarb crisp is perfectly baked when the topping is a rich golden brown, and you can see the fruit filling bubbling vigorously around the edges of the dish. This bubbling indicates the rhubarb is tender and its juices have thickened. A little peek underneath the topping with a knife can also confirm the fruit’s tenderness.
Can I prepare this crisp ahead of time?
You can definitely do some prep work in advance! You can prepare the rhubarb filling and the crisp topping separately and store them in the refrigerator for up to 24 hours. Assemble and bake just before serving for the freshest taste and best texture. You can also assemble the entire crisp and refrigerate it for a few hours before baking.
What should I serve with rhubarb crisp?
A warm slice of rhubarb crisp is heavenly on its own, but it truly shines with accompaniments. A scoop of good quality vanilla bean ice cream is a classic pairing. Other great options include a dollop of freshly whipped cream, a drizzle of crème fraîche, or even a simple custard sauce. The cold, creamy additions perfectly balance the warm, tart crisp.
And there you have it, a timeless classic! Grandma’s Rhubarb Crisp Recipe – Made Without Strawberries is more than just a dessert; it’s a taste of home and a nod to simpler times. I hope you enjoy baking and sharing this comforting treat as much as my family and I do. Don’t forget to pin this recipe for later so you can revisit this deliciousness again and again!
Grandma’s Rhubarb Crisp (No Strawberries) – Easy Recipe
Ingredients
- 6 cups fresh rhubarb, cut into 3/4-inch pieces
- 1/2 cup granulated sugar (for filling)
- 1/4 cup all-purpose flour (for filling)
- 1 tsp vanilla extract (optional, for filling)
- 1 1/4 cups all-purpose flour (for topping)
- 1/2 cup granulated sugar (for topping)
- 1/2 cup packed light brown sugar (for topping)
- 1 cup old-fashioned rolled oats
- 1 tsp ground cinnamon
- 1/2 tsp salt
- 1 cup (2 sticks) unsalted butter, very cold and cut into 1/2-inch cubes
Instructions
- Step 1 Preheat oven to 375°F (190°C). Lightly grease a 9x13 inch baking dish.
- Step 2 In a large bowl, combine the cut rhubarb, 1/2 cup granulated sugar, 1/4 cup flour, and vanilla extract (if using). Toss gently until the rhubarb is evenly coated. Pour the mixture into the prepared baking dish and spread evenly.
- Step 3 In a separate medium bowl, combine the 1 1/4 cups flour, 1/2 cup granulated sugar, brown sugar, oats, cinnamon, and salt. Mix well.
- Step 4 Add the cold, cubed butter to the dry topping ingredients. Using your fingers, a pastry blender, or a fork, cut the butter into the mixture until coarse crumbs form with some pea-sized pieces of butter remaining.
- Step 5 Evenly sprinkle the crumble topping over the rhubarb mixture in the baking dish.
- Step 6 Bake for 40-50 minutes, or until the topping is golden brown and the rhubarb filling is bubbly around the edges. If the topping starts to brown too quickly, you can loosely cover it with foil.
- Step 7 Remove from oven and let the crisp cool for at least 20-30 minutes before serving. This allows the filling to set up nicely.
- Step 8 Serve warm, preferably with a scoop of vanilla ice cream or a dollop of whipped cream.
