
Fluffy Honey-Kissed Yogurt Biscuits: Your New Favorite Comfort Bake
Rainy Sunday mornings always call for something special in our home. I remember one particular chilly autumn day, the kind that whispers for warmth from the kitchen. My little one was tucked under a blanket, watching cartoons, and I thought, “What could be more comforting than a batch of homemade biscuits?” That’s when I first truly perfected this Biscuit Recipe with Yogurt & Honey. It quickly became a treasured family favorite, known for its incredible tenderness and a subtle sweetness that brightens even the greyest day. It’s truly an easy breakfast or afternoon delight that wraps you in a hug.
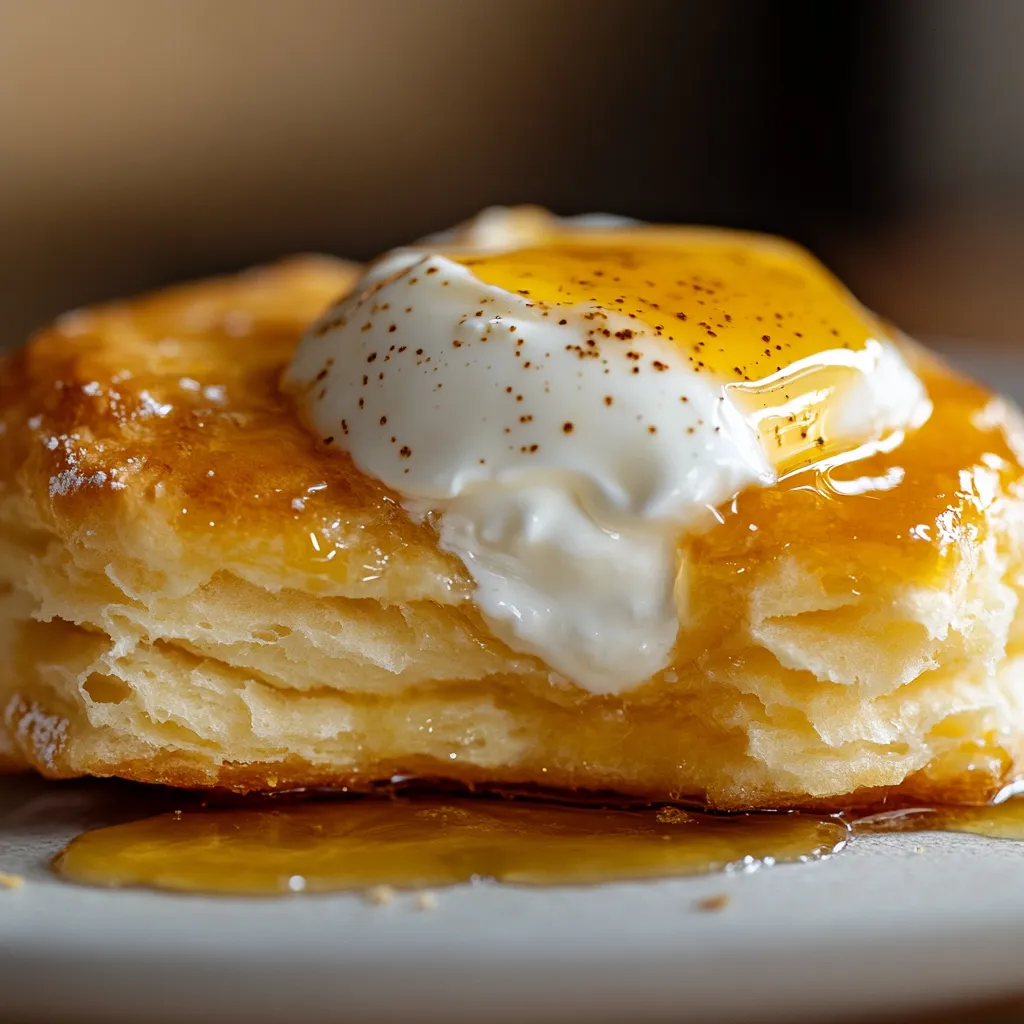
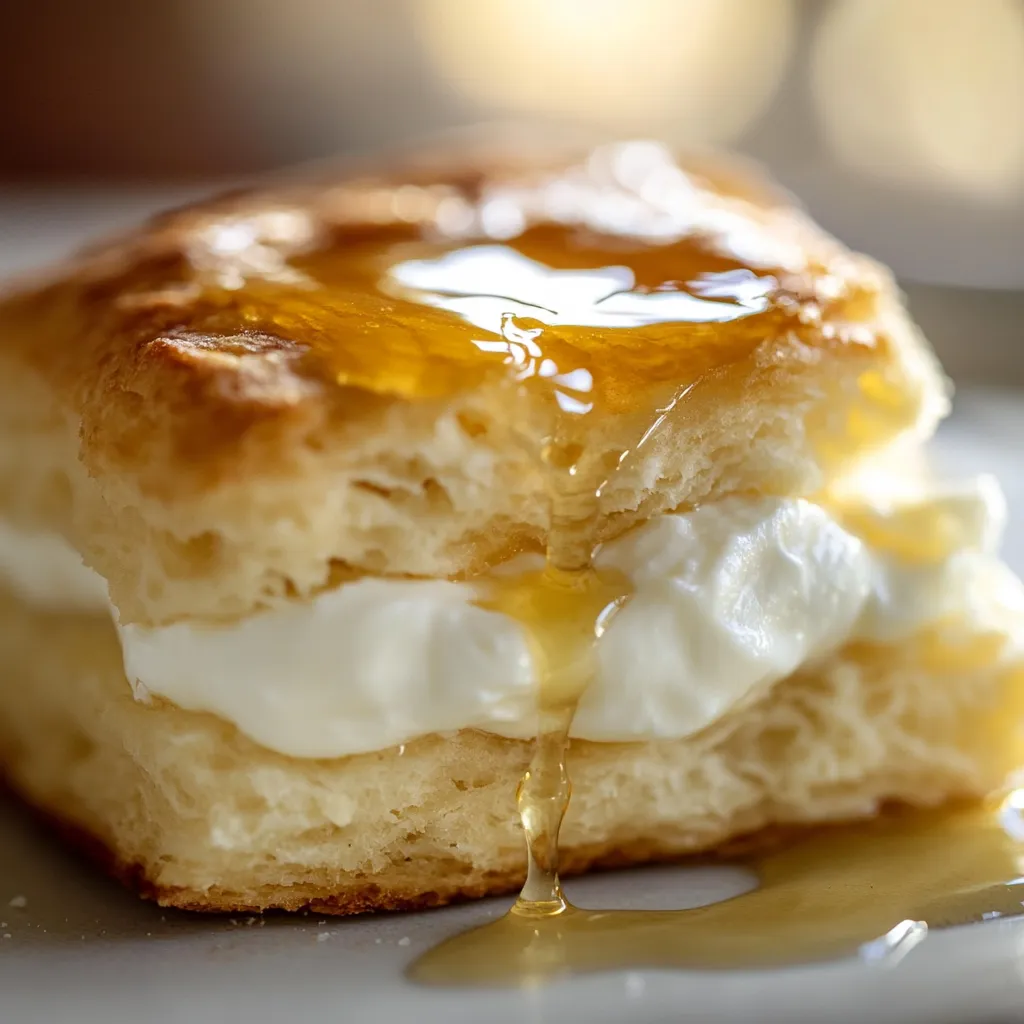
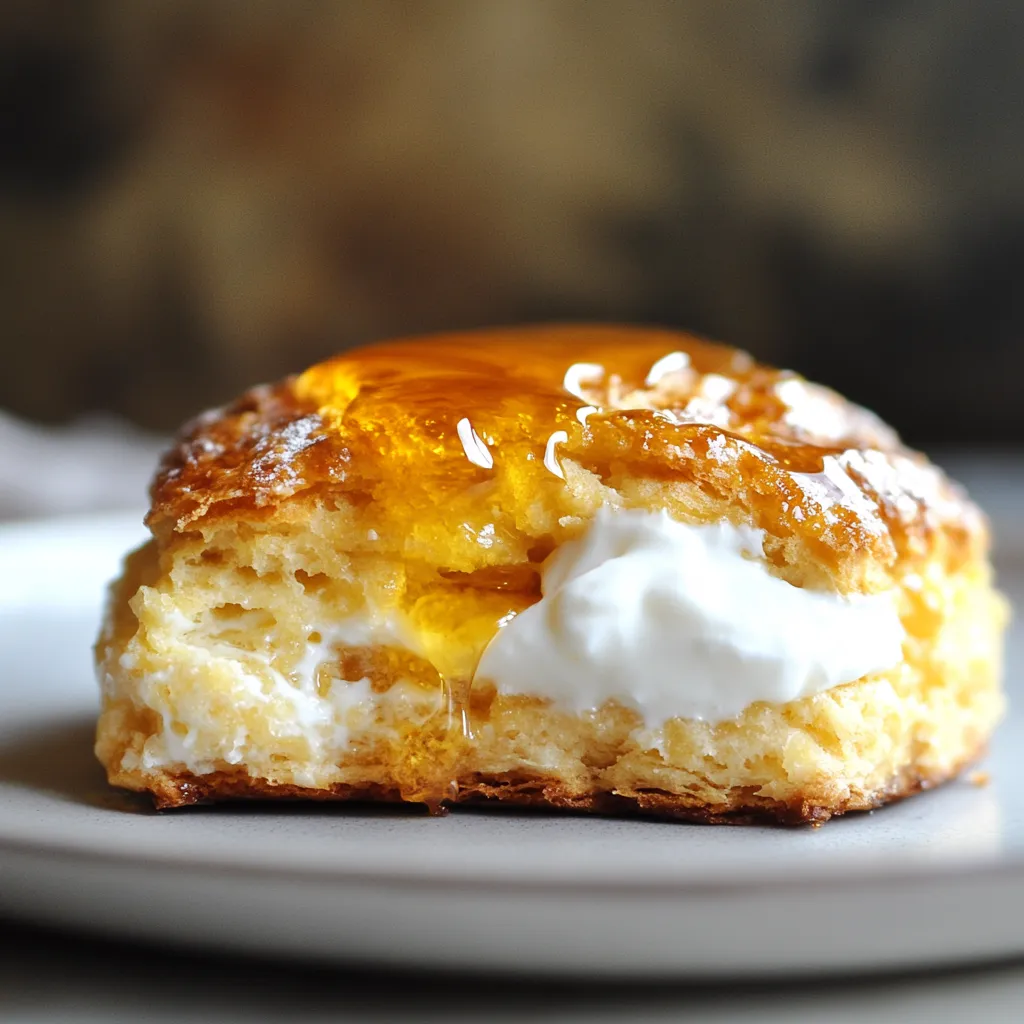
These biscuits aren’t just any ordinary bake; they’re a testament to simple ingredients coming together to create something extraordinary. The addition of yogurt brings an unparalleled softness and a delicate tang that elevates the classic biscuit to new heights. Paired with the golden sweetness of honey, you get a harmonious balance that’s utterly addictive.
Whether you’re serving them with a hearty dinner, alongside your morning coffee, or simply as a comforting treat, these fluffy biscuits are a guaranteed crowd-pleaser. They’re tested, approved, and ready to become a staple in your kitchen, bringing joy and warmth with every single bite. Get ready to bake up some serious comfort food!
Why You’ll Love This Recipe
❤️ Here’s why these Honey Yogurt Biscuits will become an instant favorite:
- Unbelievably Fluffy Texture: Thanks to the secret ingredient – yogurt! It adds a tender crumb that’s just irresistible. You won’t believe how light and airy these biscuits are, practically melting in your mouth with every bite.
- Sweet & Savory Balance: The honey provides a gentle, natural sweetness that perfectly complements the rich, buttery biscuit. It’s not overly sweet, making it versatile for both breakfast and dinner. This delicate balance means they pair wonderfully with anything from jam to savory gravies.
- Simple & Straightforward: Don’t be intimidated by homemade biscuits! This recipe uses basic pantry staples and a method that’s incredibly approachable for even beginner bakers. We’ve streamlined the process to ensure success every single time, making it a joy, not a chore.
- Quick to Make: From start to finish, you can have these warm, golden biscuits on your table in under an hour. Perfect for those spontaneous cravings or when you need a quick addition to your meal without a lot of fuss. Imagine the delightful aroma filling your kitchen!
- Versatile Serving Options: Enjoy them warm with a pat of butter, a drizzle of extra honey, or your favorite fruit preserves. They also make an excellent side for fried chicken, chili, or a hearty stew. They adapt beautifully to whatever meal you’re planning.
- Wholesome Goodness: Made with simple, natural ingredients, these biscuits feel like a healthier, more wholesome treat compared to store-bought options. You know exactly what’s going into them, making them a feel-good choice for your family.
- Tested & Approved: This isn’t just any biscuit recipe; it’s been tested and refined over countless batches to ensure consistent, delicious results. It’s a tried-and-true recipe that delivers on its promise of perfect biscuits every single time you bake them.
What You Need
You only need a few simple pantry staples for this recipe! Check the full printable recipe card below for detailed measurements. You’ll be amazed at what you can create with everyday ingredients.

Expert Tips
💡 Unlock the secrets to perfect biscuits every time with these pro tips:
- Cold Ingredients are Key: This is the golden rule for flaky biscuits! Ensure your butter (and even your yogurt) is very cold. Cold butter creates pockets of steam in the oven, leading to those desirable flaky layers. You can even cube your butter and pop it in the freezer for 10-15 minutes before mixing.
- Don’t Overmix: Overmixing develops the gluten in the flour, resulting in tough biscuits. Mix just until the ingredients are combined and no dry streaks of flour remain. A shaggy dough is a happy dough! Handle it as little as possible.
- Gentle Folding: When incorporating the butter into the flour, use a pastry blender or your fingertips to cut it in until it resembles coarse crumbs with some pea-sized pieces of butter remaining. These pieces are essential for flakiness.
- Proper Kneading (or lack thereof): Biscuits are not bread. You’re not looking for smooth, elastic dough. A few gentle folds and presses, just enough to bring the dough together and create some layers, is all you need. Think of it as folding a letter.
- High Heat for Rise: Baking biscuits at a relatively high temperature (like 425°F or 220°C) helps them rise quickly and achieve that beautiful golden-brown crust. The initial burst of heat activates the leavening agents efficiently.
- Don’t Twist the Cutter: When cutting out your biscuits, press straight down and lift straight up. Twisting the cutter can seal the edges of the biscuit, preventing it from rising properly and creating those lovely layers.
- Brush with Milk or Butter: For an extra golden top and a soft crust, brush the tops of your unbaked biscuits with a little milk or melted butter before baking. This adds both color and a touch more richness.
- Bake Close Together for Soft Sides: If you prefer soft-sided biscuits, arrange them close together on the baking sheet so they touch. For crispier edges, space them further apart.
- Rest the Dough (Optional but Recommended): While not strictly necessary, chilling the cut biscuits for 10-15 minutes before baking can help them hold their shape better and result in an even flakier texture. It gives the gluten a chance to relax.
Variations & Substitutions
Feeling creative? These biscuits are wonderfully adaptable!
- Gluten-Free: Substitute all-purpose flour with a 1:1 gluten-free baking flour blend that contains xanthan gum. You might need a tiny bit more liquid.
- Dairy-Free/Vegan: Use plant-based butter (sticks work best), a dairy-free yogurt (like unsweetened plain almond or oat yogurt), and a plant-based milk for brushing. Ensure your honey is ethically sourced or use maple syrup for a fully vegan option.
- Extra Sweetness: Add a tablespoon or two of sugar to the dry ingredients for a sweeter biscuit, or drizzle more honey on top after baking.
- Herb Savory Biscuits: Omit the honey and add 1-2 tablespoons of finely chopped fresh herbs like chives, rosemary, or thyme to the dry ingredients for a savory twist. Great with soups or stews!
- Spiced Honey Biscuits: A pinch of cinnamon, nutmeg, or cardamom can add a warm, cozy flavor, especially delicious in the fall.
Storage & Freezing
Keep your delicious homemade biscuits fresh for as long as possible!
- Room Temperature: Store cooled biscuits in an airtight container at room temperature for up to 2-3 days.
- Freezing Baked Biscuits: Once completely cooled, place biscuits in a single layer on a baking sheet and freeze until solid (about 1-2 hours). Transfer the frozen biscuits to a freezer-safe bag or container and freeze for up to 2-3 months. Reheat in a preheated 350°F (175°C) oven for 10-15 minutes, or until warmed through.
- Freezing Unbaked Biscuits: Prepare and cut the biscuits as directed. Place them on a baking sheet lined with parchment paper and freeze until solid. Transfer to a freezer-safe bag. When ready to bake, place frozen biscuits on a baking sheet and bake as directed, adding 5-10 minutes to the baking time. No need to thaw!
FAQ
Q: Can I use Greek yogurt instead of plain yogurt?
A: Yes, you absolutely can! Greek yogurt is thicker, so you might need to add a tablespoon or two of milk to the dough to achieve the right consistency. It will make for an incredibly tender biscuit, possibly even richer in flavor. Just be sure to use plain, unsweetened Greek yogurt.
Q: My biscuits came out tough. What did I do wrong?
A: This is usually a sign of overmixing the dough or handling it too much. Remember, work quickly and gently. Overworking the dough develops gluten, which makes baked goods tough. Ensure your butter is very cold and your hands aren’t warming the dough too much during the mixing process.
Q: How do I get those beautiful flaky layers?
A: Flaky layers come from very cold butter and minimal handling. Cut the cold butter into small pieces and work it into the flour quickly until it resembles coarse crumbs with some pea-sized pieces remaining. These small butter pieces will create steam pockets in the oven, lifting the dough into layers. Also, avoid twisting your biscuit cutter; press straight down and lift straight up!
Q: Can I make these ahead of time?
A: Yes, you can! You can prepare the dough, cut out the biscuits, and then freeze them on a baking sheet until solid. Once frozen, transfer them to a freezer-safe bag. When ready to bake, simply place the frozen biscuits on a baking sheet and bake as directed, adding a few extra minutes to the baking time (usually 5-10 minutes more).
Q: What’s the best way to reheat leftover biscuits?
A: For best results, reheat cooled biscuits in a preheated 300°F (150°C) oven for about 5-7 minutes, or until warmed through. You can also briefly microwave them for 15-30 seconds, but this might make them a little chewier rather than crisp on the outside.
Conclusion
There you have it – your new go-to recipe for incredibly fluffy and flavorful Honey Yogurt Biscuits. This recipe proves that homemade comfort can be both simple and spectacularly delicious. They are perfect for sharing with loved ones or enjoying all to yourself with a good cup of coffee. Don’t forget to pin this recipe for later so you can revisit this cozy bake whenever the craving strikes! Happy baking!
Fluffy Honey Yogurt Biscuits: Easy Homemade Recipe
Ingredients
- 2 cups all-purpose flour
- 1 tbsp baking powder
- 1/2 tsp baking soda
- 1/2 tsp salt
- 1/2 cup (1 stick) unsalted butter, very cold and cubed
- 3/4 cup plain full-fat yogurt, cold
- 2 tbsp honey, plus more for drizzling
- 2-3 tbsp milk (for brushing, optional)
Instructions
- Step 1 Preheat oven to 425°F (220°C). Line a baking sheet with parchment paper.
- Step 2 In a large bowl, whisk together flour, baking powder, baking soda, and salt.
- Step 3 Add the cold, cubed butter to the dry ingredients. Using a pastry blender or your fingertips, cut the butter into the flour until it resembles coarse crumbs with some pea-sized pieces of butter remaining.
- Step 4 In a separate small bowl, combine the cold yogurt and 2 tablespoons of honey.
- Step 5 Pour the yogurt mixture into the flour mixture. Stir gently with a fork or spatula until just combined. The dough will be shaggy and slightly sticky; do not overmix.
- Step 6 Turn the dough out onto a lightly floured surface. Gently pat the dough into a 1-inch thick rectangle. Fold the dough in half, then gently pat it down again to about 1-inch thickness. Repeat this folding process 2-3 times to create layers, being careful not to overwork the dough.
- Step 7 Using a 2.5-inch biscuit cutter, cut out biscuits. Press straight down and lift straight up (do not twist). Reroll scraps gently, folding once or twice, to cut out remaining biscuits.
- Step 8 Place biscuits on the prepared baking sheet, either touching for soft sides or spaced apart for crispier edges. Brush the tops with a little milk if desired for a golden finish.
- Step 9 Bake for 15-20 minutes, or until golden brown on top and cooked through. Baking time may vary slightly depending on your oven.
- Step 10 Remove from oven and let cool slightly on the baking sheet. Serve warm with extra honey for drizzling, butter, or your favorite jam.
