
Best Ever Delightful Dessert Extravaganza: Sweeten Your Day with This Easy Recipe!
There’s something truly magical about a dessert that not only tastes incredible but also looks like a work of art. I still remember those rainy Sunday afternoons at my grandmother’s house. The air would be filled with the scent of freshly brewed tea, and a quiet sense of comfort would settle over us. She always believed that a little sweetness could brighten even the gloomiest day. It was during one of these cherished moments that she first showed me how to assemble a simple yet stunning layered dessert, a precursor to what I now affectionately call the 🍰🍨🍓 Delightful Dessert Extravaganza: Sweeten Your Day! 🍰🍨🍓.
That initial spark grew into a passion for creating desserts that bring joy and a touch of elegance to any table. This particular recipe has become a treasured family favorite, tested countless times to ensure it’s not only incredibly delicious but also surprisingly easy to prepare. It’s the ultimate easy dessert recipe that delivers on both flavor and presentation, making it a perfect sweet treat for gatherings or a simple indulgence.
Whether you’re looking for a show-stopping celebration dessert or just a delightful way to treat yourself after a long week, this recipe is your answer. It’s designed to be effortlessly beautiful and wonderfully satisfying, promising to sweeten your day in the most delightful way possible. Get ready to impress everyone with minimal effort!
Why You’ll Love This Recipe
❤️ Here’s why this 🍰🍨🍓 Delightful Dessert Extravaganza: Sweeten Your Day! 🍰🍨🍓 will become your new go-to:
- Effortlessly Elegant: This dessert looks incredibly sophisticated, making it perfect for dinner parties, holidays, or any special occasion, yet it requires minimal effort to assemble. It’s a true showstopper!
- No-Bake Bliss: Say goodbye to hot ovens! This recipe is entirely no-bake, making it ideal for warmer months or when you simply don’t want the fuss of baking. Just layer, chill, and serve.
- Bursting with Fresh Flavors: Combining fresh, ripe berries with creamy textures and subtle sweetness creates a harmonious flavor profile that is both refreshing and indulgent. Each spoonful is a delight.
- Highly Customizable: Adapt this extravaganza to suit your taste, dietary needs, or what you have on hand. Swap out fruits, vary the cream, or even change the cake base – the possibilities are endless!
- Crowd-Pleaser Guaranteed: From kids to adults, everyone adores this dessert. Its vibrant colors and appealing layers make it irresistible, ensuring it disappears quickly at any gathering.
- Make-Ahead Marvel: Prepare this dessert hours or even a day in advance, allowing the flavors to meld beautifully and saving you precious time on the day of your event. Perfect for stress-free entertaining!
- Perfectly Portioned: Served in individual glasses, it’s easy to serve and ensures everyone gets their own beautiful portion. No messy slicing required!
- Light & Refreshing: Despite its rich appearance, the balance of fresh fruit and light cream makes this dessert feel wonderfully refreshing, never too heavy. It’s the perfect ending to any meal.
- Simple Ingredients: You won’t need any obscure ingredients for this recipe. Just a few pantry staples and fresh produce come together to create something truly extraordinary.
- Kid-Friendly Fun: This recipe is simple enough for little helpers to join in the layering process, making it a fun activity for the whole family. They’ll love creating their own sweet masterpieces!
What You Need
You only need a few simple pantry staples and fresh, vibrant ingredients for this recipe! We’re talking fresh berries, creamy goodness, and a delightful base. Check the full printable recipe card below for detailed measurements and a complete list of what you’ll need to create this stunning dessert.
Expert Tips
💡 Elevate your Delightful Dessert Extravaganza with these pro tips:
- Chill Your Bowl and Whisk: For the fluffiest whipped cream, place your mixing bowl and whisk attachment (if using a stand mixer) in the freezer for 10-15 minutes before whipping. Cold tools help the cream whip up faster and hold its volume better.
- Use Ripe, In-Season Berries: The fresher and riper your berries, the more flavor your dessert will have. Taste your berries; if they are a bit tart, you might want to macerate them slightly with a tablespoon of sugar for 15 minutes before layering.
- Don’t Over-Whip the Cream: Whip your heavy cream until it forms stiff peaks, but be careful not to over-whip, or it will become grainy. Soft, billowy peaks are perfect for a smooth texture.
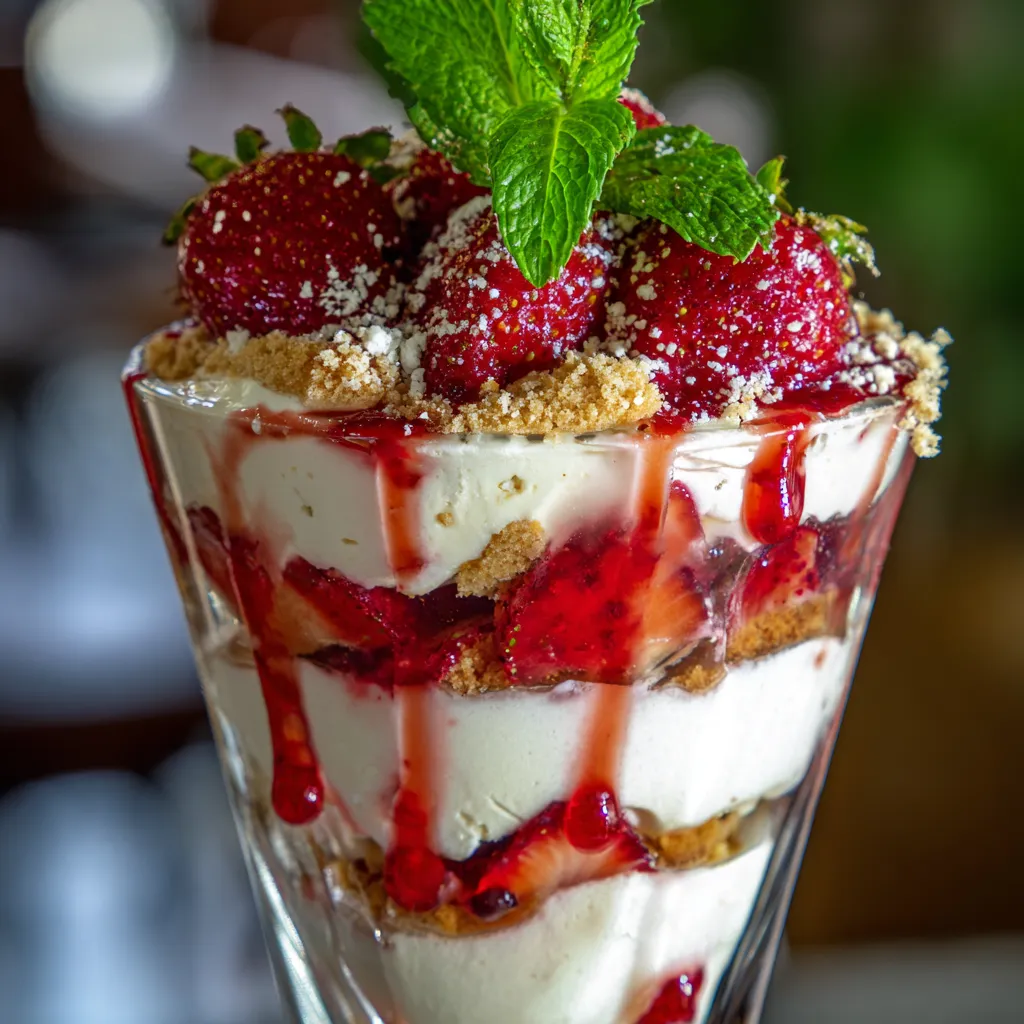
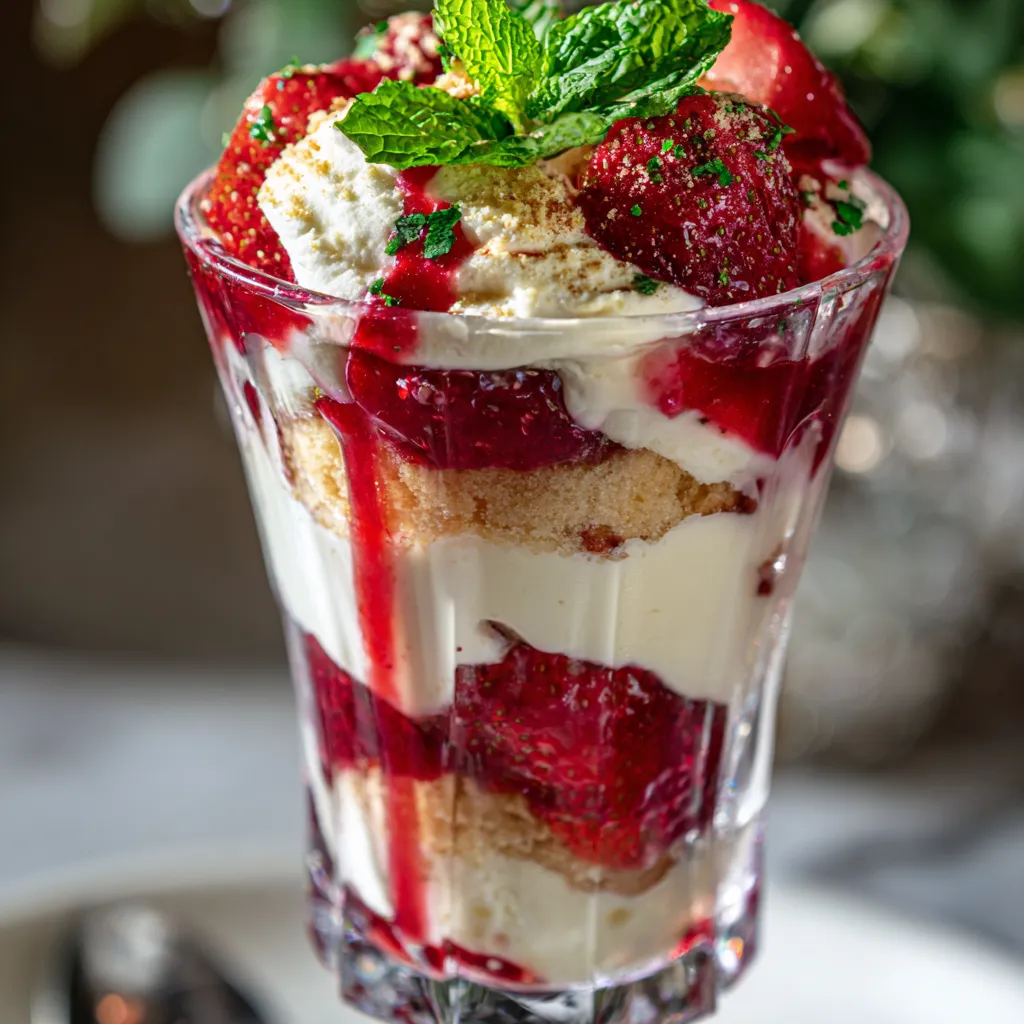
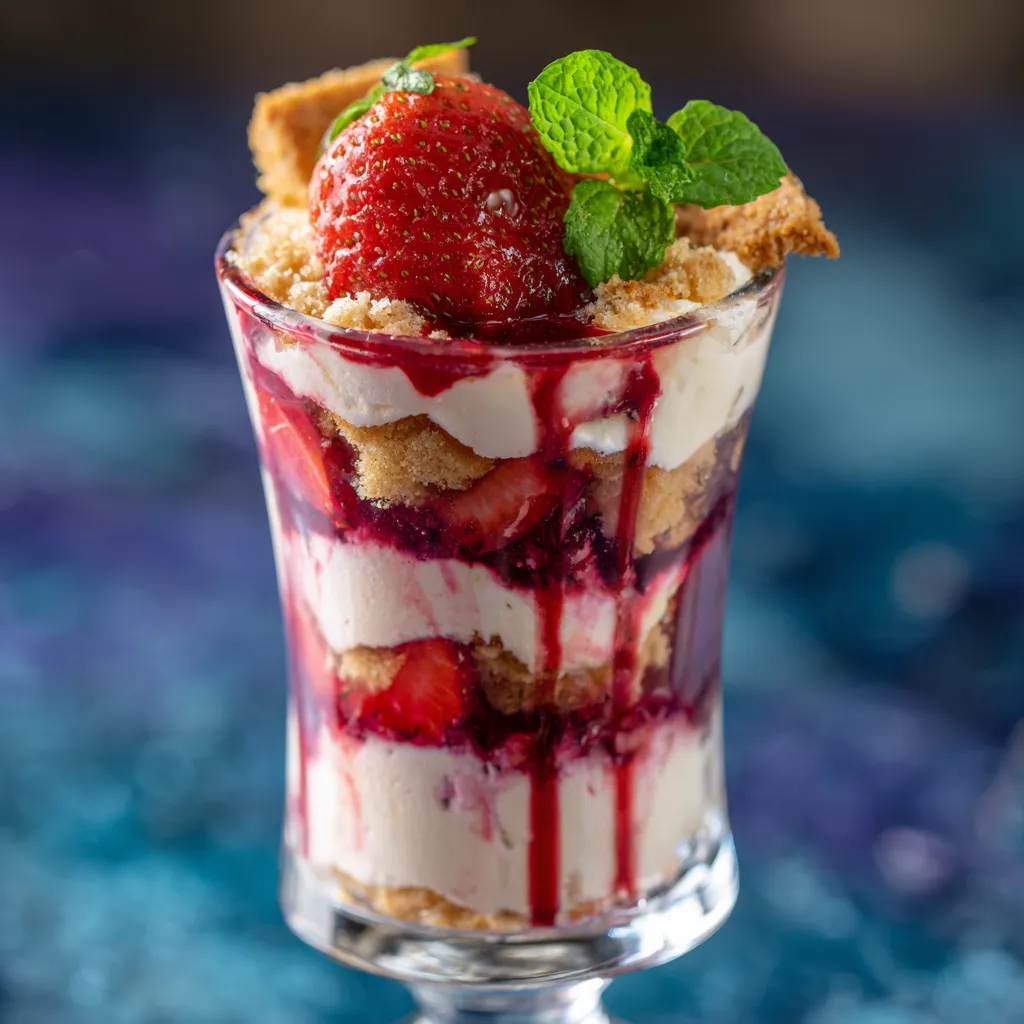
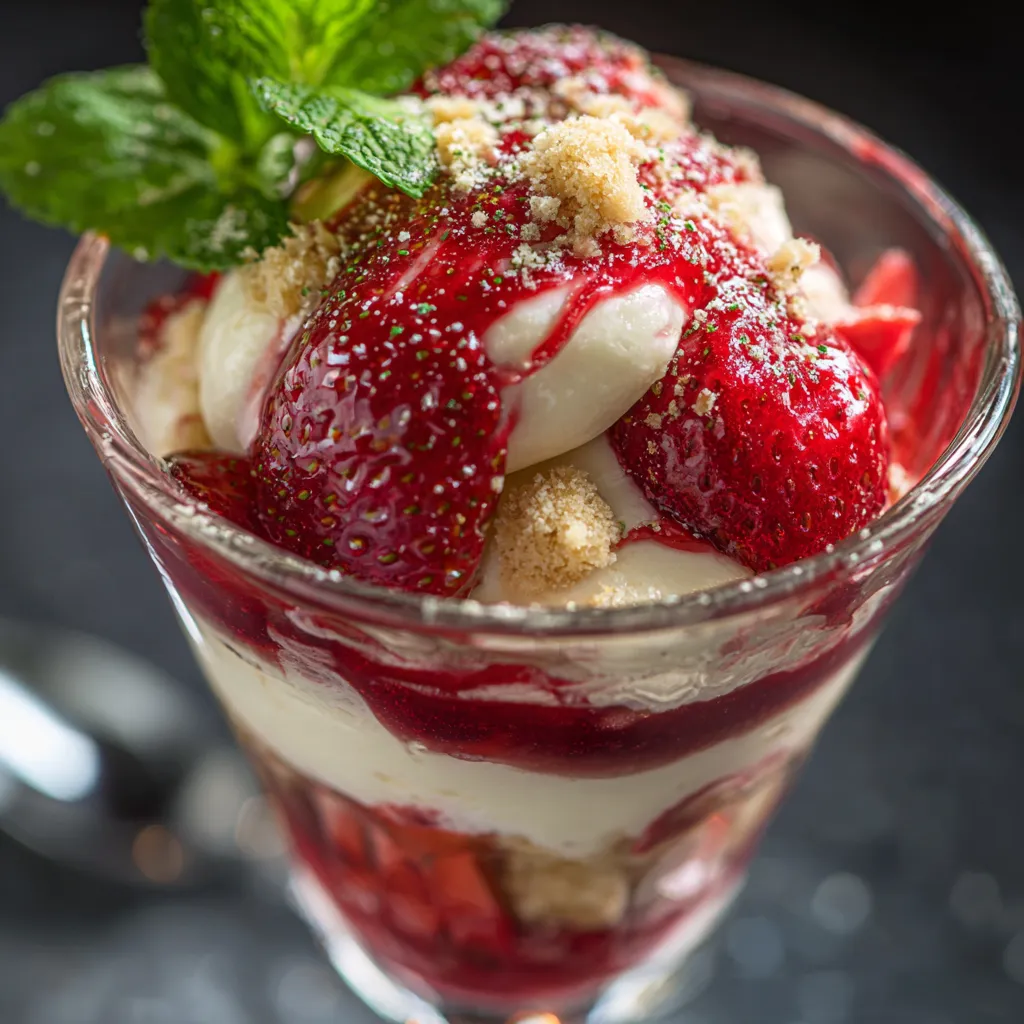
- Layering Strategy is Key: For the most appealing presentation, start with a denser layer (like cake or biscuit crumbs), then add a fruit layer, followed by a cream layer. Repeat this pattern, making sure your layers are distinct and visible through the glass.
- Pre-Portion Your Cake: If using pound cake or ladyfingers, cut or tear them into bite-sized pieces before you start assembling. This ensures even layers and makes the dessert easier to eat.
- Gentle Fruit Prep: If you’re using softer fruits like raspberries, handle them gently to prevent them from breaking apart. For strawberries, slice them evenly for a neat look.
- Embrace a Variety of Textures: Consider adding a crunchy element, like toasted nuts, granola, or crushed cookies, between layers for an interesting textural contrast. Just be mindful that crunchy elements can soften over time if added too early.
- Allow Adequate Chilling Time: This dessert needs at least 2 hours in the refrigerator for the flavors to meld and the layers to set properly. This also allows the cake or biscuits to soften slightly from the cream, creating a harmonious texture.
- Garnish Just Before Serving: For the freshest look, add your final garnishes like fresh mint leaves, a few whole berries, or a dusting of powdered sugar right before serving. This prevents wilting or sogginess.
- Clean Your Glasses: Before serving, quickly wipe the outside of your serving glasses with a clean, damp cloth to remove any smudges or fingerprints. This ensures a pristine presentation.
- Experiment with Infused Cream: For an extra layer of flavor, infuse your heavy cream before whipping. Add a vanilla bean pod, citrus zest, or even a splash of liqueur (like Grand Marnier or Chambord) to the cold cream, let it steep for 30 minutes, then strain and whip.
- Make a Simple Coulis: If you don’t have fruit preserve, you can easily make a fresh berry coulis by simmering fresh or frozen berries with a tablespoon of sugar and a squeeze of lemon juice until thickened, then straining through a fine-mesh sieve.
Variations & Substitutions
This 🍰🍨🍓 Delightful Dessert Extravaganza 🍰🍨🍓 is incredibly adaptable! Feel free to get creative and customize it to your heart’s content:
- Fruit Swaps: Instead of mixed berries, try peaches and blueberries, mango and passionfruit, or even sliced bananas with a drizzle of caramel. Cherries and dark chocolate shavings would also be divine.
- Cream Alternatives: For a lighter option, use Greek yogurt mixed with a little honey and vanilla, or a dairy-free whipped topping. You could also fold in some mascarpone cheese for a richer, more decadent cream.
- Base Alternatives: Swap out pound cake for ladyfingers (like in a tiramisu!), crushed graham crackers, amaretti biscuits, or even a gluten-free cake for a GF version. Brownie crumbles would make for an ultra-rich chocolate version!
- Keto/Low-Carb: Use sugar-free whipped cream (sweetened with erythritol or stevia), fresh berries (in moderation, like raspberries), and a crumbled almond flour cake or low-carb shortbread cookies.
- Vegan Version: Use coconut cream (chilled overnight and just scoop out the thick cream), layered with fresh fruit and vegan shortbread or crumbled vegan sponge cake. A vegan berry compote can replace preserves.
- Flavor Boosters: Add a pinch of cinnamon or cardamom to your cream, a splash of liqueur (like a berry liqueur or orange liqueur), or lemon zest for brightness.
Storage & Freezing
One of the best things about this 🍰🍨🍓 Delightful Dessert Extravaganza 🍰🍨🍓 is its make-ahead potential!
- Refrigerator: Store individual desserts, covered loosely with plastic wrap, in the refrigerator for up to 2-3 days. The flavors actually deepen overnight, making it a fantastic prep-ahead option for entertaining.
- Freezing: While the individual components (like berries or a simple cake) can be frozen separately, assembling the entire dessert and then freezing is generally not recommended. The whipped cream can change texture upon thawing, becoming watery or grainy. Enjoy this fresh from the fridge!
- Prep Ahead: You can prepare the whipped cream and slice the fruits a day in advance. Store them separately in airtight containers in the fridge. Assemble the dessert a few hours before serving for the best results.
FAQ
Can I use frozen berries?
Yes, you can use frozen berries! However, they will release more liquid as they thaw. It’s best to thaw them completely and drain any excess liquid before using them in the layers. You might even want to gently cook them into a quick compote to manage the moisture.
How far in advance can I make this dessert?
For best results, assemble the dessert at least 2 hours before serving to allow flavors to meld and textures to soften, but no more than 24 hours. If made too far in advance, the cake can become overly soggy, and the whipped cream might lose some of its freshness.
What kind of glasses should I use?
Any clear glass that allows the beautiful layers to be seen will work! Parfait glasses, trifle bowls, champagne flutes, or even small Mason jars are all excellent choices. The visual appeal is a big part of this dessert’s charm!
Can I make this a single large trifle instead of individual servings?
Absolutely! This recipe scales perfectly for a larger trifle bowl. Simply layer the ingredients as directed, increasing the quantities as needed for your serving dish. It makes a stunning centerpiece for any gathering.
My whipped cream isn’t thickening. What went wrong?
Ensure your heavy cream is very cold, straight from the fridge. Also, make sure your bowl and whisk are cold. If it’s still not thickening, ensure you’re using heavy cream (at least 36% fat content) and not half-and-half or milk. Overbeating can also cause it to separate.
Conclusion
There you have it – a recipe for pure joy and a delicious way to brighten any day! This 🍰🍨🍓 Delightful Dessert Extravaganza: Sweeten Your Day! 🍰🍨🍓 is more than just a dessert; it’s an experience, a moment of sweet indulgence that brings smiles and creates lasting memories. I hope you love making and sharing it as much as I do. Don’t forget to leave a comment below and let me know your favorite fruit combination!
Pin this recipe for later so you can revisit this delightful treat whenever a craving for something sweet strikes!
Delightful Dessert Extravaganza: Sweeten Your Day!
Ingredients
- 2 cups heavy cream, very cold
- 1/2 cup granulated sugar (or to taste)
- 1 teaspoon vanilla extract
- 1 lb fresh mixed berries (strawberries, raspberries, blueberries), washed and dried
- 1 pre-made pound cake (about 12-16 oz), sliced or cubed
- 1/2 cup fruit preserve or berry coulis (strawberry or raspberry recommended)
- Fresh mint leaves or chocolate shavings for garnish (optional)
Instructions
- Step 1 In a large, chilled mixing bowl, combine the cold heavy cream, granulated sugar, and vanilla extract. Whip with an electric mixer on medium-high speed until stiff peaks form. Be careful not to over-whip.
- Step 2 Prepare your serving glasses or a large trifle bowl. If using pound cake, cut it into bite-sized cubes or slices.
- Step 3 Begin layering: Place a layer of pound cake cubes at the bottom of each glass. Follow with a generous spoonful of mixed berries.
- Step 4 Next, add a layer of whipped cream, gently spreading it over the fruit. Drizzle a small amount of fruit preserve or coulis over the cream.
- Step 5 Repeat the layers: another layer of pound cake, followed by berries, whipped cream, and another drizzle of fruit preserve, until the glasses are full, ending with a cream and berry layer on top.
- Step 6 Cover the desserts loosely with plastic wrap and refrigerate for at least 2 hours (or up to 24 hours) to allow the flavors to meld and the cake to soften slightly.
- Step 7 Just before serving, garnish with a few fresh berries, a sprig of mint, or a sprinkle of chocolate shavings if desired. Serve chilled and enjoy your delightful dessert extravaganza!
