
Creepy Halloween Cookies for Adults: Spooky Treats for a Grown-Up Celebration
Halloween isn’t just for kids. Adults deserve spooky treats too! Elevate your Halloween party with creepy and creative cookies that are sure to impress. This guide provides ideas for making eerie, elegant, and utterly delicious Halloween cookies perfect for a grown-up celebration.
I. Setting the Spooky Scene: Cookie Decorating Essentials
Before diving into the cookie recipes, let’s gather the essential tools and ingredients needed to create truly creepy cookies.
a. The Right Cookie Base: Recipes and Tips
The foundation of any great cookie is, well, the cookie! While you can use store-bought cookies, homemade cookies offer a better taste and texture. A classic sugar cookie recipe is a perfect starting point, but consider branching out with flavors like gingerbread or chocolate for added depth.
- Sugar Cookies: Opt for a recipe that holds its shape well during baking. Chilling the dough before cutting out shapes is crucial.
- Gingerbread Cookies: The spice adds a warming element perfect for fall. Gingerbread is also sturdy, ideal for intricate designs.
- Chocolate Cookies: A rich, dark chocolate cookie provides a dramatic backdrop for lighter-colored decorations.
Tips for Perfect Cookies:
- Use high-quality ingredients.
- Don’t overmix the dough.
- Chill the dough thoroughly before cutting and baking.
- Bake until the edges are lightly golden.
- Let cool completely before decorating.
b. Royal Icing: The Decorator’s Dream
Royal icing is the go-to choice for detailed cookie decorating. It dries hard, allowing for precise lines and intricate designs.
- Basic Royal Icing Recipe: Powdered sugar, meringue powder, water, and food coloring.
- Consistency is Key: Adjust the water to achieve different consistencies – piping consistency for outlines and details, and flood consistency for filling in large areas.
- Tips for Success: Use gel food coloring for vibrant colors. Keep the icing covered to prevent it from drying out. Practice your piping techniques on parchment paper before decorating the cookies.
c. Essential Decorating Tools
Having the right tools can make all the difference in creating professional-looking creepy cookies.
- Piping Bags and Tips: Various sizes of piping tips are essential for creating different line thicknesses and details.
- Scribe Tool: A scribe tool (or toothpick) is perfect for popping air bubbles and guiding the flood icing into tight corners.
- Edible Markers: Edible markers are great for adding fine details and writing on cookies.
- Sprinkles and Edible Decorations: Stock up on a variety of sprinkles, edible glitter, and other decorations to add texture and sparkle.
- Cookie Cutters: Essential for creating the right spooky shapes.
II. Unleash Your Inner Artist: Spooky Cookie Design Ideas
Now comes the fun part: designing your creepy cookies! Here are a few ideas to spark your creativity.
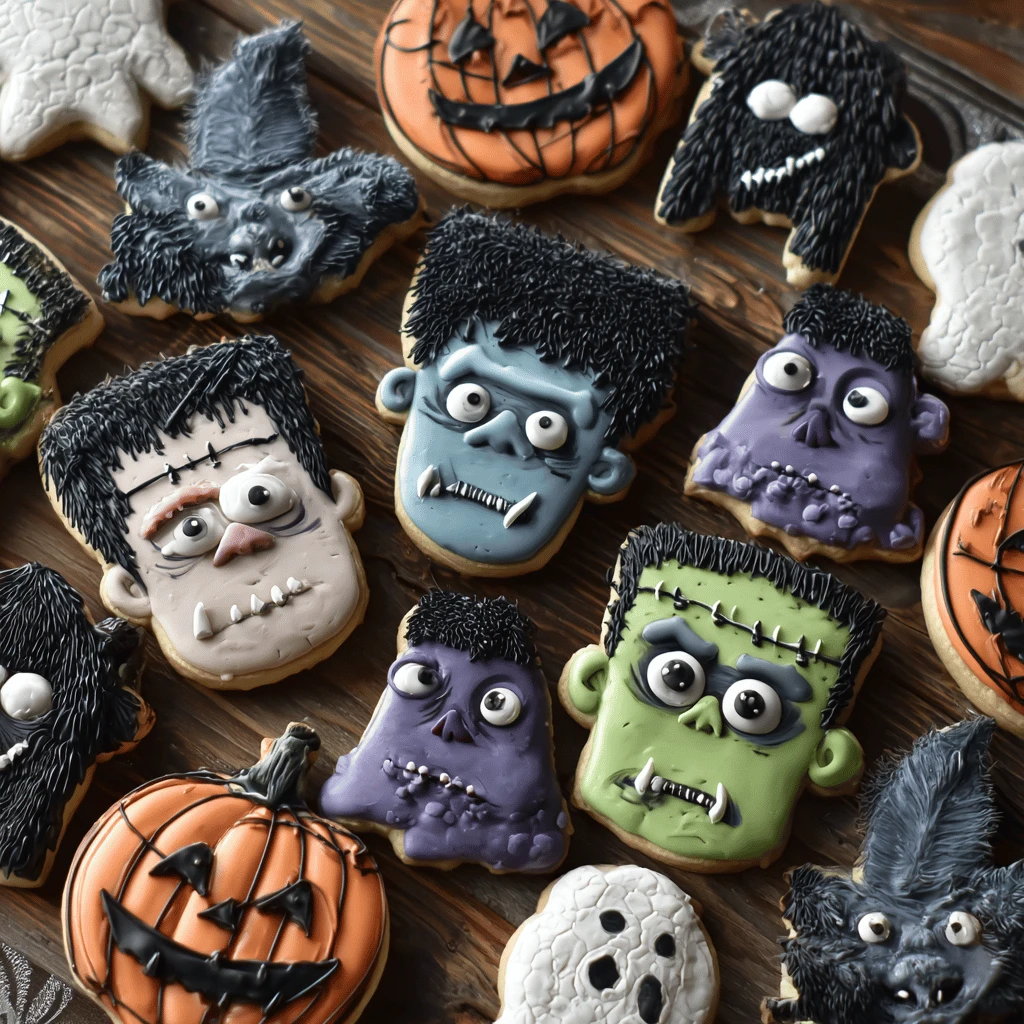
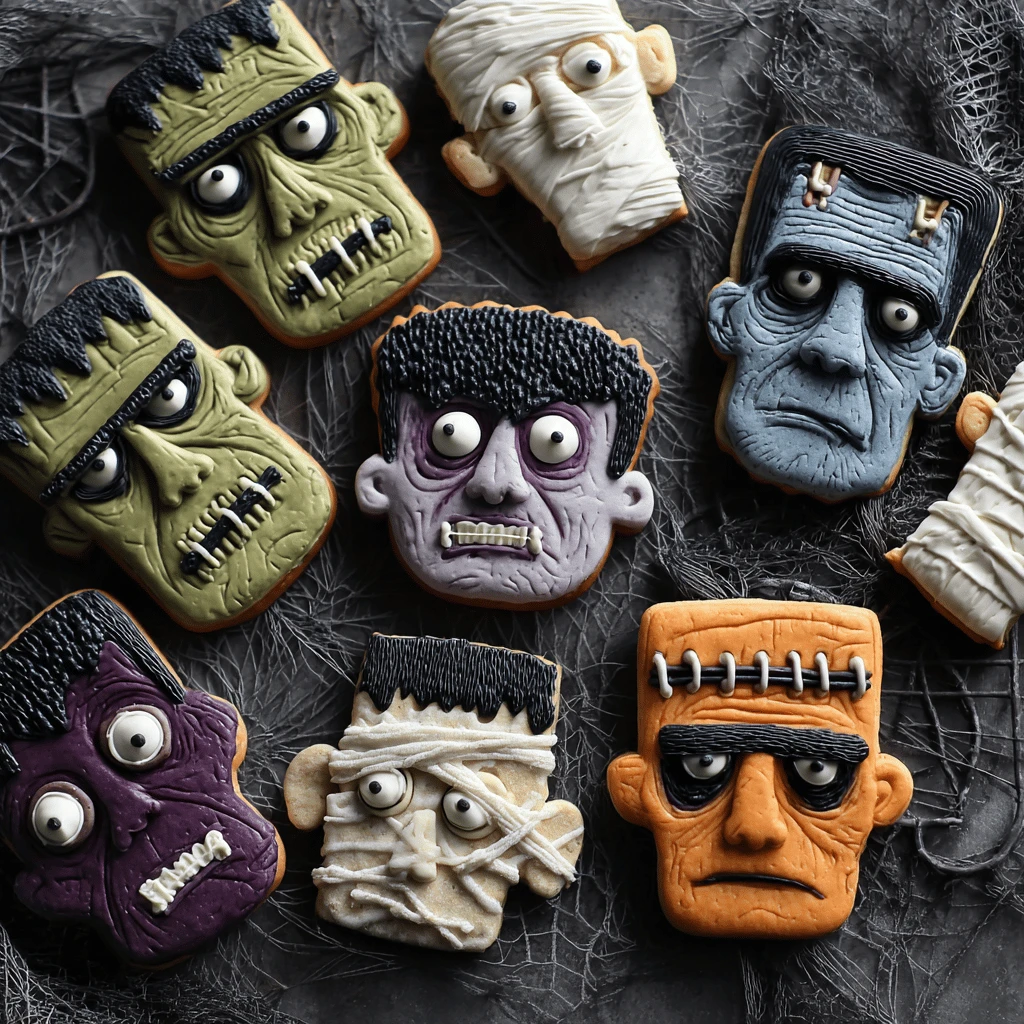
a. Classic Horror Movie Monsters
Recreate iconic monsters like Frankenstein, Dracula, and zombies.
- Frankenstein: Use green icing for the face, black for the hair and bolts. Add stitching details with a fine-tipped edible marker.
- Dracula: Pale face with red eyes and black hair. Don’t forget the fangs, piped in white icing.
- Zombies: Grey or green icing for the skin, with bloodshot eyes and torn clothing details.
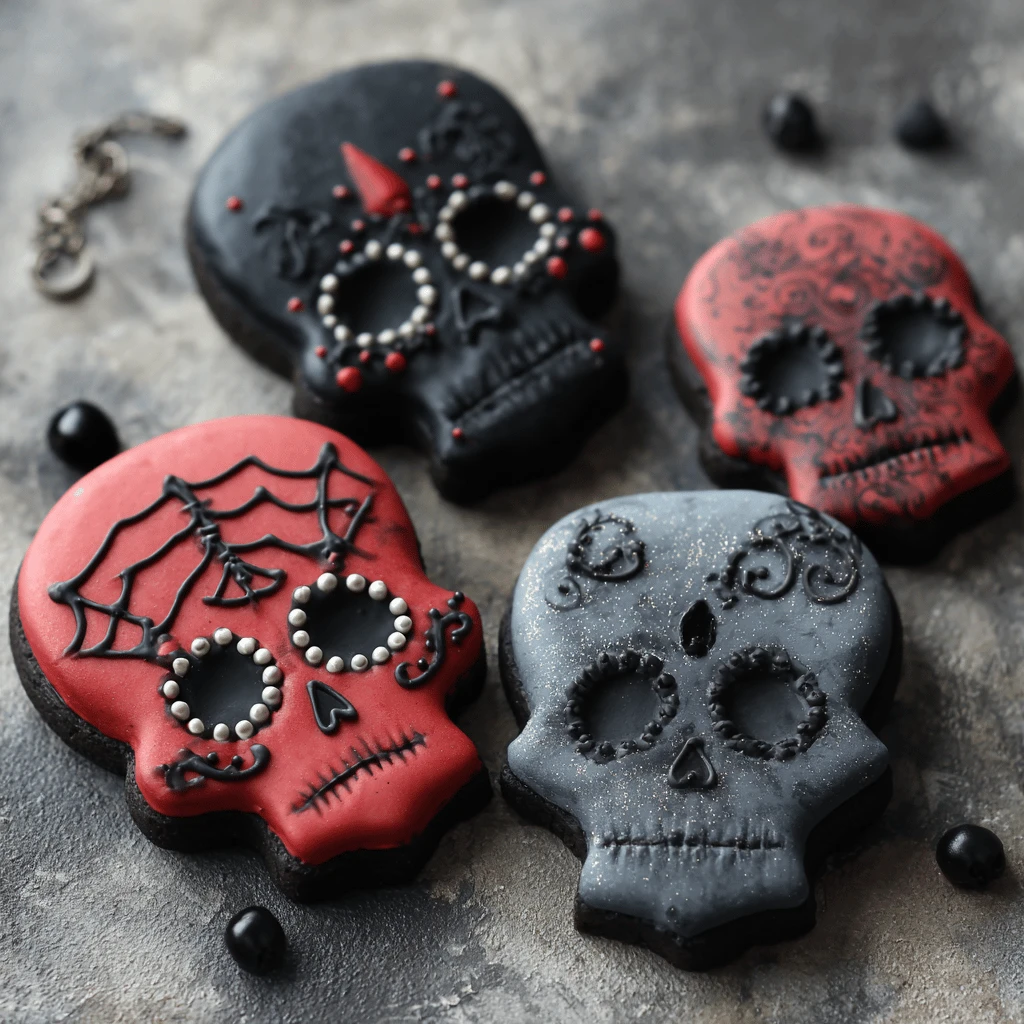
b. Eerie and Elegant Skulls and Bones
Skulls and bones can be both creepy and sophisticated.
- Sugar Skulls: Decorate sugar skull cookies with intricate floral patterns in vibrant colors, inspired by Día de los Muertos.
- Bone Cookies: Simple bone shapes can be made more interesting with shading and textured icing.
- X-Ray Cookies: Pipe a white icing skeleton onto a black cookie for an x-ray effect.
c. Spooky Symbols and Shapes
Explore classic Halloween symbols like pumpkins, bats, ghosts, and spiders.
- Pumpkins: Experiment with different shades of orange and add stem and vine details.
- Bats: Use black icing and add pointy ears and veined wings.
- Ghosts: Simple white ghost shapes can be made more interesting with expressive faces and flowing robes.
- Spiders and Webs: Pipe intricate spiderwebs onto cookies and add a small spider made of black icing or a chocolate sprinkle.
d. Incorporating Edible Details
Use edible details to enhance the creepiness of your cookies.
- Edible Blood Splatter: Use red food coloring mixed with a bit of water or vodka to create a realistic blood splatter effect.
- Edible Eyes: Add edible candy eyes to cookies for a creepy, lifelike look.
- Edible Glitter: Use black or silver edible glitter to add a touch of spooky glamour.
III. Elevating the Presentation: Making Your Cookies Stand Out
Presentation is key to making your creepy cookies truly impressive.
a. Packaging and Display Ideas
Consider how you will package and display your cookies to enhance their visual impact.
- Individual Packaging: Wrap each cookie individually in clear cellophane bags and tie with a black or orange ribbon.
- Themed Boxes: Package cookies in themed boxes decorated with spooky patterns or designs.
- Display Platters: Arrange cookies on a tiered display platter for a dramatic presentation.
- Spooky Table Setting: Incorporate the cookies into a spooky table setting with cobwebs, candles, and other Halloween decorations.
b. Incorporating Spooky Elements
Add spooky elements to your presentation to enhance the overall theme.
- Dry Ice: Use dry ice to create a spooky fog effect around the cookies.
- Dim Lighting: Use dim lighting to create a mysterious and eerie atmosphere.
- Sound Effects: Play spooky sound effects in the background to add to the ambiance.
IV. Advanced Techniques: Taking Your Cookies to the Next Level
For experienced bakers looking to push their skills, consider these advanced techniques.
a. Airbrushing for Depth and Dimension
Airbrushing can add depth and dimension to your cookies, creating realistic shading and highlights.
- Choosing an Airbrush: Invest in a quality airbrush designed for food use.
- Airbrushing Techniques: Practice airbrushing techniques like stenciling, shading, and highlighting.
- Color Blending: Experiment with blending different colors to create realistic effects.
b. Using Stencils for Intricate Designs
Stencils can be used to create intricate designs quickly and easily.
- Creating Stencils: You can buy pre-made stencils or create your own using a cutting machine.
- Stencil Techniques: Use royal icing or airbrushing to apply designs through the stencils.
- Layering Stencils: Layer different stencils to create complex and multi-dimensional designs.
c. Modeling Chocolate for 3D Elements
Modeling chocolate can be used to create 3D elements for your cookies, adding a unique and eye-catching touch.
- Making Modeling Chocolate: Modeling chocolate is made from chocolate and corn syrup.
- Sculpting Techniques: Use sculpting tools to create 3D shapes and details.
- Attaching 3D Elements: Attach the modeling chocolate elements to the cookies using royal icing.
V. Halloween Cookie FAQs
Here are some frequently asked questions about making creepy Halloween cookies.
a. Can I make royal icing ahead of time?
Yes, royal icing can be made ahead of time. Store it in an airtight container in the refrigerator for up to a week. Before using, bring it to room temperature and re-mix it to ensure a smooth consistency.
b. How do I prevent my cookies from spreading while baking?
To prevent cookies from spreading, chill the dough thoroughly before baking. You can also try baking on a silicone mat or parchment paper. Avoid overmixing the dough, and ensure your oven is at the correct temperature.
c. What is the best way to store decorated cookies?
Decorated cookies should be stored in an airtight container at room temperature. Avoid stacking them directly on top of each other, as this can smudge the icing. You can also wrap each cookie individually in cellophane bags to protect the decorations.
d. How do I fix royal icing that is too thick or too thin?
If your royal icing is too thick, add a few drops of water at a time until you reach the desired consistency. If it is too thin, add a small amount of powdered sugar, one tablespoon at a time, until it thickens up. Mix well after each addition to ensure a smooth consistency.
e. Where can I find inspiration for creepy cookie designs?
Inspiration for creepy cookie designs can be found online on platforms like Pinterest, Instagram, and food blogs. You can also look to classic horror movies, Halloween decorations, and spooky symbols for ideas.
