
Easy Crispy Chicken Breast Wrap: A Deliciously Simple Recipe
Crispy chicken wraps are a satisfying and convenient meal, perfect for lunch, dinner, or a quick snack. This recipe combines juicy, flavorful chicken with fresh ingredients, all wrapped in a warm tortilla for an easy-to-enjoy experience. Forget complicated recipes; this guide focuses on simplicity and flavor, ensuring a crispy chicken wrap that everyone will love.
The Secret to Perfectly Crispy Chicken
Achieving that irresistible crunch is key to a great chicken wrap. Here’s how to make it happen:
Selecting the Right Chicken
Opt for boneless, skinless chicken breasts for easy preparation. Chicken thighs can also be used for a richer flavor, but they may require a longer cooking time. Pound the chicken breasts to an even thickness (about ½ inch) to ensure even cooking and optimal crispiness. This also helps tenderize the chicken.
The Breading Process: A Step-by-Step Guide
The breading is where the magic happens. A simple three-step process is all you need:
1. Flour Coating: Dredge the chicken in all-purpose flour seasoned with salt, pepper, garlic powder, and paprika. This provides a dry base for the egg to adhere to.
2. Egg Wash: Dip the floured chicken in a mixture of beaten eggs and a splash of milk or water. The egg wash creates a sticky surface for the breadcrumbs.
3. Breadcrumb Coating: Coat the chicken thoroughly in panko breadcrumbs. Panko breadcrumbs are larger and lighter than regular breadcrumbs, resulting in a superior crispy texture. For an extra layer of flavor, consider adding grated Parmesan cheese, dried herbs, or spices to the breadcrumbs.
Cooking Methods for Crispy Perfection
There are several ways to cook your breaded chicken, each with its advantages:
- Pan-Frying: This is the quickest and most common method. Heat about ½ inch of oil (vegetable, canola, or peanut oil work well) in a large skillet over medium-high heat. Once the oil is hot, carefully place the breaded chicken in the skillet, ensuring not to overcrowd it. Cook for about 4-5 minutes per side, or until golden brown and cooked through. Use a kitchen thermometer to ensure the internal temperature reaches 165°F (74°C).
- Baking: For a healthier option, bake the breaded chicken. Preheat your oven to 400°F (200°C). Place the breaded chicken on a baking sheet lined with parchment paper. Drizzle the chicken with a little oil spray. Bake for about 20-25 minutes, or until golden brown and cooked through.
- Air Frying: Air frying is another excellent option for crispy chicken with less oil. Preheat your air fryer to 375°F (190°C). Place the breaded chicken in the air fryer basket in a single layer. Cook for about 12-15 minutes, flipping halfway through, or until golden brown and cooked through.
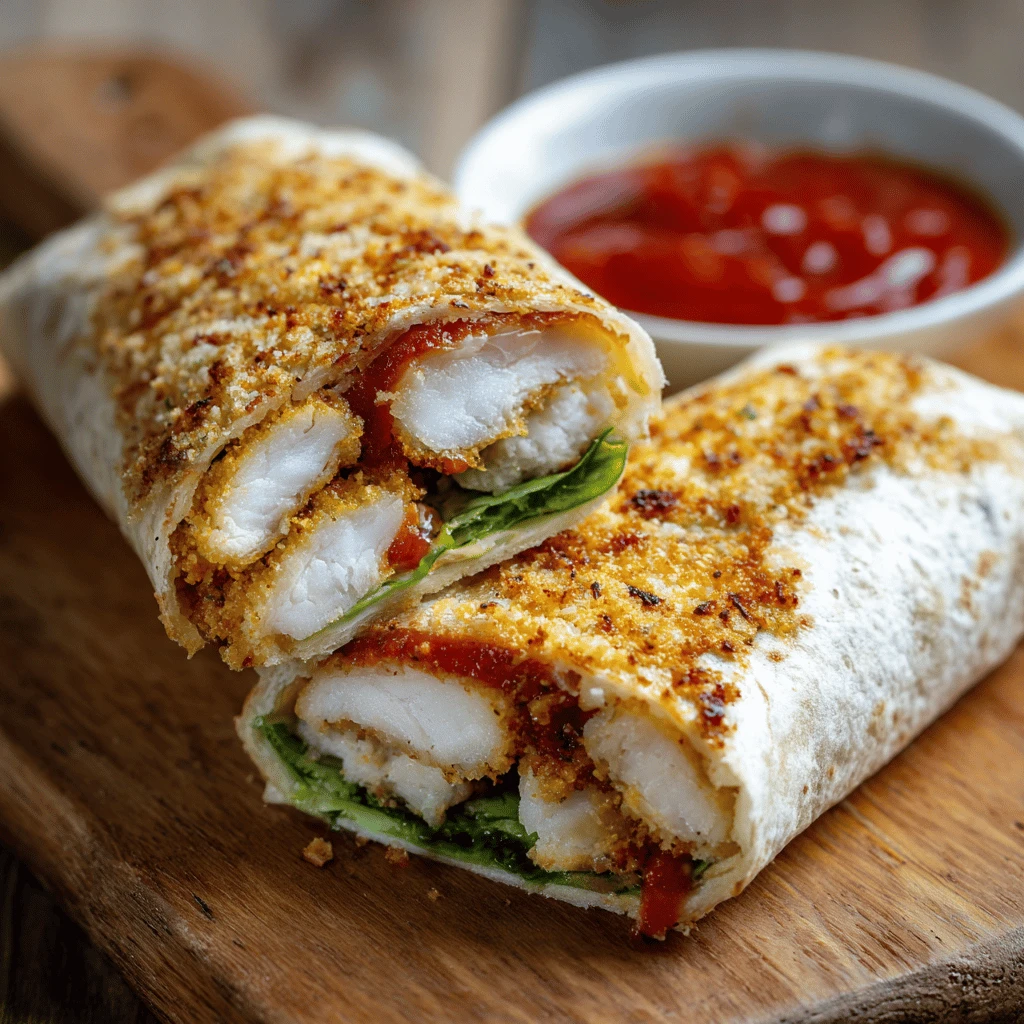
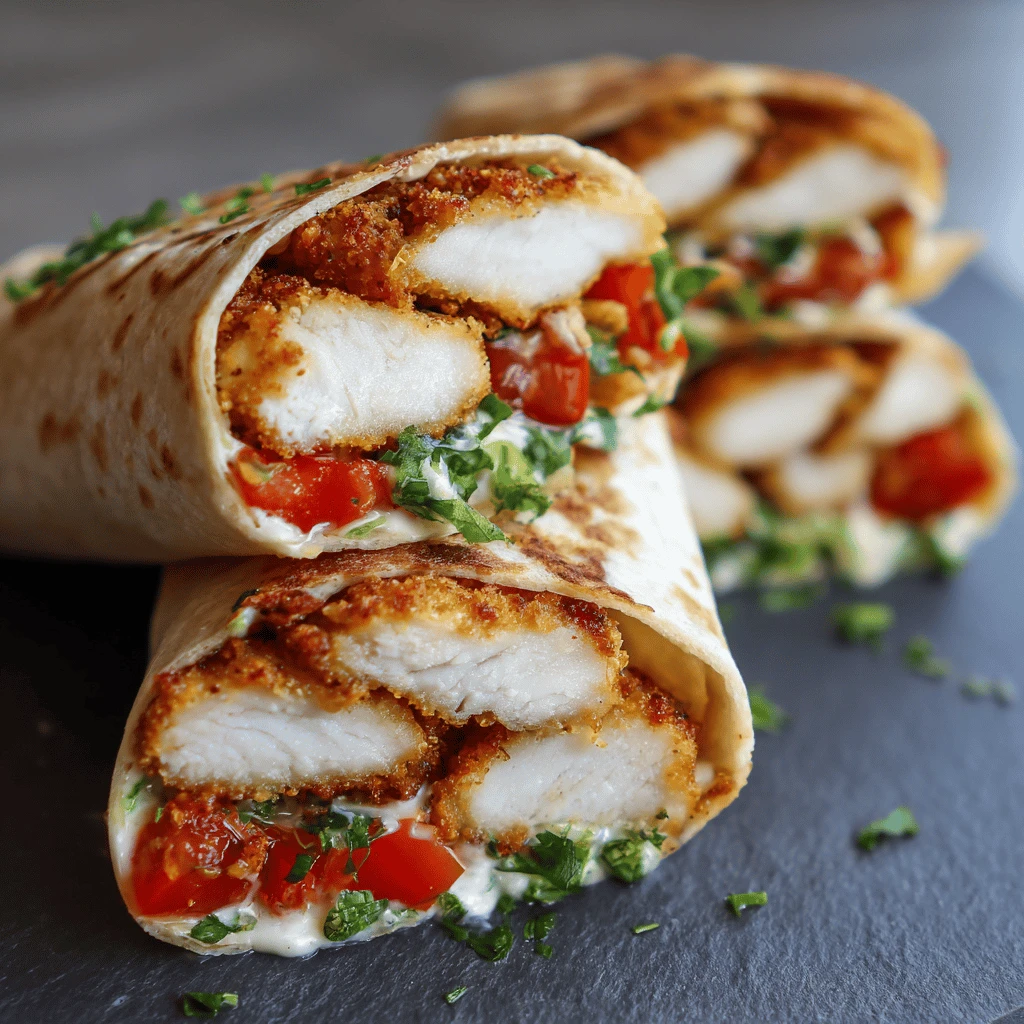
Assembling Your Delicious Chicken Wrap
Now that your crispy chicken is ready, it’s time to assemble your wrap.
Choosing the Right Tortilla
The type of tortilla you use can significantly impact the overall taste and texture of your wrap. Flour tortillas are the most common choice, but whole wheat or spinach tortillas offer a healthier alternative. Consider grilling or warming the tortilla slightly before adding the fillings to make it more pliable and prevent it from tearing.
Selecting Your Fillings and Toppings
The possibilities are endless when it comes to fillings and toppings. Here are some popular choices:
- Lettuce: Crisp lettuce, such as romaine or iceberg, provides a refreshing crunch.
- Tomato: Sliced tomatoes add juiciness and acidity.
- Onion: Red onion or thinly sliced white onion offer a sharp, pungent flavor.
- Cheese: Shredded cheddar, Monterey Jack, or pepper jack cheese adds richness and flavor.
- Avocado: Sliced avocado provides a creamy texture and healthy fats.
- Bacon: Cooked and crumbled bacon adds a smoky, savory element.
Sauces and Dressings to Elevate Your Wrap
The sauce is the final touch that brings all the flavors together. Here are some popular options:
- Ranch Dressing: A classic choice that complements the crispy chicken and fresh vegetables.
- Honey Mustard: A sweet and tangy option that adds a unique flavor profile.
- BBQ Sauce: For a smoky and savory wrap, BBQ sauce is a great choice.
- Spicy Mayo: A combination of mayonnaise and hot sauce for a creamy and spicy kick.
- Sriracha: For those who like it hot, a drizzle of Sriracha adds a fiery flavor.
Step-by-Step Assembly Instructions
1. Warm your tortilla.
2. Spread a thin layer of your chosen sauce or dressing in the center of the tortilla.
3. Add a layer of lettuce, followed by your other chosen fillings.
4. Place the crispy chicken on top of the fillings.
5. Fold in the sides of the tortilla and then fold the bottom up and over the fillings, creating a tight wrap.
Variations and Customizations
One of the best things about chicken wraps is their versatility. Here are some ideas for customizing your wrap to suit your taste:
Spicy Chicken Wrap
Add a spicy kick by using pepper jack cheese, jalapenos, and a spicy mayo sauce. You can also add a dash of cayenne pepper to your breadcrumb mixture.
BBQ Chicken Wrap
Use BBQ sauce as your dressing and add coleslaw for a classic BBQ flavor combination. Consider adding grilled onions and peppers for extra flavor.
Caesar Chicken Wrap
Use Caesar dressing, romaine lettuce, and Parmesan cheese for a Caesar-inspired wrap. You can also add croutons for extra crunch.
Mediterranean Chicken Wrap
Use hummus, feta cheese, cucumbers, tomatoes, and olives for a Mediterranean twist. A lemon-herb vinaigrette adds a bright and refreshing flavor.

Adding a Healthier Twist
- Use whole wheat tortillas for added fiber.
- Bake or air fry the chicken instead of pan-frying.
- Load up on vegetables and use lighter dressings or sauces.
- Choose lean chicken options, such as chicken tenderloins.
Tips for Success and Avoiding Common Mistakes
- Don’t Overcrowd the Pan: When pan-frying, cook the chicken in batches to prevent the oil temperature from dropping, which can result in soggy chicken.
- Use a Thermometer: Ensure the chicken is cooked through by using a kitchen thermometer. The internal temperature should reach 165°F (74°C).
- Don’t Overfill the Wrap: Overfilling the wrap can make it difficult to fold and eat.
- Warm the Tortilla: Warming the tortilla makes it more pliable and prevents it from tearing.
- Let the Chicken Rest: Allow the cooked chicken to rest for a few minutes before slicing and adding it to the wrap. This allows the juices to redistribute, resulting in more flavorful chicken.
Frequently Asked Questions (FAQ)
- How do I keep my chicken crispy after cooking? Place the cooked chicken on a wire rack instead of a plate to allow air to circulate around it. This will prevent it from getting soggy. If you’re not eating it right away, reheat it in the oven or air fryer to re-crisp it.
- Can I make these wraps ahead of time? While it’s best to assemble the wraps just before eating to prevent the tortilla from getting soggy, you can prepare the chicken and other fillings in advance. Store them separately in the refrigerator and assemble the wraps when you’re ready to eat.
- What’s the best way to reheat chicken wraps? The best way to reheat chicken wraps is in a dry skillet over medium heat. Cook for a few minutes per side, or until heated through. You can also reheat them in the oven or air fryer, but be careful not to overcook them, or they may become dry.
- Can I use other types of protein? Absolutely! While this recipe focuses on chicken, you can easily substitute other proteins, such as shrimp, tofu, or beef. Adjust the cooking time accordingly.
- What are some good sides to serve with chicken wraps? Chicken wraps pair well with a variety of sides, such as french fries, salad, coleslaw, or soup.
- Can I freeze chicken wraps? Freezing assembled wraps is not recommended as the tortillas may become soggy. You can freeze the cooked chicken separately and assemble the wraps when you’re ready to eat.
- How long does crispy chicken last in the fridge? Cooked chicken will generally last for 3-4 days in the refrigerator. Make sure to store it in an airtight container to maintain freshness.
