
Family-Friendly Pan-Seared Chicken Breast Soup
Chicken soup is a classic comfort food, but sometimes you want something a little more elevated than the usual boiled chicken recipe. Enter: Family-Friendly Pan-Seared Chicken Breast Soup. This recipe offers the best of both worlds – the soothing qualities of chicken soup with the added flavor and texture of perfectly seared chicken. It’s a simple way to transform an ordinary meal into something special that the whole family will enjoy.
Why Pan-Seared Chicken Makes a Difference
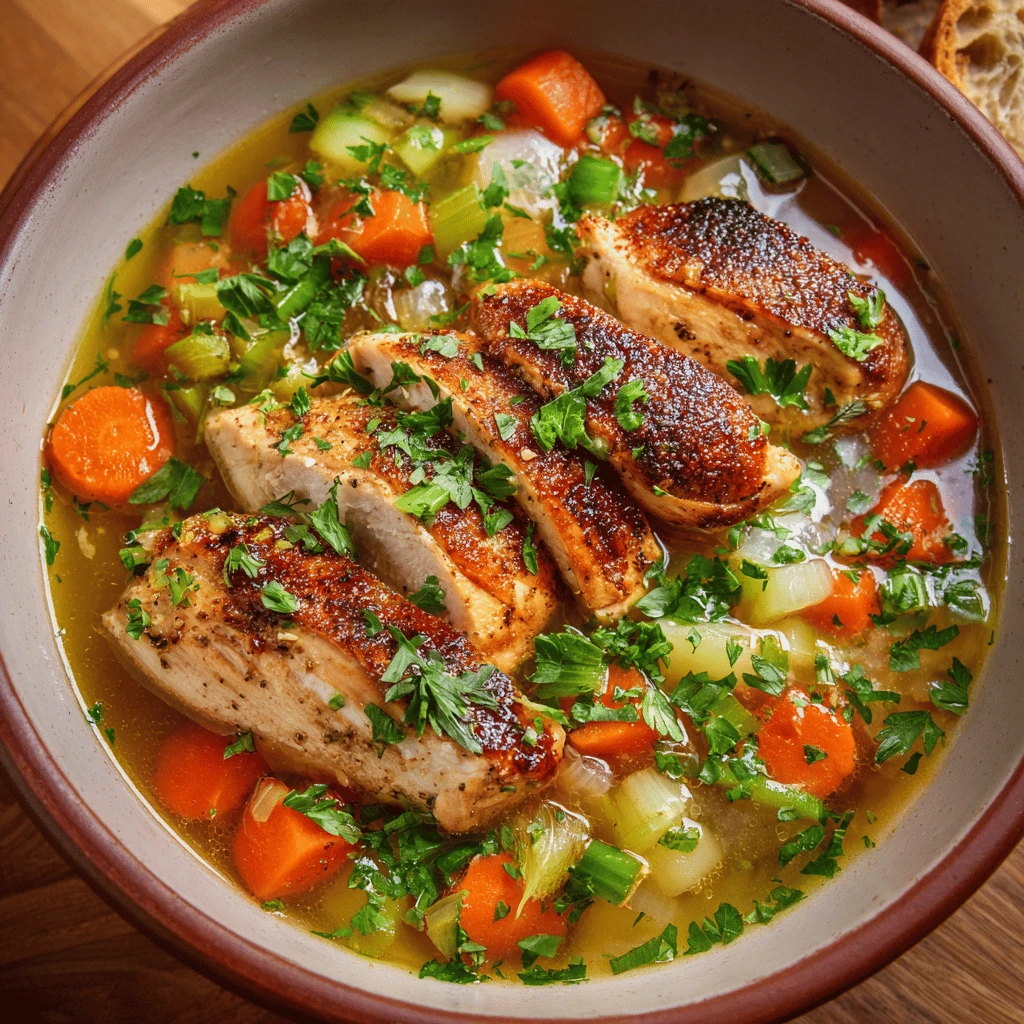
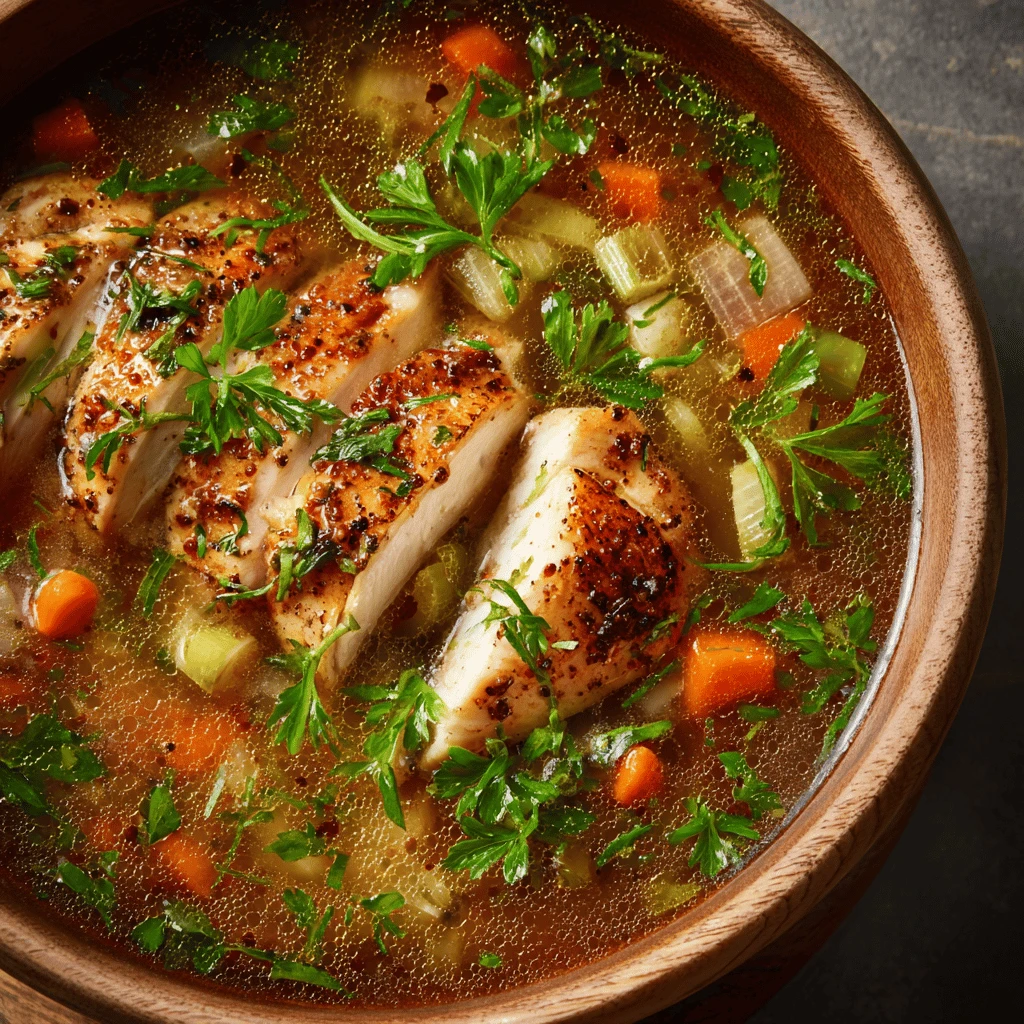
Pan-searing chicken breast before adding it to the soup elevates the flavor profile significantly. The Maillard reaction, a chemical reaction between amino acids and reducing sugars, creates a delicious crust that adds a depth of savoriness absent in boiled chicken. This sear not only enhances the taste but also adds a pleasant textural contrast to the soft vegetables and tender noodles in the soup. Furthermore, the rendered chicken fat left in the pan becomes a flavorful base for sautéing the vegetables, further intensifying the overall taste of the soup.
Consider the following benefits:
- Enhanced Flavor: Searing creates a richer, more complex flavor profile.
- Improved Texture: The crispy exterior of the chicken complements the soft soup elements.
- Nutrient Retention: Searing helps to seal in juices and retain nutrients within the chicken.
- Visual Appeal: The golden-brown chicken adds an appealing visual element to the soup.
Crafting the Perfect Pan-Seared Chicken Breast
The key to outstanding pan-seared chicken lies in a few simple but crucial techniques. First, start with high-quality chicken breasts. Opt for organic, free-range chicken if possible, as it generally has better flavor and texture. Next, ensure the chicken breasts are of uniform thickness. You can achieve this by pounding them gently with a meat mallet or slicing thicker breasts horizontally. This ensures even cooking and prevents some parts from drying out before others are cooked through.
Before searing, pat the chicken breasts completely dry with paper towels. This is essential for achieving a good sear. Moisture inhibits browning, so dry chicken is key. Season generously with salt, pepper, garlic powder, and paprika. Don’t be shy with the seasoning – it’s what gives the chicken its flavor. Heat a skillet (cast iron is ideal) over medium-high heat. Add a tablespoon or two of olive oil or avocado oil. Once the oil is shimmering, carefully place the chicken breasts in the skillet, making sure not to overcrowd the pan. Sear for 5-7 minutes per side, or until the internal temperature reaches 165°F (74°C). Let the chicken rest for a few minutes before slicing and adding it to the soup.
Here’s a more detailed step-by-step guide:
1. Prepare the Chicken: Pat chicken breasts dry and pound to an even thickness.
2. Season Generously: Season with salt, pepper, garlic powder, and paprika.
3. Heat the Skillet: Heat oil in a skillet over medium-high heat.
4. Sear the Chicken: Sear for 5-7 minutes per side, until golden brown and cooked through.
5. Rest and Slice: Let the chicken rest before slicing into bite-sized pieces.
Building a Flavorful Soup Base
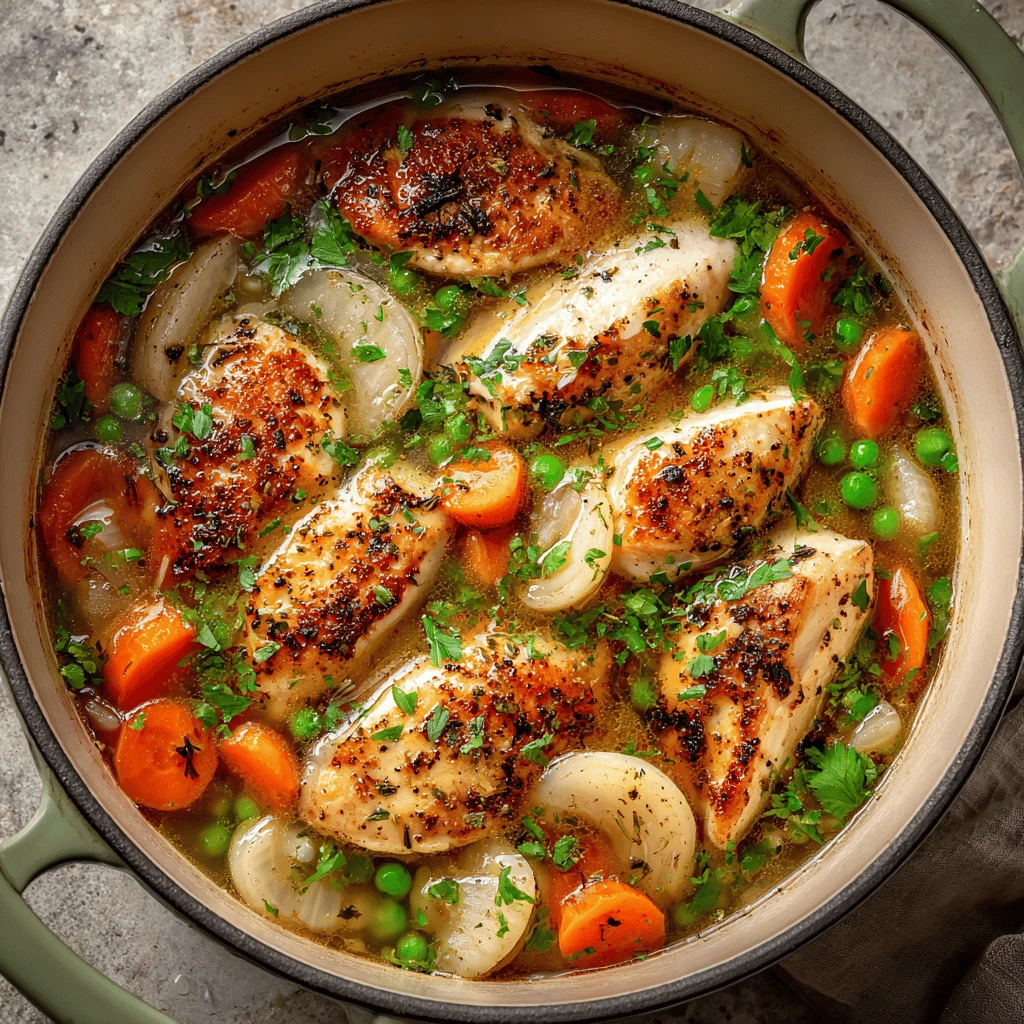
A great soup begins with a great base. In this recipe, the soup base is built on a foundation of aromatic vegetables, chicken broth, and herbs. Start by sautéing diced onion, carrots, and celery (the classic mirepoix) in the same skillet used to sear the chicken. The rendered chicken fat will infuse the vegetables with rich flavor. Cook until the vegetables are softened, about 5-7 minutes.
Next, add minced garlic and cook for another minute until fragrant. Be careful not to burn the garlic. Pour in high-quality chicken broth. Homemade is always best, but store-bought works well too. Look for low-sodium options to control the saltiness of the soup. Add dried herbs such as thyme, rosemary, and bay leaf. These herbs add depth and complexity to the flavor profile. Bring the soup to a simmer and let it cook for at least 15 minutes to allow the flavors to meld.
To enhance the flavor even further, consider adding a parmesan cheese rind to the soup while it simmers. The rind adds a subtle umami flavor that elevates the soup. Remember to remove the rind before serving. A splash of lemon juice at the end adds brightness and acidity, balancing the richness of the soup. For a creamier texture, you can stir in a dollop of Greek yogurt or a splash of heavy cream.
Essential steps for a flavorful base:
- Sauté Aromatics: Cook onion, carrots, and celery in rendered chicken fat.
- Add Garlic: Sauté minced garlic until fragrant.
- Simmer with Broth and Herbs: Add chicken broth, thyme, rosemary, and bay leaf.
- Enhance Flavor: Consider adding a parmesan rind or a splash of lemon juice.
Adding Noodles, Vegetables, and Final Touches
Once the soup base is ready, it’s time to add the noodles, remaining vegetables, and the sliced pan-seared chicken. For noodles, egg noodles, orzo, or ditalini work well. Add the noodles to the simmering soup and cook according to package directions. Be careful not to overcook the noodles, as they will become mushy.
In addition to the mirepoix, consider adding other vegetables such as peas, corn, green beans, or spinach. These vegetables add color, texture, and nutritional value to the soup. Add them during the last few minutes of cooking, so they retain their crispness and vibrant color. Finally, add the sliced pan-seared chicken to the soup. Heat it through gently. Avoid boiling the chicken, as it can become dry and tough.
Before serving, taste the soup and adjust the seasoning as needed. Add salt, pepper, or a pinch of red pepper flakes for a little heat. Garnish with fresh parsley or chives for a pop of color and fresh flavor. Serve hot with crusty bread or crackers. This soup is also delicious with a side salad.
Key steps for finishing the soup:
- Cook Noodles: Add noodles and cook until al dente.
- Add Remaining Vegetables: Add peas, corn, green beans, or spinach.
- Incorporate Chicken: Gently heat the sliced chicken in the soup.
- Adjust Seasoning: Taste and adjust with salt, pepper, and red pepper flakes.
- Garnish and Serve: Garnish with fresh parsley or chives.
Variations and Serving Suggestions
This recipe is highly adaptable. Feel free to experiment with different vegetables, herbs, and spices to create your own signature version. For a spicier soup, add a pinch of cayenne pepper or a chopped jalapeño to the soup base. For a heartier soup, add diced potatoes or sweet potatoes. If you don’t have chicken broth on hand, you can use vegetable broth or even water with a bouillon cube.
For a vegetarian option, substitute the chicken broth with vegetable broth and omit the chicken. Add tofu or chickpeas for protein. To make this soup gluten-free, use gluten-free noodles or rice. Serve the soup with a variety of toppings such as croutons, grated cheese, sour cream, or hot sauce. You can also serve it with a grilled cheese sandwich or a side of roasted vegetables.
Consider these variations:
- Spicy Version: Add cayenne pepper or chopped jalapeño.
- Hearty Version: Add diced potatoes or sweet potatoes.
- Vegetarian Version: Use vegetable broth and add tofu or chickpeas.
- Gluten-Free Version: Use gluten-free noodles or rice.
Serving Suggestions:
- Serve with crusty bread or crackers.
- Serve with a side salad or grilled cheese sandwich.
- Offer a variety of toppings such as croutons, cheese, sour cream, or hot sauce.
Frequently Asked Questions
- Can I use frozen chicken breasts? Yes, but make sure to thaw them completely before searing. Pat them dry before searing for the best results.
- Can I make this soup in a slow cooker? Yes. Sear the chicken and sauté the vegetables as directed. Then, transfer everything to a slow cooker and cook on low for 6-8 hours or on high for 3-4 hours. Add the noodles during the last 30 minutes of cooking.
- Can I freeze this soup? Yes, but the noodles may become a bit soft upon thawing. For best results, cook the noodles separately and add them to the soup after thawing.
- What if I don’t have a cast-iron skillet? A stainless steel or non-stick skillet will work too, but cast iron provides the best sear and heat distribution.
- How long does the soup last in the refrigerator? It will last for 3-4 days in an airtight container in the refrigerator.
- Can I add other types of protein? Yes, you can add shredded rotisserie chicken, turkey, or even white beans for a vegetarian option.
- What kind of herbs work best in this soup? Thyme, rosemary, bay leaf, parsley, and chives are all excellent choices.
- How can I make this soup thicker? You can add a slurry of cornstarch and water (1 tablespoon cornstarch mixed with 2 tablespoons of water) to the simmering soup, or mash some of the cooked potatoes or vegetables.
