
Cute Halloween Cupcakes: Bite-Sized Treats for Spooky Season
Halloween is the perfect time to unleash your creativity in the kitchen, and what better way to do that than with adorable, bite-sized cupcakes? These miniature treats are not only easy to eat, but they also offer endless possibilities for decoration. Whether you’re hosting a Halloween party or simply want to surprise your family with a festive snack, these cute Halloween cupcakes are sure to be a hit.
I. The Allure of Bite-Sized Halloween Treats
Bite-sized cupcakes offer several advantages over their full-sized counterparts, especially for Halloween.
Portion Control and Variety
One of the main benefits is portion control. Mini cupcakes allow you to indulge in a sweet treat without overdoing it. This is particularly useful during Halloween when sugary treats are abundant. You can enjoy a few mini cupcakes and sample different flavors and designs without feeling guilty.
Furthermore, bite-sized treats encourage variety. You can prepare a selection of different cupcake flavors and decorations, offering your guests a range of options. This is especially appealing for parties and gatherings where everyone has different preferences. Instead of committing to one large cupcake, people can try a little bit of everything.
Convenience and Presentation
Mini cupcakes are incredibly convenient to serve and eat. They’re perfect for grab-and-go situations, such as Halloween parties or school bake sales. Their small size makes them easy for children to handle, reducing the risk of messes and spills.
The presentation of mini cupcakes is also a significant advantage. Their petite size makes them inherently charming and appealing. They can be arranged in creative displays, such as cupcake towers or themed platters, adding to the overall festive atmosphere of your Halloween event. The possibilities for decoration are endless, allowing you to create truly unique and eye-catching treats.
II. Essential Tools and Ingredients for Halloween Cupcakes
Before you start baking, it’s essential to gather the necessary tools and ingredients. A well-stocked kitchen will make the process smoother and more enjoyable.
Baking Essentials
- Mini Muffin Tin: A mini muffin tin is crucial for creating bite-sized cupcakes. Ensure it’s non-stick or use cupcake liners to prevent sticking.
- Cupcake Liners: Choose Halloween-themed cupcake liners for an extra festive touch. Options include spooky patterns, colors, and designs.
- Mixing Bowls: You’ll need a set of mixing bowls for combining wet and dry ingredients.
- Measuring Cups and Spoons: Accurate measurements are vital for successful baking.
- Electric Mixer: An electric mixer (handheld or stand mixer) will make the process of creaming butter and sugar much easier.
- Spatulas: Use spatulas to scrape down the sides of the bowl and gently fold ingredients together.
- Piping Bags and Tips: Piping bags and tips are essential for creating intricate decorations. Consider various tips for different effects, such as stars, rosettes, and writing.
- Cooling Rack: A cooling rack is necessary for allowing the cupcakes to cool evenly after baking.
Key Ingredients
- Flour: All-purpose flour is the standard choice for cupcakes.
- Sugar: Granulated sugar provides sweetness and helps to create a tender crumb.
- Butter: Unsalted butter adds richness and flavor to the cupcakes. Make sure it’s softened for easy creaming.
- Eggs: Eggs bind the ingredients together and add moisture.
- Milk or Buttermilk: Liquid adds moisture and helps to create a smooth batter. Buttermilk will give the cupcakes a slightly tangy flavor.
- Vanilla Extract: Vanilla extract enhances the flavor of the cupcakes.
- Baking Powder and Baking Soda: These leavening agents help the cupcakes rise.
- Salt: A pinch of salt balances the sweetness and enhances the other flavors.
Frosting and Decoration Ingredients
- Buttercream Frosting: Buttercream is a classic choice for cupcakes. You can tint it with food coloring to create Halloween-themed colors.
- Food Coloring: Gel food coloring is recommended for vibrant and concentrated colors.
- Sprinkles: Halloween-themed sprinkles add a festive touch. Look for mixes with bats, ghosts, pumpkins, and other spooky shapes.
- Candy Melts: Candy melts can be used to create custom decorations, such as spiderwebs, ghosts, or pumpkins.
- Fondant: Fondant is a pliable sugar paste that can be rolled out and used to create intricate decorations.
- Edible Markers: Edible markers are perfect for adding fine details to your decorations.
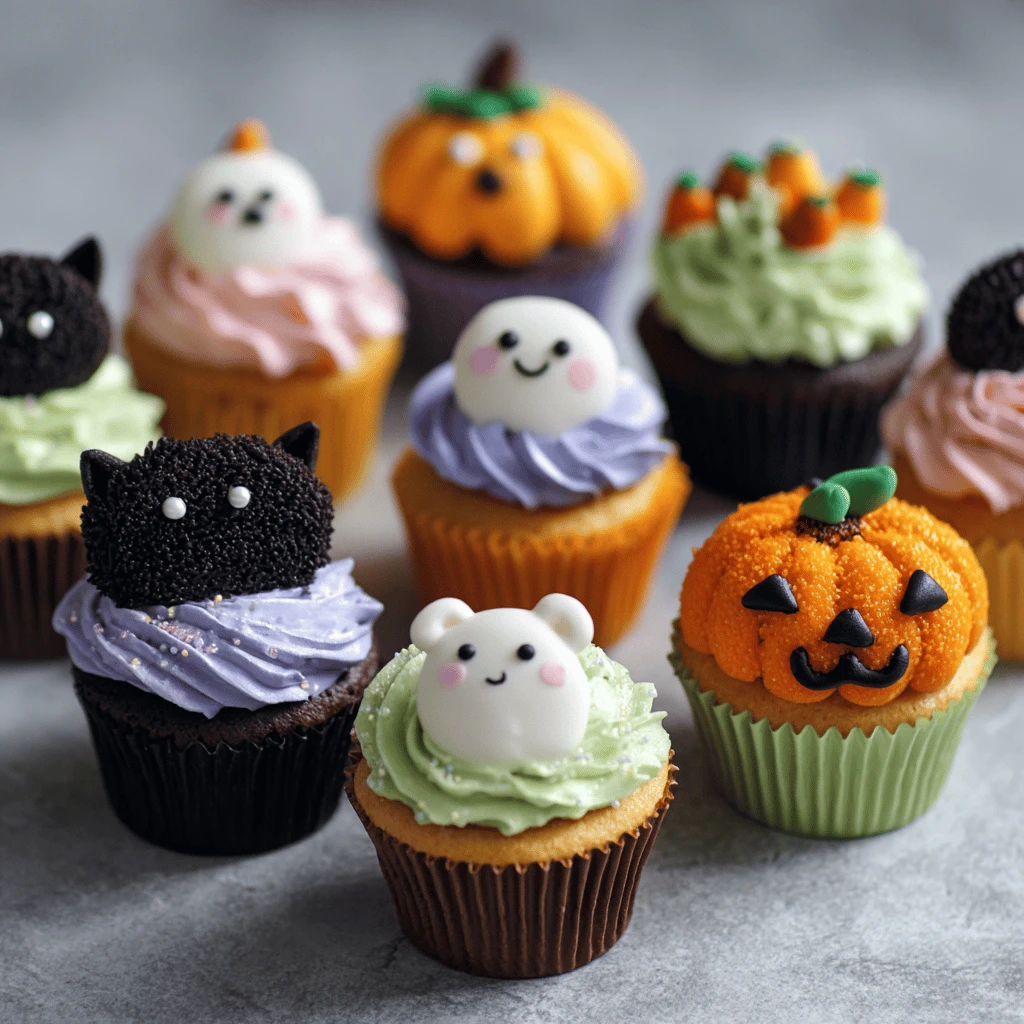
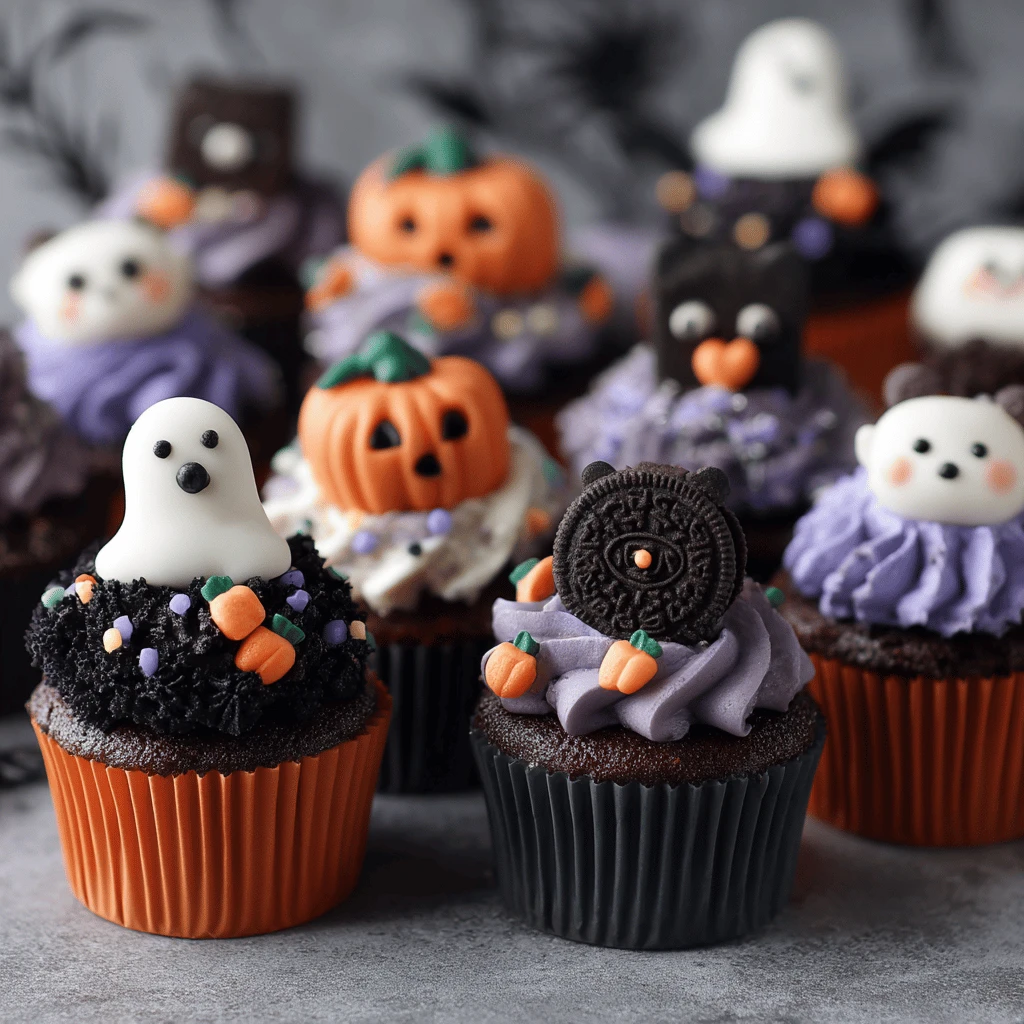
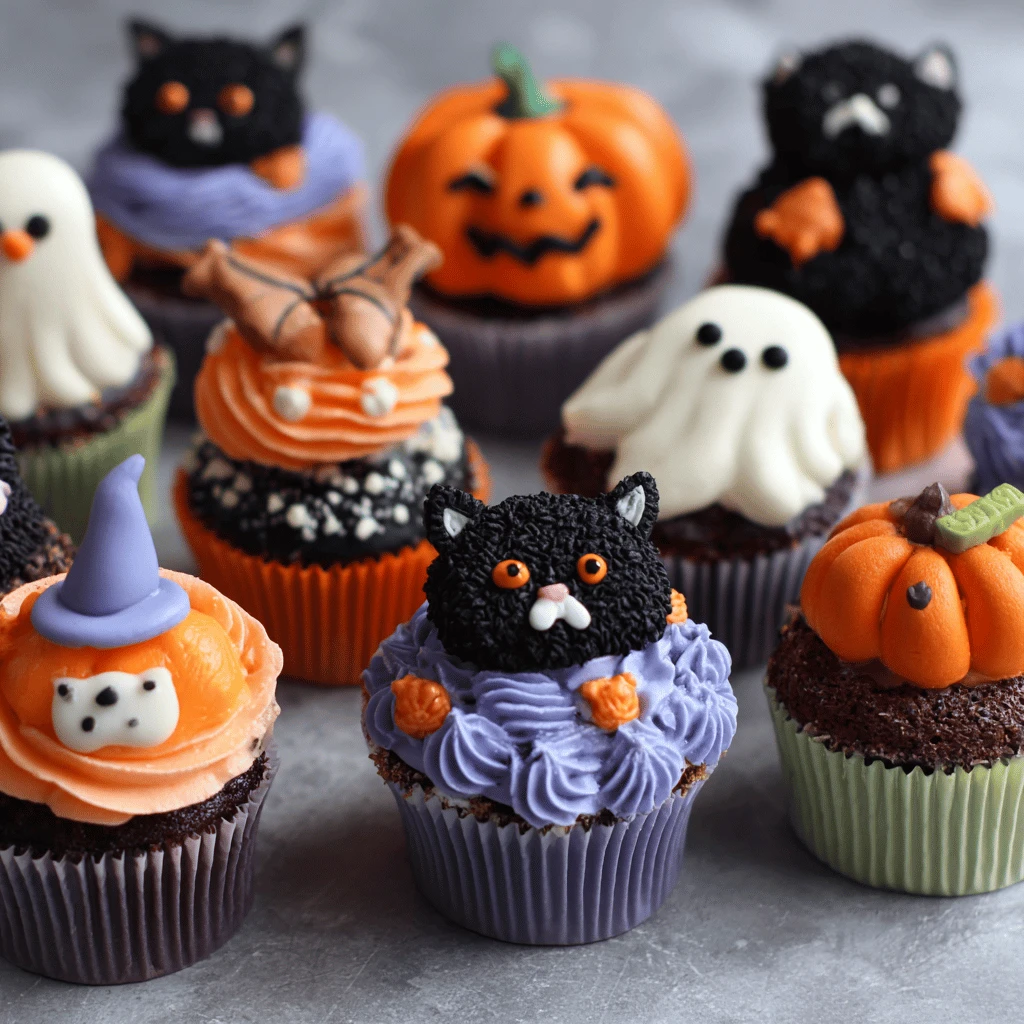
III. Creative Halloween Cupcake Decoration Ideas
The fun truly begins with the decorating! Here are some creative and spooky decoration ideas for your bite-sized Halloween cupcakes:
Spooky Spiderwebs
Create edible spiderwebs using melted chocolate or candy melts. Pipe concentric circles on top of the frosted cupcake and then drag a toothpick from the center outwards to create the web effect. Add a small plastic spider or an edible candy spider for extra creepiness.
Ghostly Cupcakes
Transform your cupcakes into adorable ghosts with a few simple steps. Frost the cupcakes with white buttercream and then use a piping bag to create a swirled ghost shape. Add mini chocolate chips or edible markers for the eyes and mouth. Alternatively, you can use white fondant to create ghost shapes and place them on top of the cupcakes.
Pumpkin Patch Cupcakes
Celebrate the harvest season with pumpkin patch-themed cupcakes. Frost the cupcakes with orange buttercream and then use green frosting to create vines. Add small candy pumpkins or fondant pumpkins to complete the look. You can also sprinkle crushed graham crackers around the base of the pumpkins to resemble dirt.
Monster Mash Cupcakes
Get creative with monster-themed cupcakes. Use different colors of frosting to create a variety of monsters, such as green Frankenstein monsters, blue furry monsters, or purple one-eyed monsters. Add candy eyes, sprinkles, and other decorations to give each monster its unique personality.
Witch Hat Cupcakes
Create adorable witch hat cupcakes by using ice cream cones as the base of the hats. Dip the cones in melted chocolate or candy melts and then place them on top of frosted cupcakes. Decorate the hats with sprinkles, edible glitter, or fondant bands.
Tombstone Cupcakes
For a spooky graveyard theme, create tombstone cupcakes. Frost the cupcakes with chocolate buttercream and then use rectangular cookies or fondant to create the tombstones. Write “RIP” or other spooky messages on the tombstones with edible markers. Sprinkle crushed Oreo cookies around the tombstones to resemble dirt.
Batty Cupcakes
Transform your cupcakes into bat-themed treats. Frost the cupcakes with chocolate or black buttercream and then use chocolate wafer cookies or fondant to create the bat wings. Attach the wings to the sides of the cupcakes and add candy eyes to complete the look.
IV. Baking and Frosting Tips for Perfect Cupcakes
Achieving perfect cupcakes requires attention to detail in both the baking and frosting stages.
Baking Techniques
- Room Temperature Ingredients: Ensure that your butter, eggs, and milk are at room temperature. This will help them emulsify properly, resulting in a smooth and even batter.
- Creaming Butter and Sugar: Cream the butter and sugar together until light and fluffy. This process incorporates air into the batter, which helps to create a tender crumb.
- Don’t Overmix: Overmixing the batter can develop the gluten in the flour, resulting in tough cupcakes. Mix until just combined.
- Fill Cupcake Liners Properly: Fill the cupcake liners about two-thirds full. This will allow the cupcakes to rise without overflowing.
- Even Baking: Rotate the muffin tin halfway through baking to ensure that the cupcakes bake evenly.
- Test for Doneness: Insert a toothpick into the center of a cupcake. If it comes out clean or with a few moist crumbs, the cupcakes are done.
- Cool Completely: Allow the cupcakes to cool completely in the muffin tin before frosting. This will prevent the frosting from melting.
Frosting Techniques
- Smooth Buttercream: For a smooth buttercream, ensure that your butter is softened but not melted. Beat the butter until light and fluffy before adding the powdered sugar.
- Consistent Consistency: Adjust the consistency of the frosting by adding milk or powdered sugar as needed. The frosting should be smooth and spreadable.
- Piping Skills: Practice your piping skills on a piece of parchment paper before decorating the cupcakes. This will help you to achieve the desired effect.
- Frosting Application: Use a piping bag or a spatula to apply the frosting to the cupcakes. Start from the center and work your way outwards.
- Clean Presentation: Use a clean spatula or knife to smooth the frosting. Wipe away any excess frosting for a clean and professional look.
- Chill the Cupcakes: After frosting, chill the cupcakes in the refrigerator for a few minutes to allow the frosting to set. This will make them easier to handle.
V. Variations and Adaptations for Dietary Needs
These Halloween cupcakes can be adapted to suit various dietary needs and preferences.
Gluten-Free Cupcakes
To make gluten-free cupcakes, substitute all-purpose flour with a gluten-free flour blend. Ensure that the blend contains xanthan gum or another binding agent to provide structure. Gluten-free cupcakes may require slightly longer baking times, so keep a close eye on them.
Vegan Cupcakes
Vegan cupcakes can be made by replacing eggs with flax eggs (1 tablespoon of ground flaxseed mixed with 3 tablespoons of water per egg) or applesauce. Substitute dairy milk with plant-based milk, such as almond milk, soy milk, or oat milk. Use vegan butter or coconut oil in place of dairy butter.
Reduced-Sugar Cupcakes
Reduce the amount of sugar in the recipe or substitute it with a sugar alternative, such as erythritol or stevia. You can also use unsweetened applesauce or mashed bananas to add sweetness and moisture.
Allergy-Friendly Cupcakes
If you have allergies, carefully check all ingredient labels to ensure they are free from allergens such as nuts, dairy, soy, or gluten. Substitute ingredients as needed to accommodate your specific allergies.
Flavor Variations
Experiment with different flavors to create unique Halloween cupcakes. Add cocoa powder to the batter for chocolate cupcakes, pumpkin puree for pumpkin spice cupcakes, or coffee extract for mocha cupcakes. You can also add spices such as cinnamon, nutmeg, or cloves to enhance the flavor.
By following these tips and techniques, you can create a variety of delicious and adorable bite-sized Halloween cupcakes that are sure to delight everyone.
FAQ Section
Q: How far in advance can I make Halloween cupcakes?
A: You can bake cupcakes 1-2 days in advance and store them in an airtight container at room temperature. Frosting can be made 2-3 days in advance and stored in the refrigerator. Decorate the cupcakes on the day you plan to serve them.
Q: How do I store decorated Halloween cupcakes?
A: Store decorated cupcakes in an airtight container at room temperature or in the refrigerator, depending on the type of frosting. Buttercream frosting can be stored at room temperature for a few days, while cream cheese frosting should be refrigerated.
Q: Can I freeze Halloween cupcakes?
A: Yes, you can freeze unfrosted cupcakes for up to 2-3 months. Wrap them tightly in plastic wrap and then place them in a freezer bag. Thaw the cupcakes at room temperature before frosting.
Q: What are some alternatives to buttercream frosting?
A: Alternatives to buttercream frosting include cream cheese frosting, chocolate ganache, whipped cream, and fondant.
Q: How can I make my cupcakes more moist?
A: To make your cupcakes more moist, add a tablespoon of oil to the batter, use buttermilk instead of milk, or brush the cupcakes with simple syrup after baking.
