
Scary Halloween Cookies: Simple Ideas for Spooktacular Treats
Halloween is the perfect time to unleash your inner baker and create treats that are both delicious and delightfully frightening. Forget complicated recipes and intricate designs – these simple cookie ideas will let you whip up a batch of scary (but tasty) Halloween cookies in no time. Whether you’re hosting a Halloween party or just want to surprise your family with a spooky snack, these ideas are sure to be a hit.
I. Easy Cookie Bases for Halloween Fun
Before you can decorate, you need a solid cookie base. The beauty of these Halloween cookies is that you don’t need to be a master baker to achieve impressive results. Here are a few simple cookie dough recipes that work perfectly for Halloween creations:
- Classic Sugar Cookies: This is the quintessential cookie base for decorating. The dough is easy to roll out and cut into shapes, and the cookies hold their shape well during baking. You can find countless sugar cookie recipes online, or use a store-bought sugar cookie mix for even greater convenience.
- Peanut Butter Cookies: For a richer, more flavorful cookie, try peanut butter. The nutty taste complements many Halloween themes, and the soft texture makes them easy to bite into. Use a simple peanut butter cookie recipe, or add a touch of cocoa powder for a “dirt” effect.
- Chocolate Cookies: Dark and mysterious, chocolate cookies are perfect for spooky designs. Choose a simple chocolate cookie recipe or adapt your favorite chocolate chip cookie recipe by omitting the chips and adding a bit of extra cocoa powder.
- Gingerbread Cookies: While often associated with Christmas, gingerbread cookies can be transformed into terrifying treats. The spicy flavor adds a unique twist to Halloween, and the sturdy texture is great for intricate decorating. Use a gingerbread cookie recipe or a mix, and experiment with different shapes and spices.
Tips for Perfect Cookie Bases:
- Chill the dough: Chilling the dough before rolling it out helps prevent it from spreading during baking, resulting in cookies that hold their shape better.
- Roll the dough evenly: Use a rolling pin to roll the dough to a uniform thickness for even baking.
- Use cookie cutters or a sharp knife: Cut out your desired shapes using cookie cutters or a sharp knife.
- Bake until lightly golden: Bake the cookies until they are lightly golden around the edges. Avoid overbaking, as this can make them dry and crumbly.
- Let cool completely before decorating: Allow the cookies to cool completely on a wire rack before decorating. This will prevent the frosting from melting.
II. Spooky & Simple Decoration Ideas
Now for the fun part: decorating! Here are some easy Halloween cookie decorating ideas that require minimal skill but deliver maximum impact:
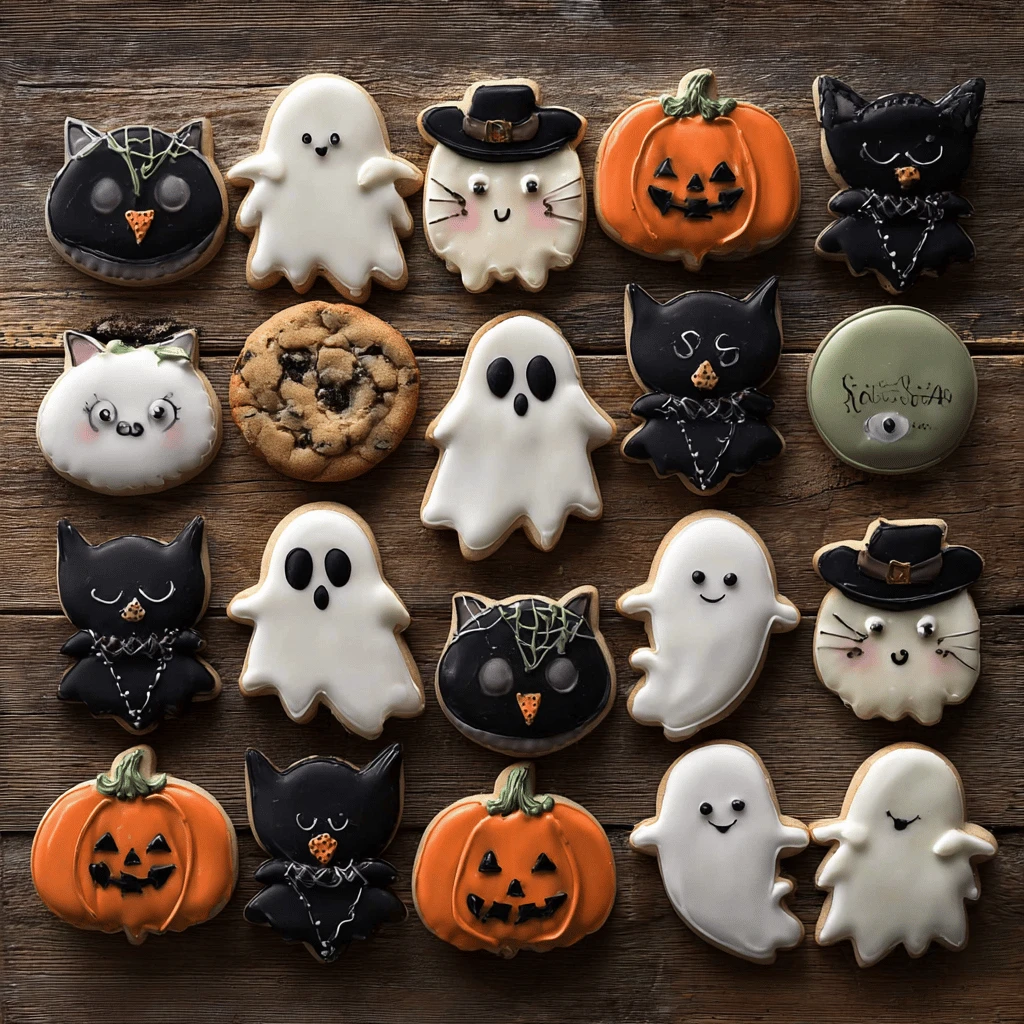
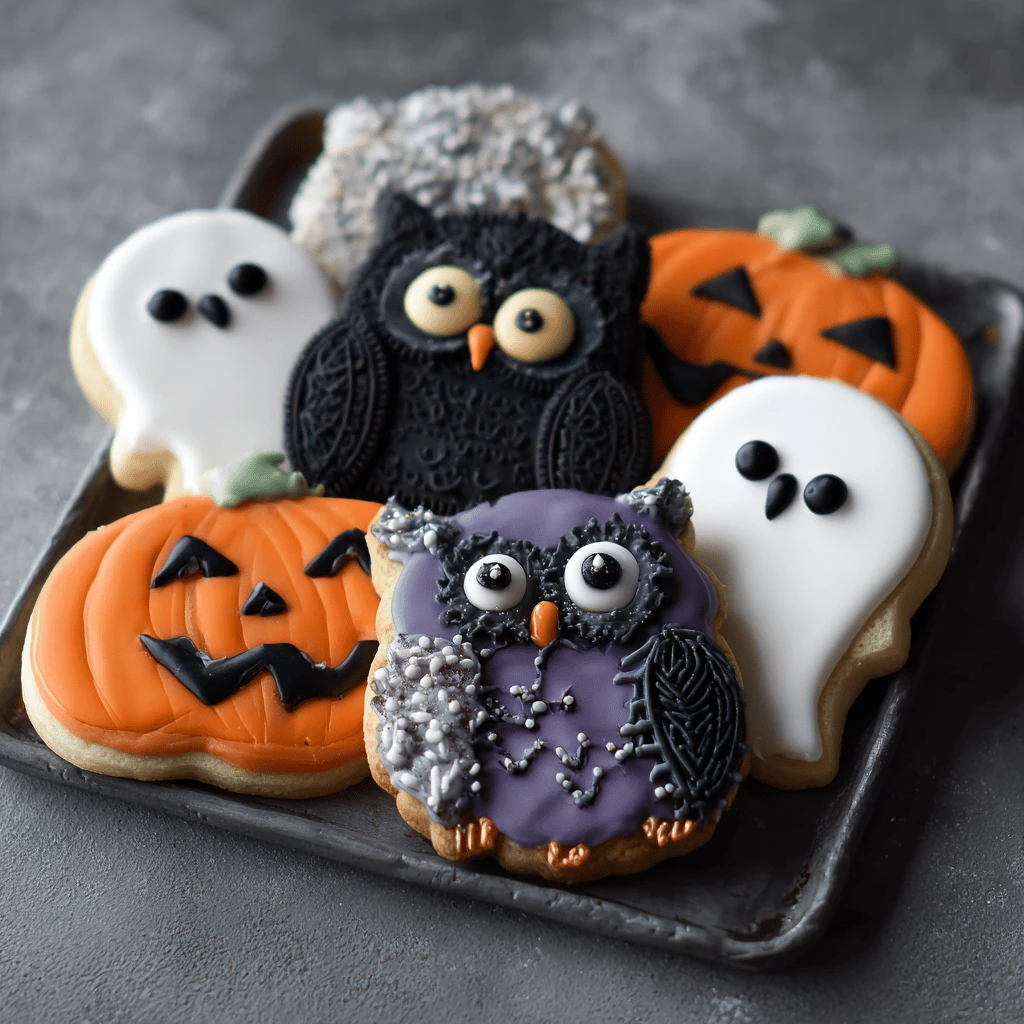
- Ghost Cookies: Ice sugar cookies with white frosting and add two black candy eyes. For an extra touch, use black decorating gel to create a simple mouth or a ghostly “boo.”
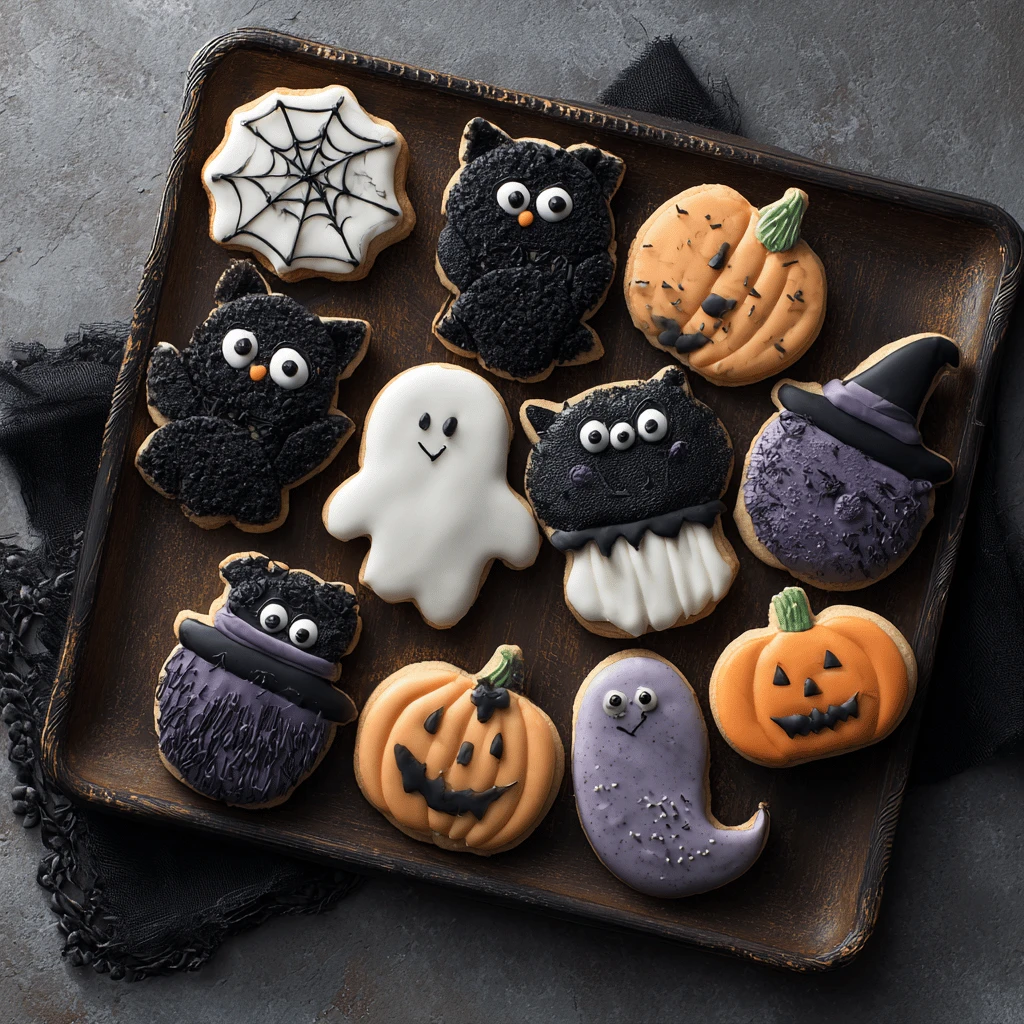
- Spiderweb Cookies: Ice cookies with a dark-colored frosting (black, chocolate, or even purple). Use white frosting to pipe concentric circles on top, then drag a toothpick from the center outwards to create a spiderweb effect. Add a small candy spider for the final touch.
- Mummy Cookies: Ice cookies with white frosting. Before the frosting sets, add two candy eyes. Then, use thin strips of white fondant or frosting to create the mummy’s wrappings, overlapping them slightly.
- Pumpkin Cookies: Ice cookies with orange frosting. Use green frosting to pipe a stem at the top. Add simple details like lines or a face with black decorating gel.
- Monster Cookies: Ice cookies with green, purple, or blue frosting. Add candy eyes in different sizes and colors. Use black decorating gel to create a mouth with jagged teeth. Add sprinkles for extra texture and fun.
- Eyeball Cookies: Ice cookies with white frosting. Place a large round candy in the center to represent the iris. Use red decorating gel to create veins around the iris.
- Bat Cookies: Use a bat-shaped cookie cutter. Ice the cookies with black frosting. Add two small candy eyes and white frosting for fangs.
- Candy Corn Cookies: Ice cookies with white frosting. Divide the cookie into thirds and color each section with yellow, orange, and white frosting to mimic candy corn.
- Skull Cookies: Use a skull-shaped cookie cutter. Ice the cookies with white frosting. Use black decorating gel to add eye sockets, a nose, and a mouth.
- Zombie Cookies: Ice cookies with green frosting. Add candy eyes in different directions. Use red decorating gel to create blood splatters.
Tips for Easy Decorating:
- Use store-bought frosting: Save time and effort by using store-bought frosting in tubes or cans.
- Use decorating gel: Decorating gel is easy to use and provides precise control for adding details.
- Use candy eyes: Candy eyes are a quick and easy way to add personality to your cookies.
- Use sprinkles: Sprinkles add texture and color to your cookies.
- Don’t be afraid to experiment: Let your creativity flow and try different combinations of colors, toppings, and techniques.
III. Advanced Decorating (But Still Simple!)
Ready to take your cookie decorating to the next level? Here are a few slightly more advanced techniques that are still easy to master:
- Royal Icing: Royal icing is a smooth, hard-drying icing that is perfect for creating intricate designs. It requires a bit more practice to get the consistency right, but the results are worth it.
- Piping Techniques: Learn basic piping techniques like outlining, flooding, and adding details with different tips.
- Fondant Accents: Use fondant to create 3D elements like small pumpkins, bats, or ghosts.
- Edible Markers: Use edible markers to draw details directly onto the cookies.
- Airbrushing: If you have an airbrush, you can use it to add subtle shading and highlights to your cookies.
Tips for Advanced Decorating:
- Practice: Practice your piping and decorating techniques on parchment paper before decorating the cookies.
- Use a piping bag with different tips: Experiment with different tips to create different effects.
- Work in layers: Allow each layer of frosting or icing to dry before adding the next layer.
- Use a scribe tool: A scribe tool can be used to smooth out the frosting and create clean lines.
- Be patient: Take your time and don’t rush the decorating process.
IV. Presentation is Key: Making Your Cookies Look Extra Scary
The way you present your cookies can make all the difference. Here are some ideas for making your Halloween cookies look extra spooky:
- Spooky Packaging: Package your cookies in clear cellophane bags tied with black or orange ribbon. Add a Halloween-themed tag or sticker.
- Themed Platters: Arrange your cookies on a platter with other Halloween treats like candy corn, chocolate bats, and gummy worms.
- Creepy Display: Create a creepy display using props like cobwebs, plastic spiders, and skulls.
- Edible “Dirt”: Crush chocolate cookies or Oreos and sprinkle them around the base of your cookies to create an edible “dirt” effect.
- Dry Ice: Add a small amount of dry ice to a bowl of water near your cookie display to create a spooky fog effect. (Use caution when handling dry ice!)
Tips for Presentation:
- Choose a theme: Select a theme for your presentation and stick to it.
- Use contrasting colors: Use contrasting colors to make your cookies stand out.
- Add height and dimension: Use different heights and dimensions to create a visually appealing display.
- Pay attention to detail: Pay attention to the small details, like the placement of the cookies and the arrangement of the props.
- Have fun!: Don’t be afraid to get creative and have fun with your presentation.
V. Safety First: Allergen Considerations and Handling
Halloween is fun, but food safety should always be a top priority. Here are some important considerations:
- Allergens: Be aware of common allergens like peanuts, tree nuts, dairy, eggs, and gluten. Clearly label your cookies if they contain any of these allergens.
- Cross-Contamination: Avoid cross-contamination by using separate utensils and surfaces for different ingredients.
- Food Coloring: Use food coloring sparingly, as some people may be sensitive to it.
- Proper Storage: Store your cookies in an airtight container to keep them fresh.
- Hand Washing: Wash your hands thoroughly before and after handling food.
Tips for Safety:
- Ask about allergies: Ask your guests about any allergies they may have before serving the cookies.
- Provide ingredient lists: Provide a list of ingredients for each type of cookie.
- Use separate serving utensils: Use separate serving utensils for each type of cookie to avoid cross-contamination.
- Store cookies properly: Store cookies in an airtight container at room temperature or in the refrigerator, depending on the ingredients.
- Discard leftovers: Discard any leftover cookies that have been sitting out at room temperature for more than two hours.
FAQ: Scary Halloween Cookies
Q: How can I make my cookies extra spooky?
A: Use dark colors like black, dark purple, and deep red in your frosting and decorations. Incorporate spooky elements like spiders, bats, skulls, and ghosts.
Q: What are some easy Halloween cookie decorating ideas for kids?
A: Ghost cookies with candy eyes, simple pumpkin cookies, and monster cookies with lots of sprinkles are great for kids to decorate.
Q: Can I freeze Halloween cookies?
A: Yes, you can freeze both baked and unbaked cookies. Freeze baked cookies in an airtight container for up to 2-3 months. Freeze unbaked cookie dough in a log or individual portions for up to 2 months.
Q: What kind of frosting is best for decorating Halloween cookies?
A: Royal icing is great for detailed decorations as it hardens well. Buttercream is also good, especially for less detailed work. A simple glaze can also be used.
Q: How do I make black frosting?
A: Use black cocoa powder and gel food coloring. Start with a chocolate base and add black cocoa for a deep color. Then, add black gel food coloring a little at a time until you reach the desired shade. Let it sit for a few hours, as the color deepens over time.
