
Easy Crispy Chicken Breast Rice Bowl
Craving a quick, satisfying, and flavorful meal? Look no further than the Easy Crispy Chicken Breast Rice Bowl. This recipe combines the comforting simplicity of a rice bowl with the irresistible crunch of perfectly cooked chicken breast. It’s a customizable dish that’s perfect for weeknight dinners, meal prepping, or a quick lunch.
Why This Crispy Chicken Breast Rice Bowl is a Winner
This isn’t just another rice bowl recipe. Several factors make this dish stand out:
- Crispy Perfection: We’ll share tips and tricks for achieving that craveable, golden-brown, crispy chicken without deep-frying.
- Quick and Easy: From start to finish, this meal comes together in under 30 minutes.
- Customizable Flavors: The recipe serves as a base, allowing you to adapt the sauces, toppings, and sides to your personal preferences.
- Budget-Friendly: Chicken breast is a relatively affordable protein, and rice is a pantry staple.
- Nutritious and Balanced: This bowl provides a good source of protein, carbohydrates, and vegetables.
Achieving Crispy Chicken Breast: The Secret’s in the Technique
Many recipes involve deep-frying to achieve crispy chicken. This method, while effective, can be messy and unhealthy. Here’s how to get that same satisfying crunch without all the oil:
The Breadcrumb Coating
The key to crispy chicken lies in the breadcrumb coating. We’ll use a three-step dredging process:
1. Flour: Provides a base for the egg to adhere to. Use all-purpose flour, or for a gluten-free option, try rice flour or a gluten-free blend.
2. Egg Wash: Acts as a “glue” to hold the breadcrumbs in place. Whisk eggs with a splash of milk or water for a smoother consistency.
3. Breadcrumbs: This is where the magic happens. Panko breadcrumbs are highly recommended for their larger size and airy texture, which creates a superior crispy coating. Season the breadcrumbs generously with salt, pepper, garlic powder, onion powder, and paprika for added flavor.
The Cooking Process
Pan-frying or baking are both viable options for cooking the chicken:
- Pan-Frying: Heat a thin layer of oil (about 1/4 inch) in a large skillet over medium-high heat. Use an oil with a high smoke point, such as vegetable oil, canola oil, or peanut oil. Once the oil is hot, carefully place the breaded chicken breasts in the skillet, being careful not to overcrowd the pan. Cook for about 4-5 minutes per side, or until golden brown and cooked through.
- Baking: Preheat your oven to 400°F (200°C). Place the breaded chicken breasts on a baking sheet lined with parchment paper. Drizzle with a small amount of oil. Bake for 20-25 minutes, or until golden brown and cooked through. For extra crispiness, broil for the last few minutes, watching carefully to prevent burning.
Tips for Extra Crispy Chicken
- Pound the Chicken: Flattening the chicken breasts to an even thickness ensures they cook evenly.
- Dry the Chicken: Pat the chicken breasts dry with paper towels before dredging. This helps the flour adhere better.
- Don’t Overcrowd the Pan: Overcrowding the pan will lower the temperature of the oil and result in soggy chicken. Cook in batches if necessary.
- Use a Meat Thermometer: Ensure the chicken is cooked through by using a meat thermometer. The internal temperature should reach 165°F (74°C).
- Rest the Chicken: After cooking, let the chicken rest for a few minutes before slicing. This allows the juices to redistribute, resulting in more tender and flavorful chicken.
Building Your Perfect Rice Bowl: Components and Combinations
The beauty of a rice bowl lies in its versatility. Here’s a breakdown of the key components and how to customize them:
The Base: Rice Selection
- White Rice: A classic choice, readily available and cooks quickly. Long-grain rice like jasmine or basmati offers a pleasant aroma and slightly fluffy texture.
- Brown Rice: A healthier option, packed with fiber and nutrients. Brown rice takes longer to cook than white rice.
- Sushi Rice: A short-grain rice that becomes sticky when cooked, perfect for holding the bowl together.
- Quinoa: A protein-rich and gluten-free alternative to rice.
- Cauliflower Rice: A low-carb and healthy option made from grated cauliflower.
The Sauce: Flavor Boosters
The sauce is what ties the whole bowl together. Consider these options:
- Teriyaki Sauce: A classic Japanese sauce, sweet and savory. You can buy pre-made teriyaki sauce or make your own.
- Sriracha Mayo: A spicy and creamy sauce made from mayonnaise and sriracha. Adjust the amount of sriracha to your desired level of heat.
- Peanut Sauce: A rich and flavorful sauce made from peanut butter, soy sauce, rice vinegar, and other ingredients.
- Sweet Chili Sauce: A sweet and slightly spicy sauce, perfect for adding a touch of sweetness and heat.
- Ponzu Sauce: A citrus-based soy sauce, tangy and refreshing.
- Unagi Sauce: A sweet and savory eel sauce, adds depth of flavor.
The Toppings: Texture and Freshness
Toppings add texture, flavor, and visual appeal to the rice bowl.
- Scallions: Provide a fresh, oniony bite.
- Sesame Seeds: Add a nutty flavor and a bit of crunch.
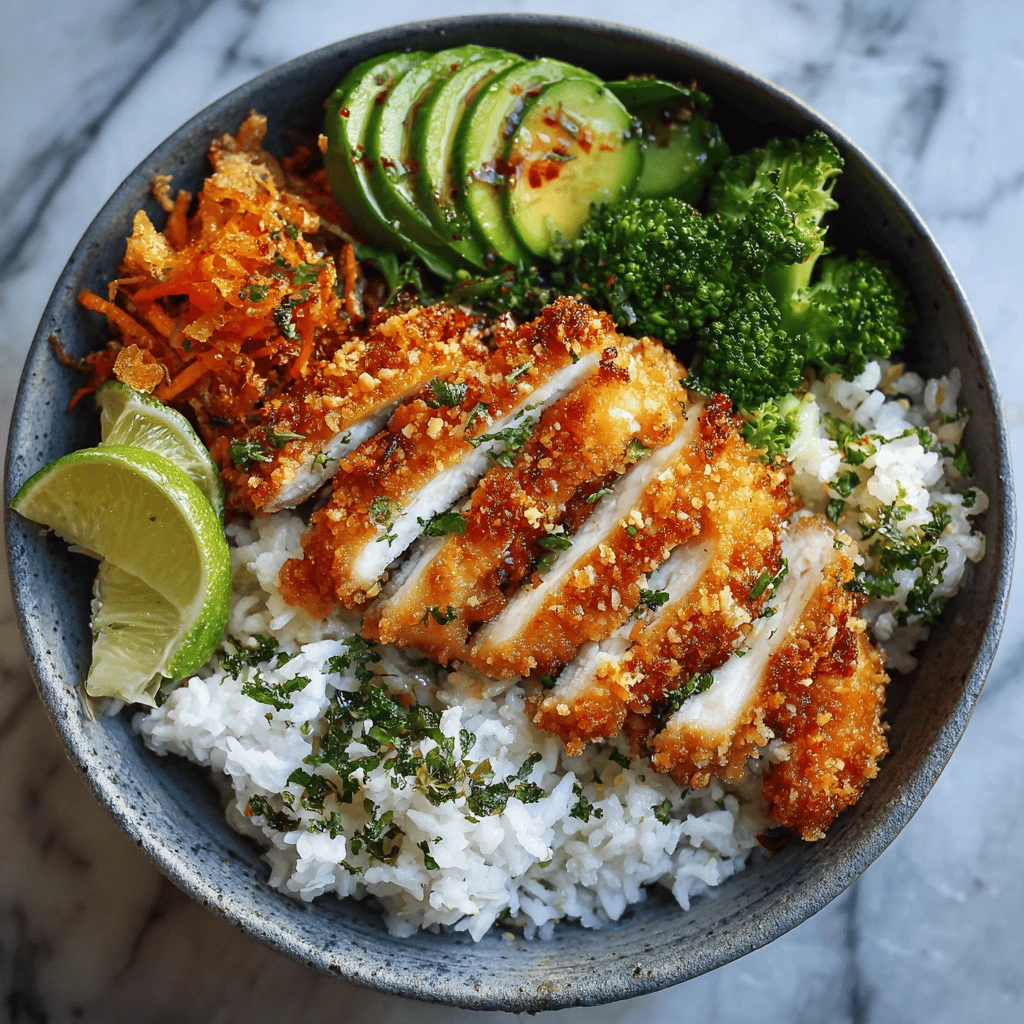
- Avocado: Creamy and healthy, provides healthy fats.
- Pickled Ginger: Adds a tangy and slightly sweet flavor, complements Asian flavors.
- Seaweed Snacks: Crunchy and salty, a great addition for umami flavor.
- Edamame: Adds protein and a slightly sweet flavor.
- Kimchi: Fermented cabbage with a spicy and sour flavor, adds a probiotic boost.
The Vegetables: Nutrient Powerhouse
Adding vegetables is a must for a balanced and nutritious meal.
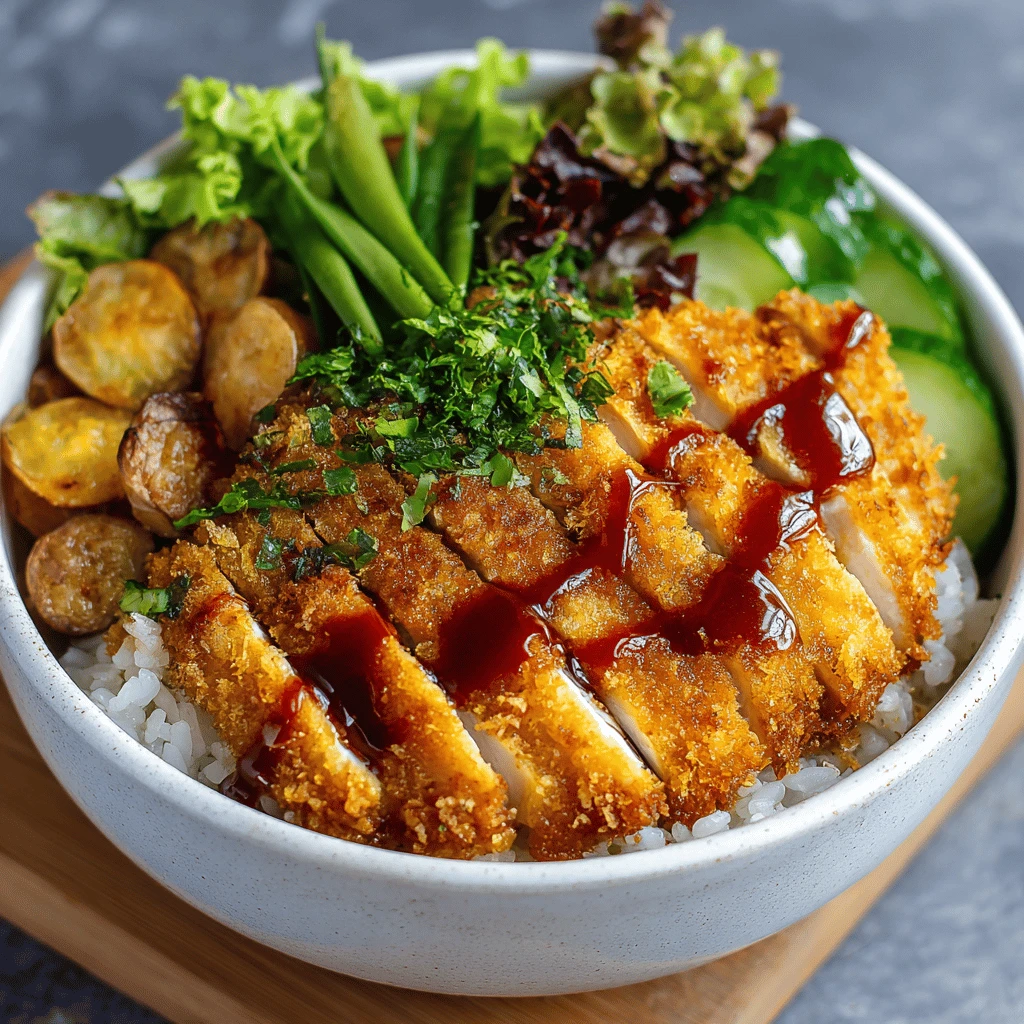
- Steamed Broccoli: A classic choice, provides vitamins and fiber.
- Sautéed Spinach: A nutrient-rich leafy green.
- Carrots: Adds sweetness and crunch. Shredded or julienned carrots work well.
- Cucumbers: Refreshing and hydrating.
- Bell Peppers: Adds sweetness and crunch.
- Bean Sprouts: Adds a crunchy texture.
Putting it All Together: Step-by-Step Assembly
Now that you have all your components ready, it’s time to assemble your rice bowl:
1. Cook the Rice: Prepare your chosen rice according to package directions.
2. Prepare the Chicken: Bread and cook the chicken breast according to the instructions above. Slice the cooked chicken into strips or cubes.
3. Assemble the Bowl: Place a generous serving of rice in a bowl. Top with the crispy chicken, your choice of vegetables, and toppings. Drizzle with your favorite sauce.
4. Enjoy: Dig in and enjoy your delicious and satisfying Easy Crispy Chicken Breast Rice Bowl!
Recipe Variations and Serving Suggestions
The beauty of this recipe is its adaptability. Here are some variations and serving suggestions to inspire you:
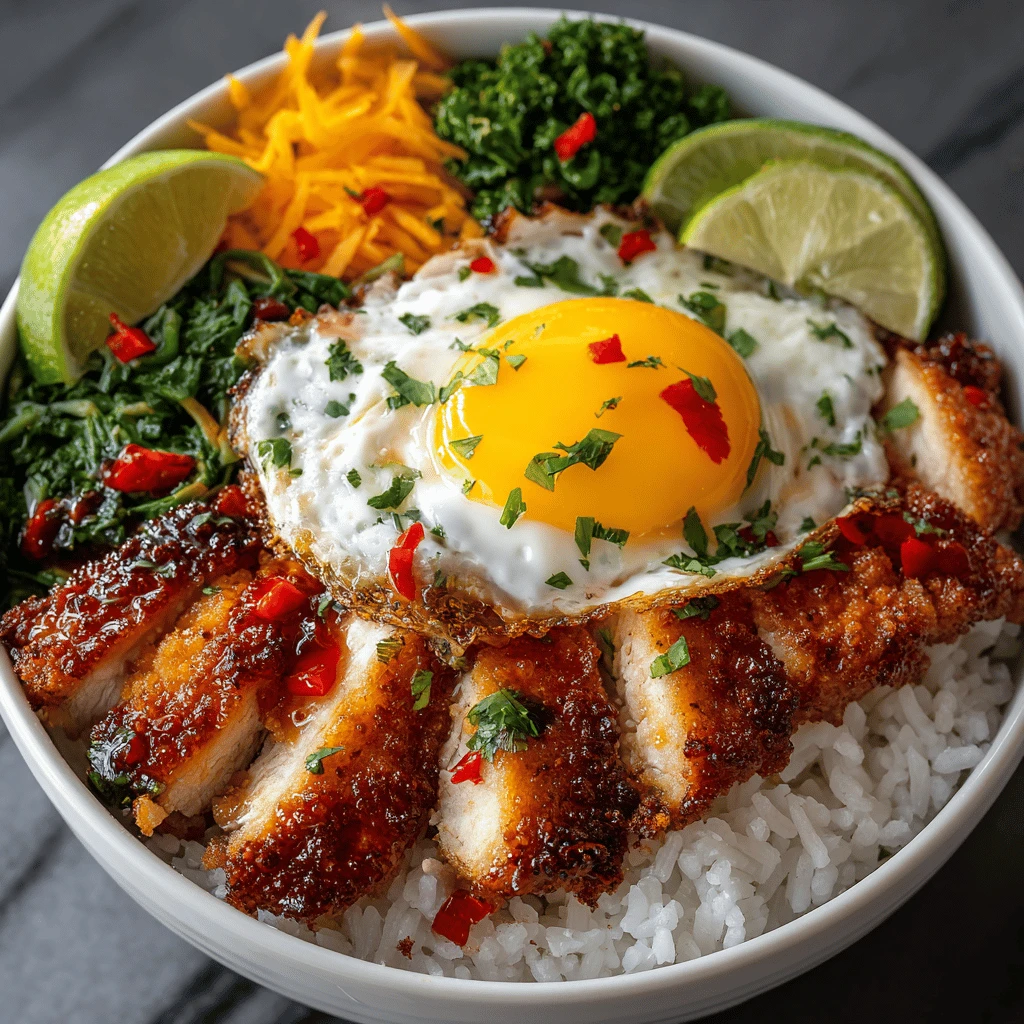
- Spicy Chicken Bowl: Add a pinch of cayenne pepper to the breadcrumb coating or use a spicy sauce like sriracha mayo or gochujang.
- Teriyaki Chicken Bowl: Use teriyaki sauce as the main sauce and add steamed broccoli and sesame seeds.
- Korean Chicken Bowl: Use gochujang sauce, kimchi, and a fried egg.
- Healthy Chicken Bowl: Use brown rice or quinoa, plenty of vegetables, and a light dressing like ponzu sauce.
- Meal Prep: Prepare the rice, chicken, and vegetables in advance and store them in separate containers. Assemble the bowls just before serving.
- Side Dishes: Serve with a side of miso soup, seaweed salad, or edamame.
Frequently Asked Questions (FAQ)
-
- Can I use chicken thighs instead of chicken breasts?
Yes, you can use chicken thighs. They will be more flavorful and tender, but may take a bit longer to cook. Make sure to cook them to an internal temperature of 175°F (80°C).
-
- Can I air fry the chicken?
Yes, you can air fry the chicken. Preheat your air fryer to 400°F (200°C). Place the breaded chicken breasts in the air fryer basket and cook for 12-15 minutes, or until golden brown and cooked through, flipping halfway through.
-
- Can I make this recipe vegetarian or vegan?
Yes, you can substitute the chicken with tofu or tempeh. Use a plant-based breadcrumb coating and egg substitute (such as flaxseed meal mixed with water).
-
- How long does the cooked chicken last in the refrigerator?
Cooked chicken will last for 3-4 days in the refrigerator.
-
- Can I freeze the cooked chicken?
Yes, you can freeze the cooked chicken. Wrap it tightly in plastic wrap and store it in a freezer-safe container. It will last for up to 2-3 months in the freezer.
