
Bloody Red Velvet Cupcakes – A Spooky Twist on a Classic
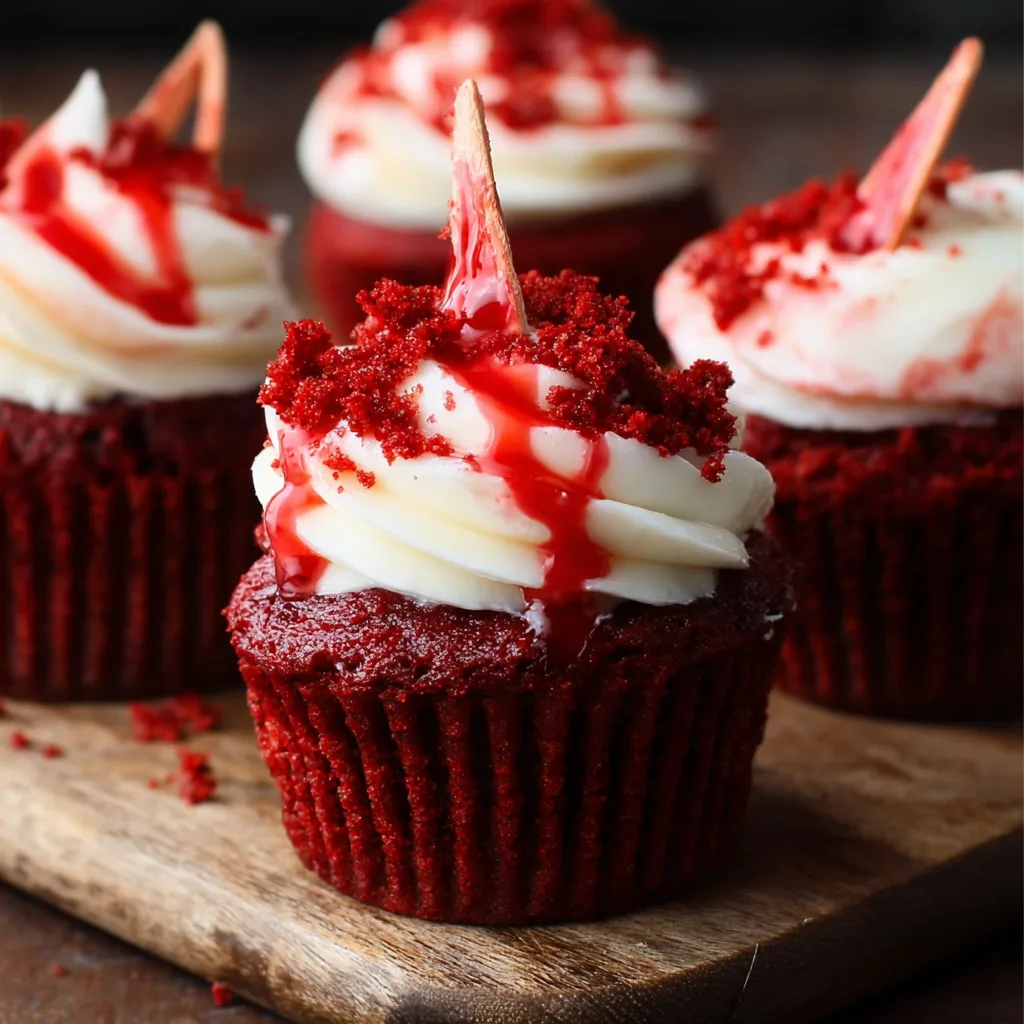
Bloody red velvet cupcakes bring dramatic flair to any Halloween table. These creepy creations blend fright and flavor into one unforgettable dessert. Perfect for horror-themed parties or spooky-season baking, they add theatrical blood effects to a rich, decadent treat. Whether you’re planning a haunted house bash or just love novelty baking, these cupcakes deliver sweet shock value with every bite.
What Makes Them “Bloody”?
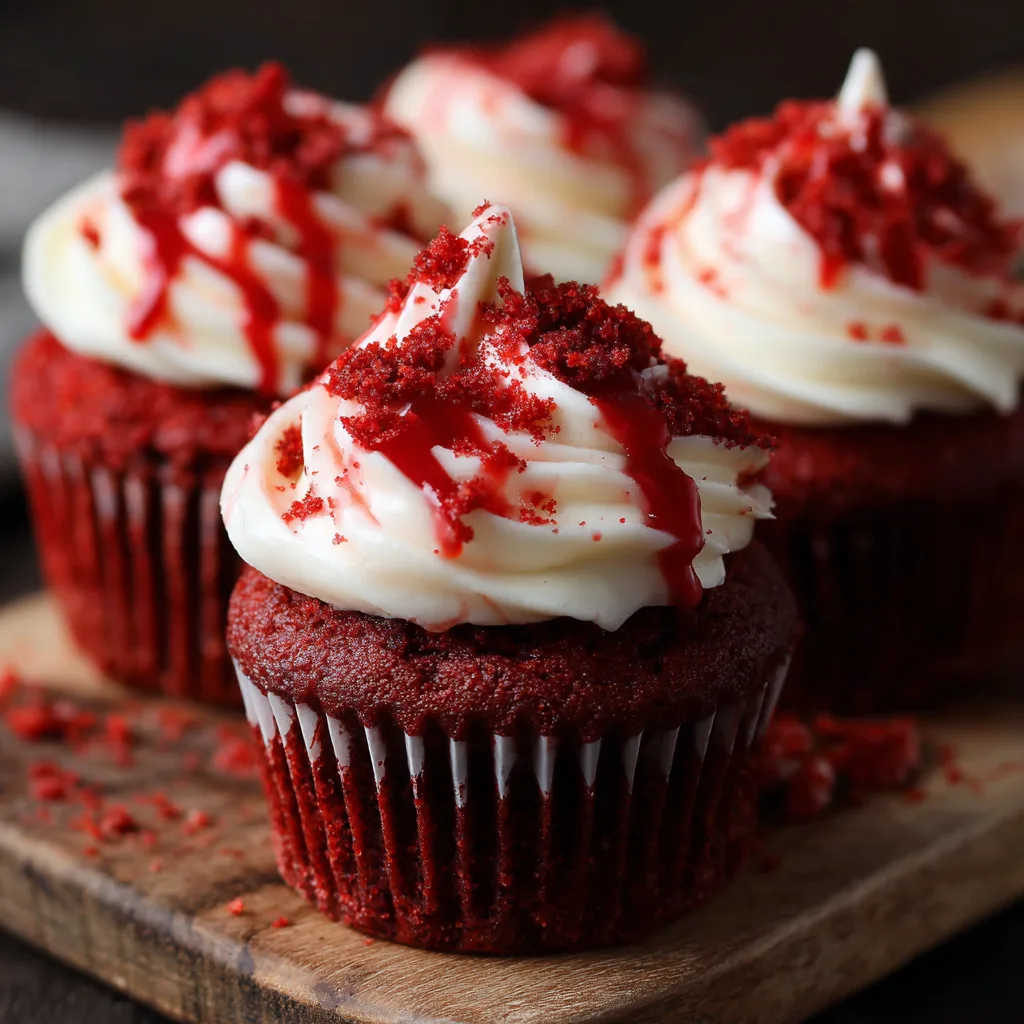
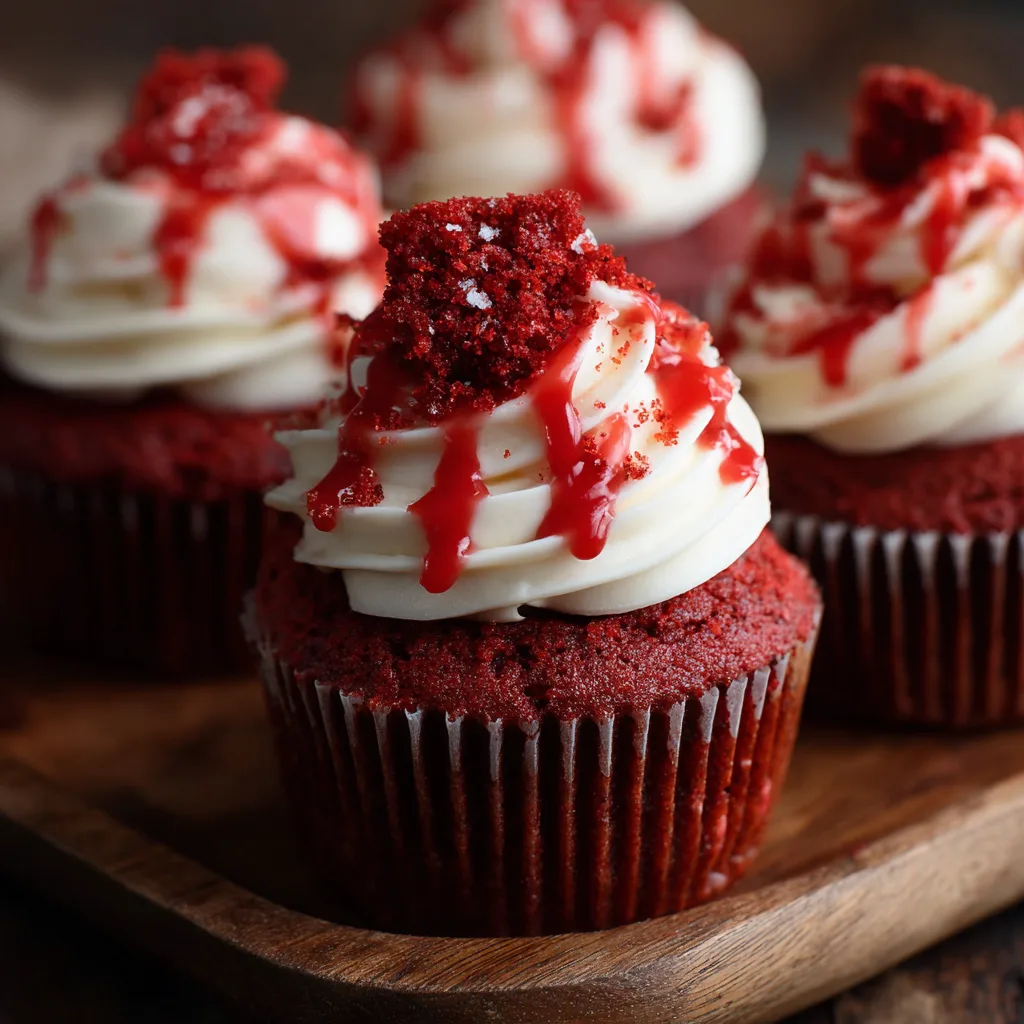
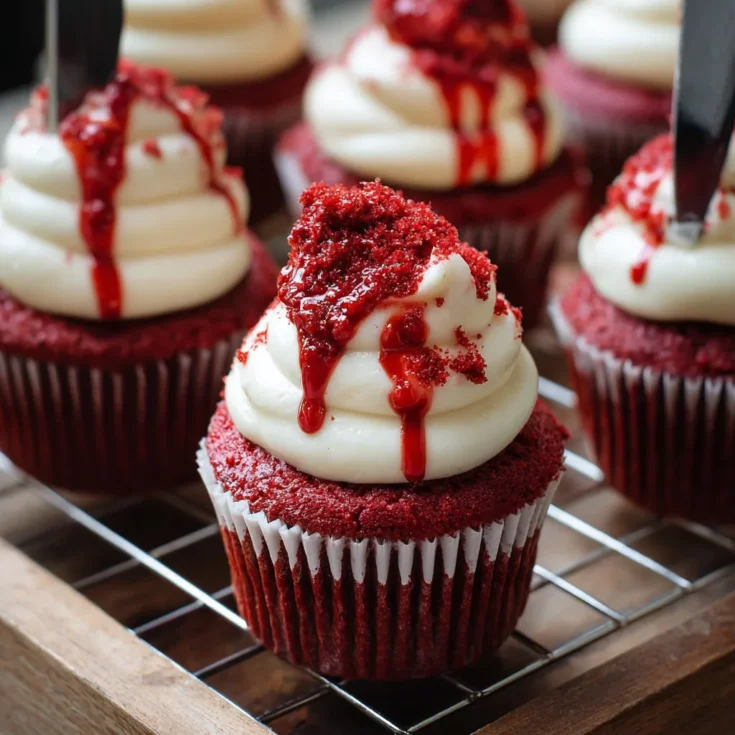
The “bloody” look comes from cleverly crafted elements that mimic real blood. A thick drizzle of raspberry or strawberry coulis oozes over the creamy frosting, giving an intense visual. Some bakers take it further by adding edible glass shards made from sugar syrup. Others use blood-red icing piped in splatter patterns. These gruesome details turn a familiar favorite into a festive fright, making the cupcakes stand out at any Halloween event.
Why Red Velvet Is Ideal for This Effect
Red velvet already boasts a rich crimson hue, thanks to food coloring or natural beet juice. This color gives it a head start when aiming for a “bloody” look. The cake itself offers more than just aesthetics—it has a subtle chocolate flavor, balanced by a mild tang from vinegar or buttermilk. Its smooth, velvety crumb pairs perfectly with soft cream cheese frosting. This contrast in color and texture makes red velvet the ideal base for Halloween-themed designs. When topped with dark coulis or sugar glass, the cupcakes become eye-catching and eerie. Red velvet cupcakes look spooky, taste indulgent, and hold their structure well—making them both beautiful and delicious showstoppers for October celebrations.,
Classic Red Velvet Cupcake Ingredients: What You’ll Need for a Frighteningly Good Base
Red velvet cupcakes start with pantry basics, but the right combinations make all the difference. Flour choice matters—cake flour gives a tender, fine crumb, while all-purpose flour adds structure. Use granulated sugar for sweetness, and unsweetened cocoa powder for that hint of chocolate flavor.
Buttermilk or vinegar reacts with the cocoa and leavening agents to create the signature soft texture. This acid also helps deepen the red hue when paired with food coloring. Some bakers swap artificial dyes for beet juice as a natural alternative, which adds color without changing the taste.
Don’t forget the eggs and oil. Eggs bind the batter and help it rise. Oil, instead of butter, keeps the cake moist and tender for longer. Finally, add vanilla extract for depth and aroma. Together, these ingredients form a rich and vibrant base that’s perfect for spooky cupcake transformations.
Cream Cheese Frosting vs Buttercream: Which Tops It Best?
Choosing between cream cheese frosting and buttercream depends on your flavor goals and event needs. Cream cheese frosting offers a slight tang that contrasts beautifully with red velvet’s mild cocoa flavor. It’s soft, silky, and spreads easily.
However, cream cheese frosting can soften quickly, especially in warm settings. If you’re serving cupcakes at an outdoor event or leaving them out for a while, stability may be an issue. Refrigeration helps but may firm it too much before serving.
Buttercream, on the other hand, is firmer and holds its shape well. It’s sweeter and more buttery, which some prefer for decorative piping. It stores better at room temperature but lacks the signature tang that makes red velvet shine. Some bakers even blend both frostings to get the best of both worlds.
Fake Blood Options: Raspberry, Strawberry, or Jam Drizzles
Creating a realistic blood effect is key to the horror aesthetic. Raspberry or strawberry coulis are popular choices because of their bold red color and pourable texture. You can make your own by simmering berries with sugar and straining the mixture for a seedless finish.
Store-bought options like jam or dessert syrup offer convenience, but check the consistency. Too thick, and they won’t drip; too thin, and they’ll run off the frosting. Reduce them gently over heat if needed. Aim for a balance—gooey enough to stay in place, but fluid enough to mimic blood.
Creepy Decorative Add-Ons: Sugar Glass and Spooky Toppers
Want to push your Halloween cupcakes over the top? Add edible sugar glass shards for a gruesome twist. Made from sugar syrup or isomalt, these shards break like real glass and look stunning when streaked with fake blood.
You can also use candy knives, royal icing blades, or small plastic props for added drama. Just be sure everything is food-safe or removed before eating. These spooky extras make your cupcakes look like they came straight out of a horror film.
Prep & Equipment Needed for Bloody Red Velvet Cupcakes
Before baking, gather your tools. You’ll need two mixing bowls—one for dry ingredients, the other for wet. A stand mixer or electric hand mixer helps save time. Line your cupcake tin with paper liners to ensure clean removal. Prepare a silicone baking mat (like a Silpat) if you plan to make edible glass shards. Have piping bags and tips ready for frosting. A candy thermometer is helpful for heating sugar to the right temperature. If using decorative knives or candies, set those aside for later.
Making the Cupcake Batter: The Blood-Red Base
Start by preheating your oven to 350°F (175°C). In a medium bowl, sift together cake flour, cocoa powder, baking soda, and salt. Sifting ensures a lump-free, airy batter. In a separate large bowl, beat sugar and eggs until light and fluffy. Add oil, vanilla, and red food coloring—or beet juice for a natural touch. Mix until smooth.
Stir in buttermilk and vinegar to give the batter its signature tang. Gradually fold in the dry ingredients, mixing just until combined. Avoid overmixing, which can toughen the crumb. The batter should be thick but smooth and deeply red. Scrape down the sides of the bowl to make sure everything is fully incorporated.
Baking and Cooling: Setting the Spooky Stage
Scoop the batter evenly into the lined cupcake tin, filling each cup about two-thirds full. Bake for 18 to 22 minutes, or until a toothpick inserted in the center comes out clean. Avoid overbaking, which can dry out the cupcakes.
Let them cool in the pan for five minutes before transferring to a wire rack. Always allow cupcakes to cool completely before frosting. Warm cake will melt the frosting and ruin the final appearance.
Frosting Preparation: Creamy Topping for Your Creepy Cakes
For the perfect cream cheese frosting, bring both cream cheese and butter to room temperature. This ensures smooth mixing. Beat them together until fluffy and lump-free. Add powdered sugar slowly, mixing until fully incorporated.
Finish with a splash of vanilla extract for extra flavor. If the frosting is too soft, chill it briefly in the fridge. For best results, transfer the frosting to a piping bag and pipe onto cooled cupcakes. Use a round or star tip for dramatic swirls that hold shape.
Creating Fake Blood: Raspberry Coulis or Corn Syrup Drizzle
To make a fruit-based blood effect, combine raspberries or strawberries with sugar in a small saucepan. Simmer gently until the berries break down. Strain the mixture to remove seeds and return the liquid to the pan.
Simmer again to reduce and thicken. The finished coulis should coat a spoon but still drip slowly. For a faster option, mix corn syrup with a few drops of red food coloring and a touch of cocoa for realism. Chill slightly to thicken before using.
Edible Glass Shards or Bloody Icing: The Final Touch
For glass shards, heat sugar, corn syrup, and water to 300°F (hard-crack stage) using a candy thermometer. Pour the mixture onto a Silpat-lined tray and let it cool. Once hardened, break it into sharp-looking shards.
Handle with care—they’re brittle but edible. Press a few shards gently into the frosting. Add drips of coulis or dyed syrup to mimic splattered blood. If preferred, skip the glass and use piped icing or candy knives for a safer but equally spooky look.
Troubleshooting Common Cupcake Problems: Color, Texture, and Decoration
If your red velvet cupcakes look pale, the issue may lie in food coloring quantity or cocoa balance. Add more gel coloring for intensity. Too much cocoa can mute the red, so measure carefully.
Dry cupcakes often result from overbaking or too much flour. Always spoon and level your flour—not scoop. Use a timer and test early for doneness.
Runny frosting usually comes from using ingredients that are too warm. Let the frosting chill if it’s too soft to pipe. For a firmer texture, add more powdered sugar.
If your coulis turns too thin, simmer it longer to reduce. Don’t skip straining—it helps the sauce stay smooth and thick.
Sticky or yellowing sugar shards indicate humidity exposure. Always store sugar glass in a dry, airtight container. Make them close to serving time for best results.
Creative Variations and Easy Substitutions for Dietary Needs
You can easily adapt bloody red velvet cupcakes for different diets. For gluten-free baking, use a 1:1 gluten-free flour blend. Add a pinch of xanthan gum for better structure.
Going dairy-free? Swap buttermilk with almond or coconut milk mixed with vinegar or lemon juice. Use vegan cream cheese and plant-based butter in the frosting.
If you need a shortcut, boxed red velvet cake mix works well. Add vinegar and a spoon of cocoa powder to improve the texture and taste. This saves time while keeping the festive look. You can still customize with homemade frosting, raspberry drip, and spooky toppings.
Mini versions of these cupcakes also work for parties. Just adjust the baking time to 10–12 minutes and decorate after cooling.
Serving and Storage: Keep Them Fresh and Fabulous
Because of the cream cheese frosting, always store these cupcakes in the refrigerator. Let them sit at room temperature for 30 minutes before serving for the best texture.
Refrigerate any leftover coulis in a sealed container. It lasts about a week and can be reheated gently for reuse.
If you want to make cupcakes in advance, freeze them unfrosted. Wrap them tightly and add frosting and decorations after thawing. Avoid freezing the sugar glass or drip—they don’t hold well in the freezer.
Frequently Asked Questions About Bloody Red Velvet Cupcakes
How long do Bloody Red Velvet Cupcakes last?
Bloody red velvet cupcakes stay fresh for 3 to 5 days when stored in the fridge. Keep them in an airtight container to prevent drying out. For best results, add the raspberry coulis or blood drizzle right before serving. This keeps the texture glossy and realistic. You can also freeze the baked cupcakes—without frosting or decorations—for up to one month. Thaw them at room temperature, then decorate as desired. Avoid freezing the sugar glass or syrup, as they don’t handle moisture well after defrosting.
Can I make them ahead of time?
Yes, these cupcakes are great for make-ahead prep. You can bake and frost them a day or two in advance. Store them in the fridge, covered, and allow them to soften slightly at room temperature before serving. For the best “bloody” effect, add the coulis or fake blood right before display. Edible sugar glass shards can be made early, but store them in a dry container to avoid stickiness or clouding. Assemble everything shortly before guests arrive for a polished, fresh look.
Can I use store-bought sauce or jam?
Absolutely. Store-bought seedless raspberry or strawberry dessert sauces make an easy and tasty shortcut. To improve their texture, thin the sauce with a little water or lemon juice. Warm it gently and test the drip. It should fall slowly, not run off. This simple option still creates a bold visual impact without the extra cooking time.
Are these safe for kids and parties?
These cupcakes are made with non-toxic, food-safe ingredients. Edible sugar glass shards are safe to eat, but should have smooth edges. Always supervise young children during serving, especially with hard decorations. You can also swap the shards for soft candy or decorative icing if preferred. They’re perfect for family-friendly Halloween parties.
Bloody Red Velvet Cupcakes – Scary-Good Halloween Dessert
A rich and spooky twist on a classic dessert—these red velvet cupcakes are topped with tangy cream cheese frosting and dripping raspberry or strawberry “blood.” Finish them with edible sugar-glass shards or eerie icing details for Halloween or horror-themed celebrations.
Ingredients
- All-purpose or cake flour
- Granulated sugar
- Unsweetened cocoa powder
- Baking soda
- Salt
- Eggs
- Vegetable oil
- Buttermilk (or dairy-free alternative)
- White vinegar
- Vanilla extract
- Red food coloring or beet juice
- Cream cheese
- Unsalted butter
- Powdered sugar
- Raspberries or strawberries (or seedless jam)
- Granulated sugar (for coulis or syrup)
- Optional: corn syrup, lemon juice, isomalt or sugar for edible glass
Instructions
☐ Preheat oven and prepare cupcake tin
☐ Sift and mix dry ingredients
☐ Whisk wet ingredients separately
☐ Combine wet and dry mixtures
☐ Fill liners and bake
☐ Cool completely on rack
☐ Make and chill frosting
☐ Pipe frosting on cupcakes
☐ Prepare raspberry coulis or blood syrup
☐ Drizzle blood topping
☐ Create and add sugar glass or candy decorations
Notes
