
Easy Chicken Broth: Why Make It at Home?
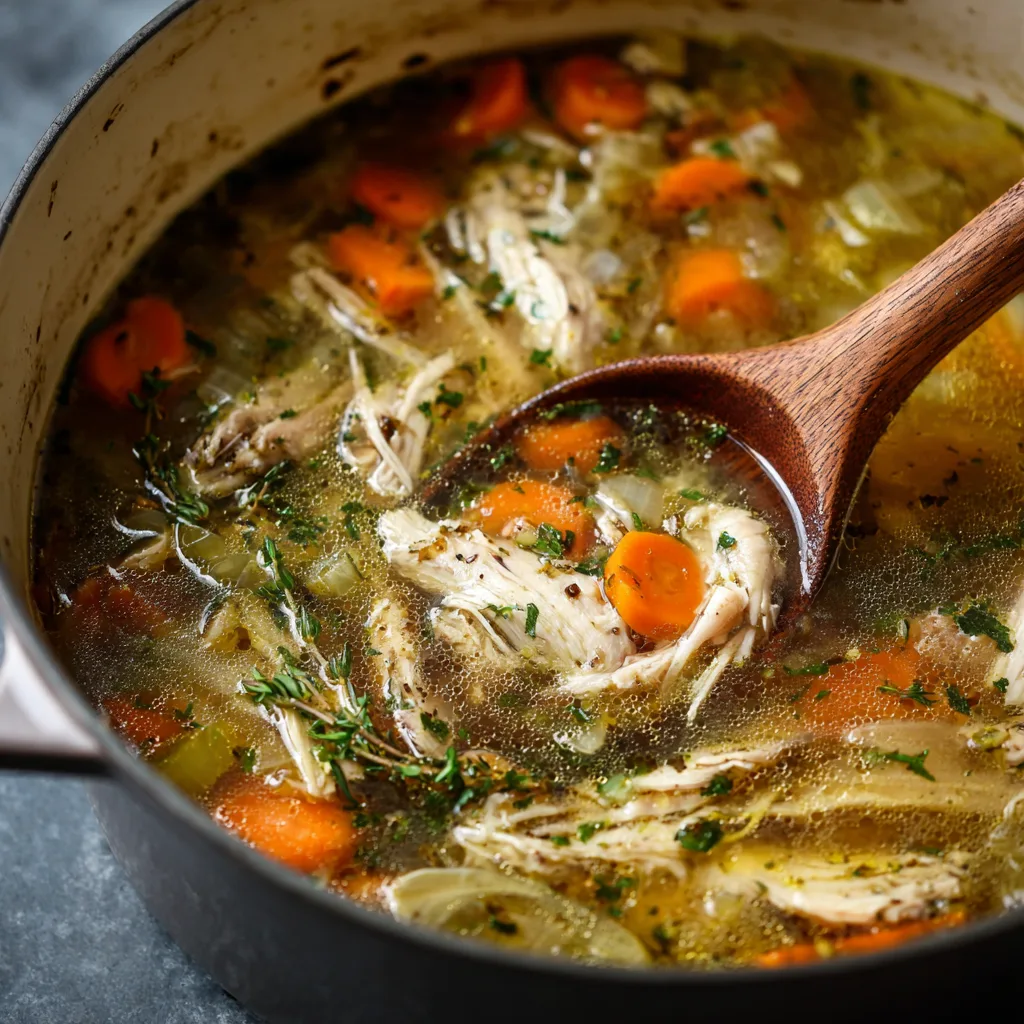
Making your own chicken broth at home transforms your cooking in remarkable ways. Unlike store-bought versions, homemade broth bursts with fresh flavor and wholesome ingredients. It’s a simple, rewarding process that elevates your meals and supports better health. Whether you use it as a base for soups, stews, or sauces, easy chicken broth adds depth and comfort to any dish.
Benefits of Homemade Chicken Broth Over Store-Bought
Store-bought broths often contain hidden additives, preservatives, and high sodium levels. When you make broth at home, you control every ingredient. This control lets you limit salt and avoid artificial flavors or chemicals. Homemade broth also delivers richer nutrients because it simmers slowly, extracting minerals and collagen from the bones and vegetables. Plus, homemade broth is budget-friendly. You can use leftover chicken bones or scraps, reducing waste while creating a nourishing kitchen staple. This simple swap leads to healthier, tastier meals that your whole family will enjoy.
Flavor Control and Health Advantages
One of the best reasons to make chicken broth yourself is flavor control. You decide how bold, rich, or delicate it tastes. Add fresh herbs or spices to suit your palate. Adjust salt and seasoning levels without worrying about excess sodium common in store brands. Homemade broth contains no preservatives, artificial colors, or additives, making it a cleaner choice for your diet. This control also means you can customize the broth for special diets such as gluten-free or low-sodium plans. Overall, homemade broth supports wellness by nourishing your body with natural, simple ingredients.
Understanding Broth vs. Stock: Flavor and Texture Differences
While broth and stock are often used interchangeably, they differ significantly. Chicken broth is lighter and more flavorful, made by simmering meat and some bones with vegetables and seasonings. Stock, on the other hand, uses mostly bones and simmers longer, resulting in a richer, gelatinous texture packed with collagen. Broth is ready to enjoy on its own or as a base, while stock offers a heartier foundation for thick sauces and braises. Knowing these differences helps you choose or make the perfect liquid for your recipes. For quick, flavorful, and versatile cooking, easy chicken broth shines.
What You’ll Need for Easy Chicken Broth: Ingredients and Equipment
Making easy chicken broth starts with choosing the right ingredients and tools. Both play a key role in creating rich flavor and smooth preparation. Here’s what you’ll need.
Chicken Choices: Picking the Best Parts for Broth
You can use a variety of chicken parts to make broth, depending on what’s available and your flavor preferences. Whole chickens provide a balanced mix of meat and bones, perfect for a well-rounded broth. If you want to use leftovers, chicken carcasses or frames work wonderfully—they still have plenty of flavor and collagen to extract. Chicken wings are excellent for adding richness since they contain a good amount of connective tissue. Rotisserie chicken scraps or bones saved from meals offer a convenient, budget-friendly option without sacrificing taste. Using these parts not only reduces waste but also creates a broth packed with nutrients and delicious flavor.
Vegetables and Aromatics: Building Flavor with Simple Additions
Vegetables and aromatics are essential for adding depth and freshness to your broth. The classic trio of onion, carrot, and celery forms a flavorful base known as mirepoix, which enhances every batch. Adding whole garlic cloves boosts the broth with gentle pungency. Fresh herbs like thyme, parsley stems, and bay leaves bring complexity without overpowering the taste. Whole peppercorns add a subtle warmth and slight spice. You can customize these aromatics based on your preferences, but keeping the core ingredients ensures a well-balanced broth with clean, vibrant flavors.
Equipment Options: Tools to Make Broth Easily
You don’t need fancy equipment to make homemade chicken broth, just a few basics. A large stockpot works best for stovetop simmering and allows plenty of room for ingredients to develop flavor. Slow cookers are perfect if you want a hands-off method that slowly extracts richness over several hours. Pressure cookers or Instant Pots speed up the process without compromising taste or nutrition. To strain the broth smoothly, use a fine-mesh strainer or cheesecloth. Finally, have clean storage containers ready for refrigerating or freezing your finished broth.
Step 1 – Prep the Ingredients: Getting Ready for Flavor
Start by trimming any excess fat or skin from your chicken parts to keep the broth clear and light. Roughly chop your vegetables—onions, carrots, and celery—into large chunks. This size helps release flavor without turning the broth cloudy. For a neat and easy cleanup, you can tie your herbs and spices in a cheesecloth sachet or use a tea infuser. This keeps the aromatics contained while allowing their flavors to infuse fully. Preparing ingredients this way streamlines the cooking process and ensures a clean, vibrant broth.
Step 2 – Simmering Options: Choosing Your Cooking Method
Stovetop Simmering
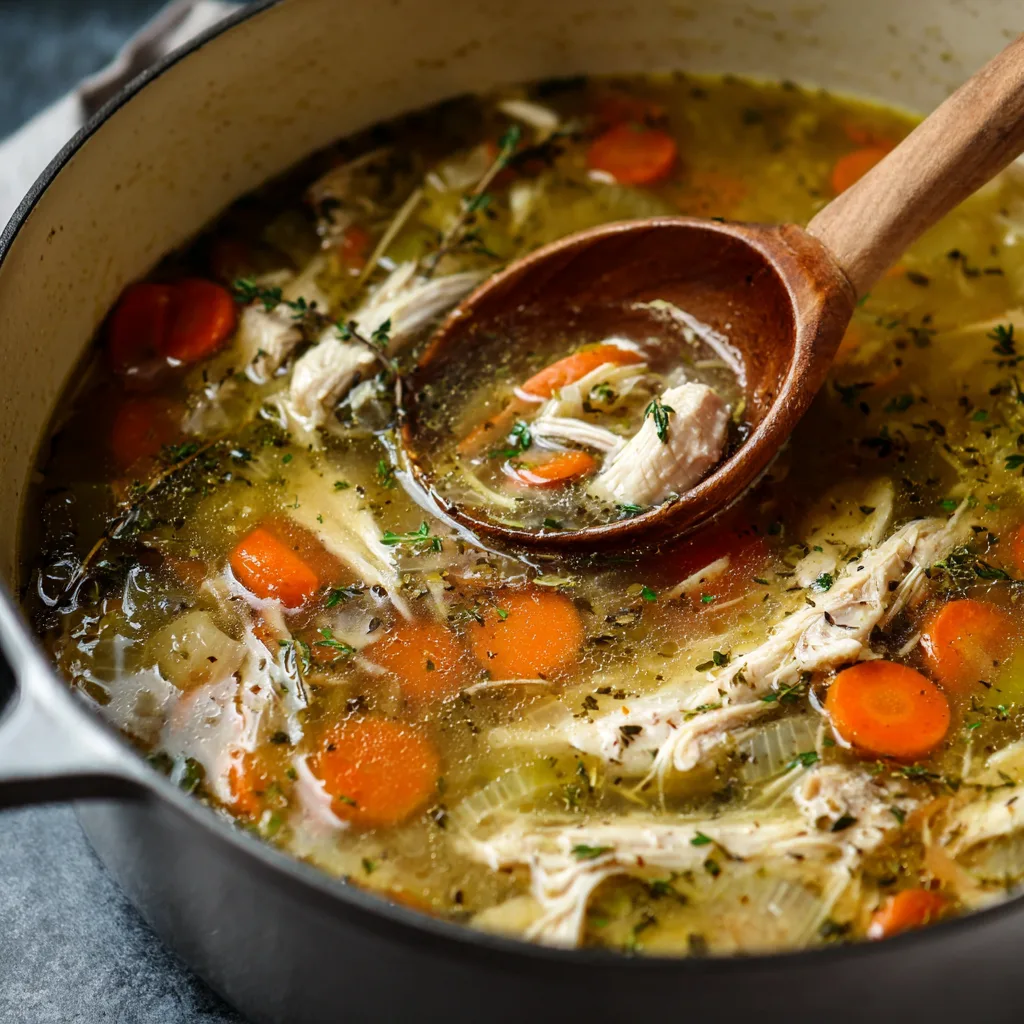
Place your chicken and vegetables in a large stockpot and cover everything with cold water by about two inches. Starting with cold water helps draw flavors gradually. Bring the pot to a gentle boil over medium-high heat. As it heats, foam and impurities will rise to the surface—skim this off regularly using a ladle or spoon. Once you remove the foam, reduce heat to low and let the broth simmer gently for 1 to 3 hours. Longer simmering extracts more flavor and nutrients, but even a shorter simmer yields a tasty broth.
Pressure Cooker Method
Using a pressure cooker or Instant Pot speeds up broth making while locking in flavor. Add all your prepared ingredients, cover with water, and seal the lid. Cook at high pressure for about 45 minutes to 1 hour. After cooking, allow the pressure to release naturally for best results. This method is excellent when you need rich broth in less time without sacrificing depth.
Slow Cooker Option
For a hands-off approach, place all ingredients in a slow cooker. Cover with water and cook on low for 10 to 12 hours. This slow, steady heat gently extracts maximum flavor and collagen, producing a deeply savory broth. Slow cooking is ideal for overnight preparation, letting you wake up to a pot of ready-to-use broth.
Step 3 – Straining & Skimming: Final Touches for Clarity
Once cooking is complete, remove large solids with a slotted spoon and strain the broth through a fine-mesh strainer or cheesecloth into a clean container. Straining removes small particles for a smooth texture. Allow the broth to cool slightly before refrigerating. As it chills, fat will rise to the surface and solidify, making it easy to skim off with a spoon. Removing excess fat improves flavor and results in a cleaner broth. Proper straining and skimming ensure your homemade chicken broth looks clear and tastes fresh.
How to Store & Preserve Your Homemade Chicken Broth
After preparing your easy chicken broth, proper storage keeps it fresh and flavorful. Store your broth in airtight containers and refrigerate it for up to 4 to 5 days. If you don’t plan to use it soon, freezing is the best option. Pour the broth into freezer-safe containers or ice cube trays for convenient portioning. Frozen broth stays good for 3 to 6 months without losing quality. Always label containers with the date to keep track. When thawing, defrost broth in the refrigerator overnight or gently warm it on the stove. Following these storage tips helps maintain your broth’s delicious taste and nutritional benefits.
Clear vs. Cloudy Broth: Achieving the Perfect Clarity
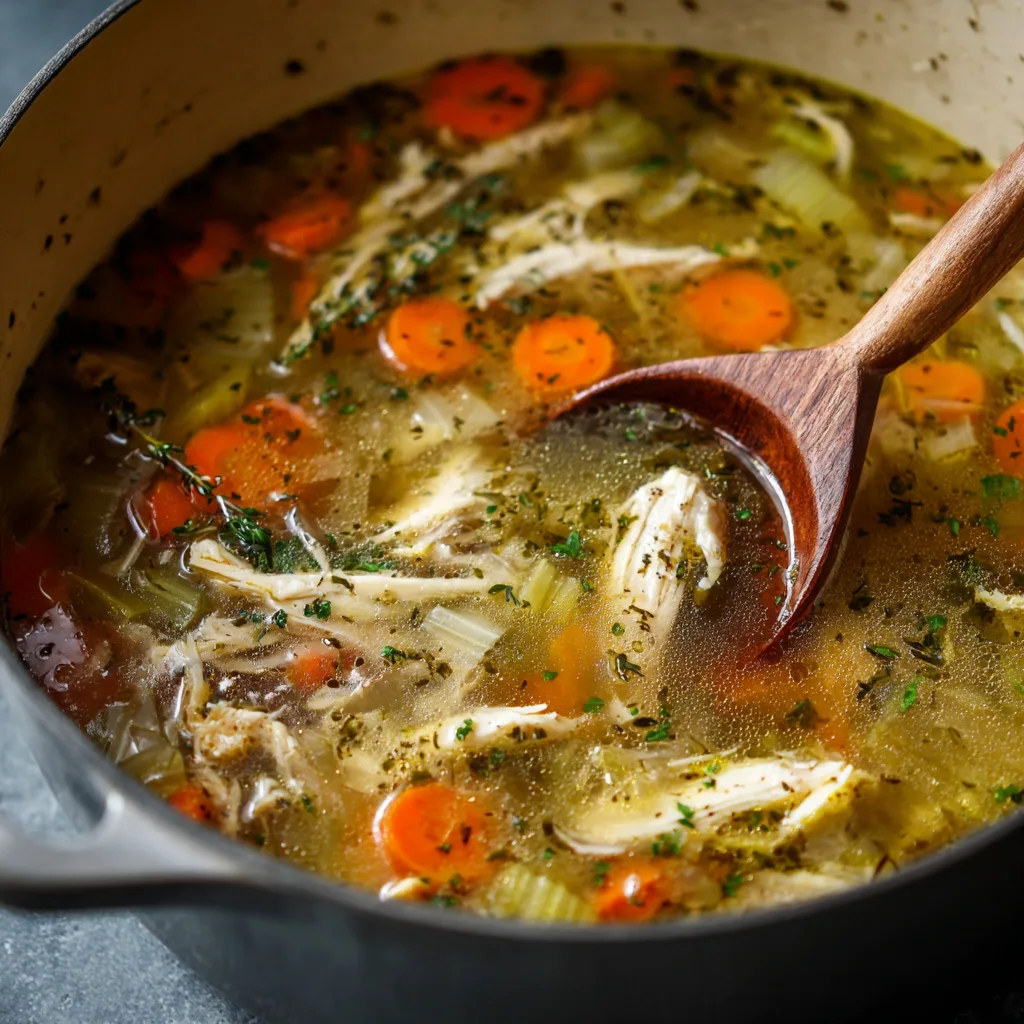
Clear broth is a sign of well-made chicken broth, and achieving this starts with gentle simmering. Always begin with cold water to help extract flavors slowly and reduce cloudiness. As the broth heats, foam and impurities will rise—skimming them regularly with a spoon prevents murkiness. Avoid boiling the broth vigorously; a gentle simmer keeps it clear while still cooking the ingredients thoroughly. Patience during cooking and attentive skimming produce broth with a clean, transparent appearance and refined flavor that enhances any dish.
Repurposing Solids & Meat: Reduce Waste and Maximize Flavor
Don’t throw away your cooked chicken and vegetables after making broth—they still have value. Remove the meat from bones and shred it for salads, sandwiches, or soups. The meat adds protein and a delicious taste boost. Vegetables like carrots and celery soften and lose flavor after simmering; these can be pureed into pet food or composted if you prefer. However, discard onion and garlic pieces as they can turn bitter after long cooking. Using these solids creatively reduces waste and makes your broth-making process more sustainable.
Versatile Uses for Easy Chicken Broth in Your Kitchen
Chicken broth is incredibly versatile and elevates countless recipes. Use it as a base for hearty soups and stews, adding depth and richness. Pour broth into risottos or cook grains like rice and quinoa to infuse them with savory flavor. It also works well for making sauces, gravies, and braises. For a simple, nourishing option, sip warm broth on its own as a comforting drink. Homemade broth’s natural richness enhances every dish, making it an essential ingredient for any home cook’s pantry.
Frequently Asked Questions About Easy Chicken Broth
What’s the Difference Between Broth, Stock, and Bone Broth?
Broth is a flavorful liquid made by simmering meat and some bones for 45 minutes to 2 hours. It tends to be lighter and ready to use quickly. Stock simmers longer, usually 4 to 6 hours, focusing more on bones, which releases gelatin for a richer texture. Bone broth takes this even further by cooking bones for 24 hours or more, resulting in a collagen-rich, nutrient-dense liquid often consumed for its health benefits. Each type serves a different purpose in cooking and nutrition.
Can I Use Boneless Chicken or No Bones for Broth?
Using bone-in chicken parts is ideal because bones release gelatin and flavor that enrich the broth’s body. Boneless chicken produces a lighter broth with less depth and thickness. While boneless chicken broth is still tasty, including bones provides a fuller mouthfeel and better nutrition. For easy chicken broth, bone-in options are recommended for the best results.
How Long Should I Simmer Chicken Broth?
Simmering times vary by cooking method. On the stovetop, simmer broth gently for 1 to 3 hours to extract flavor without cloudiness. Pressure cookers cut this time to 45 minutes to 1 hour while preserving rich taste. Slow cookers require 10 to 12 hours on low heat for maximum nutrient extraction. Choose your method based on time and convenience while ensuring gentle cooking to maintain clarity.
How Can I Keep My Broth Clear?
Start with cold water and add ingredients gradually to draw flavors slowly. Maintain a gentle simmer—avoid boiling vigorously—to prevent cloudiness. Skim foam and impurities as they rise to the surface throughout cooking. After cooking, strain the broth twice through a fine-mesh strainer or cheesecloth to remove small particles. These steps result in a clear, visually appealing broth.
How Long Can I Safely Store Homemade Chicken Broth?
Store broth in the refrigerator for 4 to 5 days in airtight containers. For longer storage, freeze broth for 3 to 6 months. Use freezer-safe containers or portion broth into ice cube trays for easy thawing. Always label your containers with the date to ensure freshness and safe consumption. Proper storage preserves both flavor and quality.
Easy Chicken Broth – Homemade, Healthy, and Full of Flavor

A simple, flavorful homemade chicken broth perfect for soups, sauces, or sipping.
Ingredients
- 1 whole chicken (4–5 lb) or equivalent bone-in pieces
- 2 carrots, rough-chopped
- 2 celery stalks, rough-chopped
- 1 onion, quartered
- 3 garlic cloves, smashed
- 1 bay leaf
- 5–10 peppercorns
- A handful of fresh herbs (thyme, parsley)
- 10–12 cups cold water
- 1 tsp salt (adjust to taste)
Instructions
☐ Place chicken, vegetables, garlic, herbs, bay leaf, peppercorns, and salt in your chosen cooker.
☐ Add cold water to cover ingredients (about 10–12 cups).
☐ For stovetop: Bring to a boil, skim foam, reduce heat, simmer partially covered for 1–3 hours.
☐ For pressure cooker: Seal lid, cook at high pressure for 45 minutes, allow natural release.
☐ For slow cooker: Cook on low for 10–12 hours.
☐ Strain broth through fine-mesh sieve or cheesecloth into a bowl or jug.
☐ Let cool slightly, refrigerate until fat solidifies, then skim off fat.
☐ Store broth in airtight containers in the fridge for 4–5 days or freeze for 3–6 months.
Notes
