
No-Bake Lotus Biscoff Cream Dessert
The first time I tasted the No-Bake Lotus Biscoff Cream Dessert, I was hooked by its velvety smoothness and the crunch of the Biscoff cookies.
I remember making it for my family on a sunny Sunday afternoon, and the aroma of Lotus Biscoff wafting through our kitchen, making everyone’s mouth water.
As we sat down to enjoy it, I realized that this No-Bake Lotus Biscoff Cream Dessert quickly became a cherished family favorite.
Why You’ll Love This No-Bake Lotus Biscoff Cream Dessert
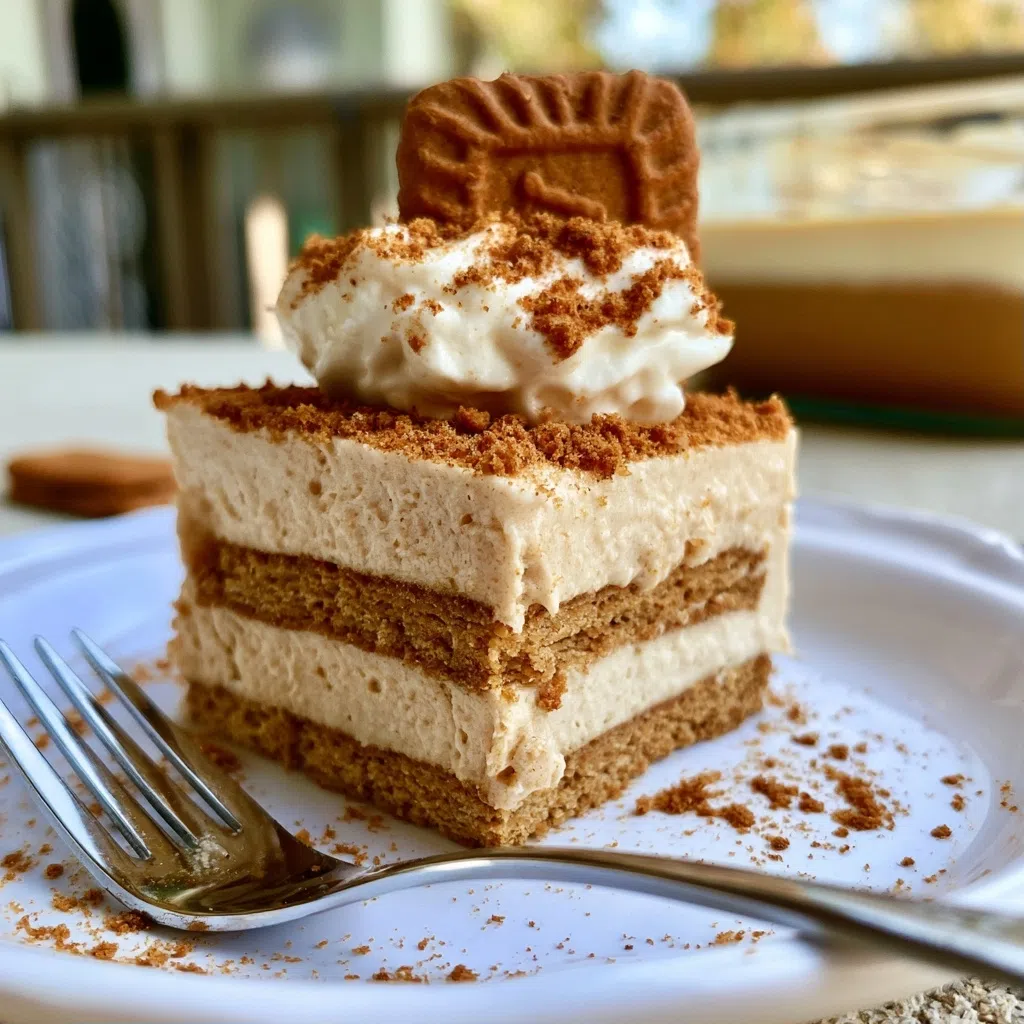
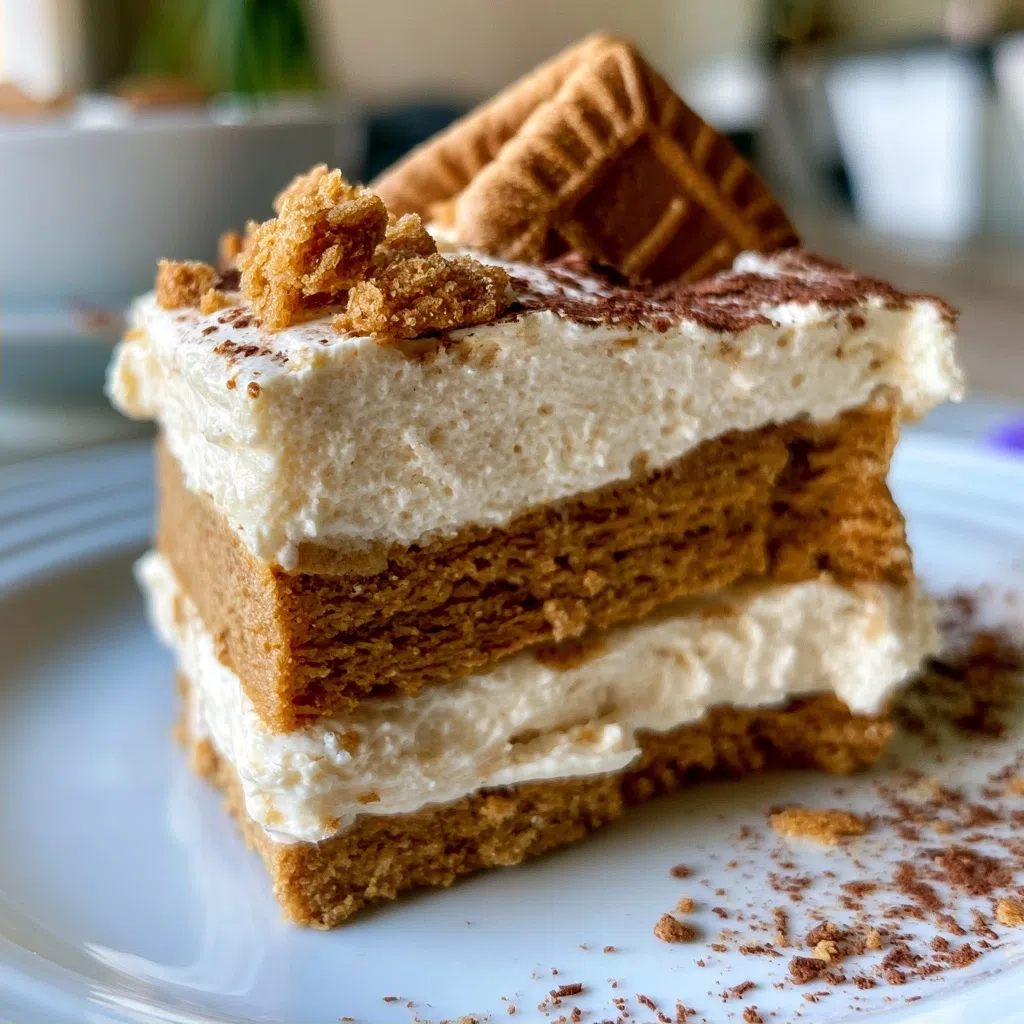
- The textures of the crunchy Biscoff cookies and the smooth cream are a perfect match.
- The flavor profile is a beautiful balance of sweet and savory, with the Lotus Biscoff adding a unique twist.
- You can make it in under 30 minutes, which is perfect for a quick dessert.
- The recipe is foolproof, and the result is always consistent.
- It’s perfect for any occasion, whether it’s a family gathering or a party with friends.
Ingredients You’ll Need
- 1 cup Lotus Biscoff cookies
- 1 cup mascarpone cheese
- 1/2 cup heavy cream
- 1/4 cup granulated sugar
- 1 tsp vanilla extract
- 1/4 cup chopped Lotus Biscoff cookies

The star ingredients of this recipe are the Lotus Biscoff cookies and the heavy cream, which provide the perfect balance of flavor and texture.
The Biscoff cookies add a unique flavor and crunch, while the heavy cream gives the dessert a smooth and creamy texture.
Expert Tips for the Best No-Bake Lotus Biscoff Cream Dessert
- The critical technique in this recipe is to chill the mixture in the fridge for at least 30 minutes to allow it to set properly.
- A common mistake is to overmix the cream, which can result in a stiff and separations.
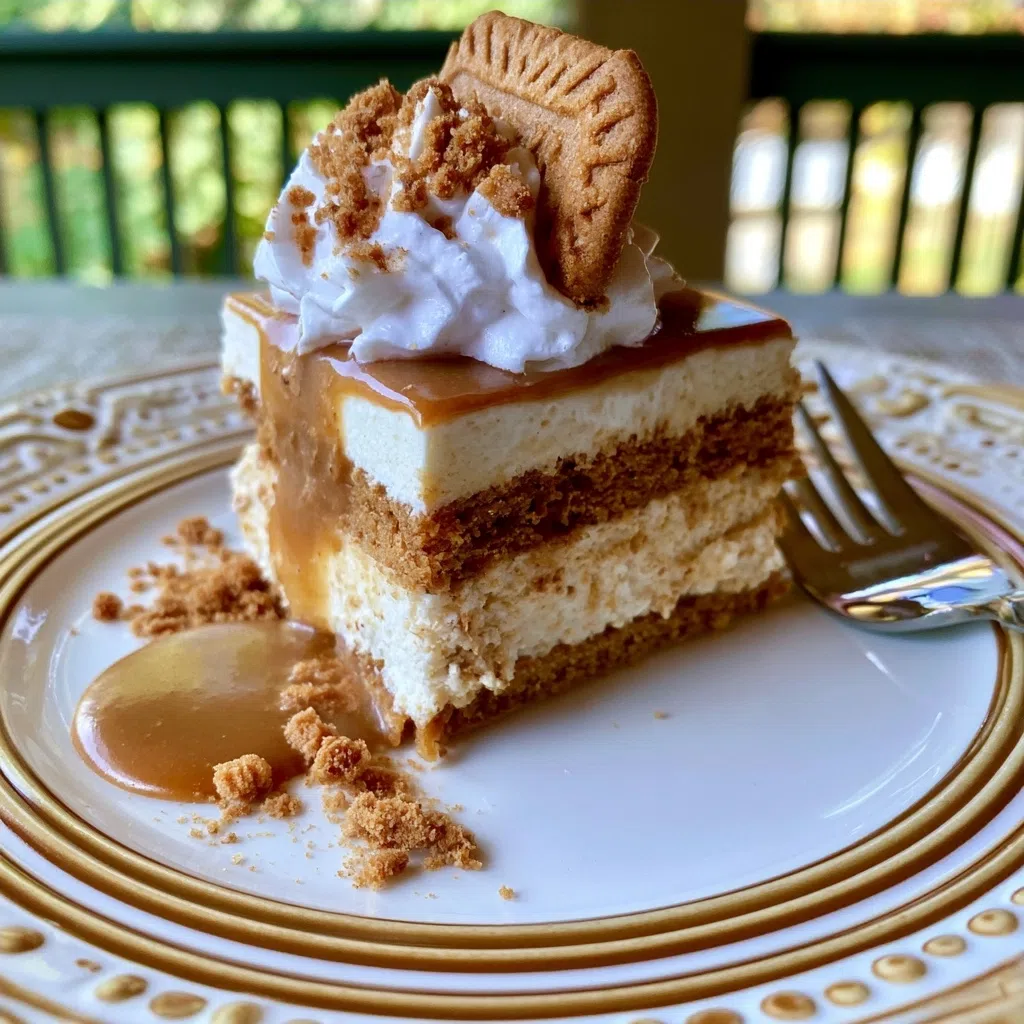
- To upgrade this recipe, you can add a layer of caramel sauce or chopped nuts on top.
- The doneness cue is when the mixture is set and firm to the touch.
- You can make this dessert ahead of time and store it in the fridge for up to 24 hours.
Variations and Substitutions
You can swap the heavy cream with a non-dairy alternative, such as almond milk or soy cream, to make it vegan-friendly.
You can also add a protein twist by mixing in some Greek yogurt or protein powder.
For a bold flavor twist, you can add a teaspoon of cinnamon or nutmeg to the mixture.
How to Store and Reheat
This dessert can be stored in the fridge for up to 3 days, and it’s best to keep it in an airtight container.
To reheat, simply leave it at room temperature for 30 minutes, or microwave it for 10-15 seconds.
Frequently Asked Questions
Yes, you can make this dessert ahead of time and store it in the fridge for up to 24 hours.
Yes, you can substitute the heavy cream with a non-dairy alternative, such as almond milk or soy cream, to make it vegan-friendly.
This dessert can be stored in the fridge for up to 3 days, and it’s best to keep it in an airtight container.
I hope you enjoy making and devouring this No-Bake Lotus Biscoff Cream Dessert as much as my family and I do!
Give it a try and let me know what you think – I’d love to hear about your experience!
Lotus Biscoff Cream Dessert
🧂 Ingredients
👩🍳 Instructions
-
1Crush the Lotus Biscoff cookies in a food processor until finely ground.
-
2In a large mixing bowl, whip the mascarpone cheese and heavy cream until stiff peaks form.
-
3Add the granulated sugar and vanilla extract to the mascarpone mixture and whip until combined.
-
4Fold in the crushed Lotus Biscoff cookies.
-
5Spoon the mixture into individual serving cups or a large serving dish.
-
6Top with additional crushed Lotus Biscoff cookies if desired.
