

Best Ever Easy Portuguese Custard Tarts (Pastel de Nata) Recipe!
There’s something truly magical about the aroma of freshly baked goods filling your home, isn’t there? For me, it instantly transports me back to a rainy Sunday afternoon years ago. I was browsing through a market in Lisbon, the vibrant city alive even under grey skies, when I first tasted a Pastel de Nata – warm, crisp, and utterly heavenly. That moment sparked an obsession, a quest to recreate that perfect bite right in my own kitchen.
After many trials and errors, countless batches, and a fair share of slightly-less-than-perfect tarts, I finally perfected this recipe for Easy Portuguese Custard Tarts (Pastel de Nata). This isn’t just a recipe; it’s a piece of sunshine, a taste of Portugal, and a truly delightful sweet treat that’s surprisingly simple to master. Prepare to impress your family and friends with this incredible comfort food that’s quickly become a family favorite.
I’ve tested this recipe countless times, ensuring it delivers that iconic caramelized top, a rich, creamy custard, and a wonderfully flaky crust every single time. Get ready to bake a little bit of happiness!

❤️ Here’s why these Easy Portuguese Custard Tarts (Pastel de Nata) are about to become your new favorite:
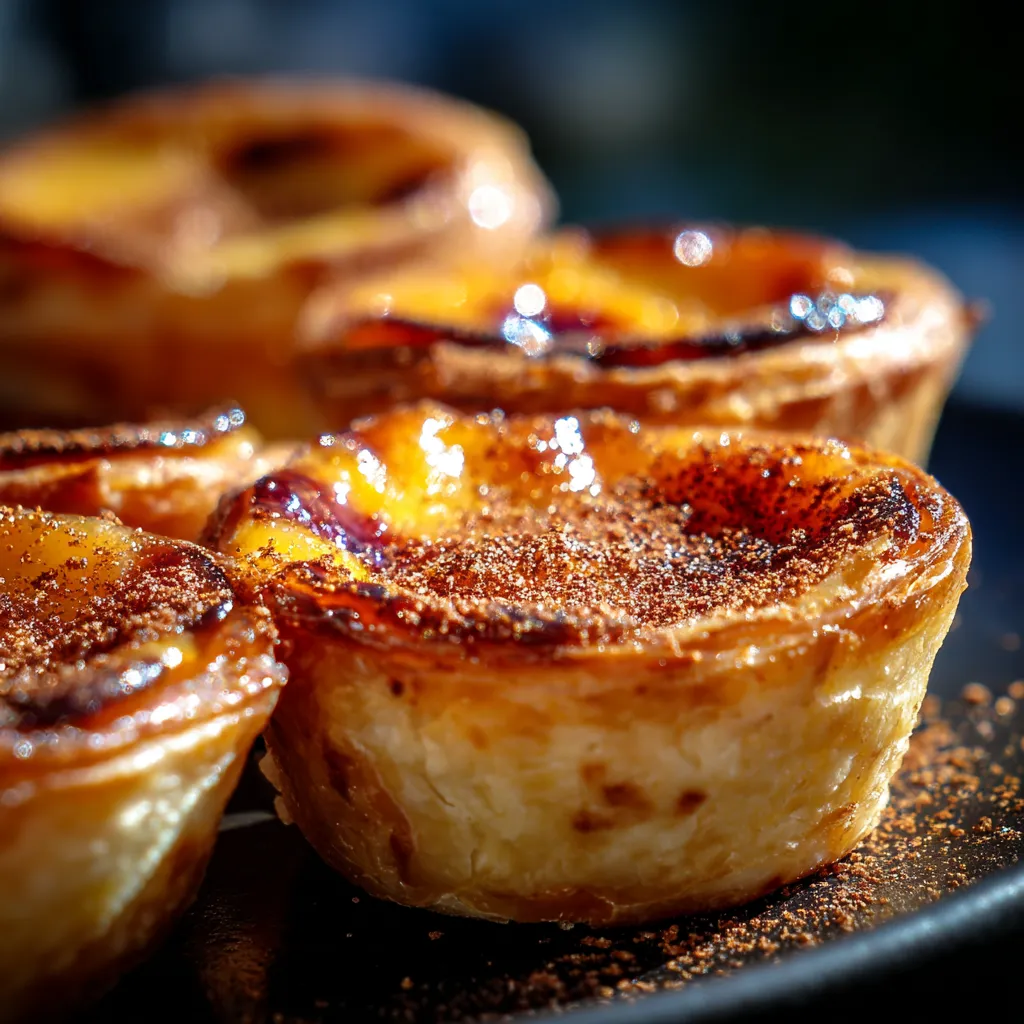
- Authentic Flavor, Simplified: We capture the incredible taste of traditional Pastel de Nata without needing a specialized bakery oven or complicated techniques. You’ll get that rich, creamy custard and distinctive caramelized spots.
- Crispy, Flaky Perfection: Using good quality store-bought puff pastry saves you time and effort, yet still delivers that wonderfully crisp, buttery crust that shatters delicately with every bite. It’s a cheat code for gourmet results!
- Effortlessly Elegant: These tarts look incredibly impressive, making them perfect for special occasions, brunch gatherings, or simply elevating your everyday dessert game. Your guests will think you spent hours slaving away!
- Crowd-Pleaser Guaranteed: From kids to adults, everyone adores these sweet, custardy treats. They disappear almost as fast as you can make them, so consider making a double batch!
- Versatile & Adaptable: While truly delicious on their own, they’re also fantastic dusted with cinnamon or powdered sugar. You can even experiment with a hint of vanilla or orange zest in the custard.
- Pure Comfort in Every Bite: There’s something deeply satisfying about the warm, sweet custard contrasted with the crisp pastry. It’s the ultimate comfort dessert, perfect for cozy evenings or a pick-me-up anytime.
What You Need
You only need a few simple pantry staples for this recipe! We’re talking basic ingredients that come together to create something truly extraordinary. Check the full printable recipe card below for detailed measurements and a complete list.
💡 Expert Tips for Perfect Pastel de Nata:
- Puff Pastry Quality Matters: While store-bought puff pastry is our time-saving hero, opt for a good quality all-butter brand if you can find it. It makes a significant difference in the flakiness and flavor of your crust. Make sure it’s fully thawed but still cold when you work with it to prevent sticking.
- Rolling Out the Pastry: Don’t be afraid to roll your puff pastry a bit thinner than it comes in the package. This helps create more layers and a crisper base. Aim for about 1/8 inch thickness. When pressing it into the muffin tin, try to stretch it up the sides slightly to create a taller edge for the custard.
- Preventing Soggy Bottoms: A hot oven is crucial! The high heat helps to rapidly cook the pastry, creating a barrier that prevents the custard from making it soggy. Don’t overcrowd the oven; bake in batches if necessary to maintain consistent heat.
- Tempering the Egg Yolks: This step is vital for a smooth, lump-free custard. Slowly stream a small amount of the hot milk mixture into the beaten egg yolks while whisking constantly. This gradually brings the yolks up to temperature without scrambling them. Once tempered, you can add the yolk mixture back into the main saucepan.
- Strain for Silky Smoothness: After combining the custard, always strain it through a fine-mesh sieve. This removes any tiny bits of cooked egg yolk or flour lumps, ensuring your custard is incredibly silky and professional-looking. Don’t skip this step!
- Don’t Fear the Char: Those beautiful, dark caramelized spots are the hallmark of authentic Pastel de Nata! Bake them at a high temperature until the custard bubbles vigorously and the tops turn dark brown in spots. This isn’t burnt; it’s flavor!
- Cooling is Key: While tempting to devour them straight from the oven, allowing the tarts to cool slightly in the muffin tin before transferring to a wire rack helps them set properly and prevents breakage. They’re delicious warm or at room temperature.
- Keep it Clean: Always scrape the bottom of your saucepan when whisking the custard to prevent scorching. A rubber spatula or flat-bottomed whisk works wonders here.
- Adjusting Sweetness (Optional): The provided sugar amount creates a perfectly balanced sweetness. However, if you prefer a less sweet dessert, you can slightly reduce the sugar by 1-2 tablespoons, though I don’t recommend reducing it too much as it affects the texture.
Variations & Substitutions
This classic recipe is perfect as is, but if you’re feeling adventurous or have dietary needs, here are a few ideas:
- Citrus Zest: Instead of lemon, try orange zest for a slightly different aromatic profile. You can also add a tiny pinch of freshly grated nutmeg to the custard.
- Vanilla Bean: For an extra layer of luxury, infuse the milk with half a vanilla bean, split and scraped, along with the cinnamon stick. Remove it before straining.
- Gluten-Free: You can experiment with gluten-free puff pastry (available in some specialty stores) and a gluten-free all-purpose flour blend in the custard. Results may vary slightly, but it’s definitely worth a try!
- Dairy-Free Custard: While challenging to replicate the exact richness, you could try substituting whole milk with full-fat canned coconut milk and using a plant-based butter alternative for the pastry. You might need to adjust the flour slightly for custard consistency.
- Spiced Custard: Add a tiny pinch of ground cardamom or star anise to the milk mixture for a unique twist.

Storage & Freezing
These Easy Portuguese Custard Tarts (Pastel de Nata) are best enjoyed fresh, ideally on the day they are made, when the pastry is at its crispiest. However, you can store them for a short period:
- Countertop: Store leftover tarts in an airtight container at room temperature for up to 1 day. The pastry may lose some of its crispness, but the custard remains delicious.
- Refrigerator: For longer storage, keep them in an airtight container in the refrigerator for up to 3 days.
- Reheating: To restore some crispness, reheat chilled tarts in a preheated oven at 350°F (175°C) for 5-7 minutes, or until warmed through and the pastry crisps up.
- Freezing: I don’t recommend freezing baked tarts as the texture of the custard can change upon thawing, and the pastry can become quite soggy.
FAQ
Q: Why aren’t my tarts getting those dark caramelized spots?
A: The key is a very hot oven! Ensure your oven is fully preheated to 500°F (260°C). If your oven runs cool, you might need to adjust the temperature up slightly. Also, make sure you’re filling the tarts just enough (about two-thirds full) so the custard can bubble and brown effectively without overflowing.
Q: Can I use a different type of pastry?
A: For authentic Pastel de Nata, puff pastry is essential for that distinctive flaky texture. While you could technically use shortcrust pastry, the result would be more like a traditional custard tart and less like the Portuguese classic. Stick to puff pastry for the best experience!
Q: My custard is lumpy, what went wrong?
A: Lumpy custard is usually due to not whisking constantly while heating the milk mixture, or not tempering the egg yolks slowly enough. Ensure you’re whisking vigorously over medium heat, and always strain your custard through a fine-mesh sieve before pouring it into the pastry shells to catch any lumps.
Ready to Bake Your Own Little Piece of Portugal?
I hope you’re as excited as I am to bring the irresistible flavors of Portugal into your home with these Easy Portuguese Custard Tarts (Pastel de Nata). They’re more than just a dessert; they’re a little taste of sunshine, history, and pure baking joy. Don’t hesitate to dive in – you’ll be so glad you did!
If you make this recipe, be sure to tag me on social media! I love seeing your creations. Happy baking, friends!
Pin this recipe for later!
Easy Portuguese Custard Tarts (Pastel de Nata) Recipe!
Ingredients
- 1 sheet (14 oz / 400g) good quality puff pastry, thawed
- 1 ½ cups (360ml) whole milk
- ¾ cup (150g) granulated sugar
- ¼ cup (30g) all-purpose flour
- 6 large egg yolks
- 1 lemon, zested (peel only, no white pith)
- 1 cinnamon stick
- Pinch of salt
Instructions
- Step 1 Preheat oven to 500°F (260°C). Lightly grease a 12-cup standard muffin tin or use non-stick spray.
- Step 2 On a lightly floured surface, roll out the thawed puff pastry slightly thinner, to about 1/8 inch thickness. Using a 3-inch round cutter (or rim of a glass), cut out 12 circles. Press each pastry circle into the cavities of the muffin tin, allowing the edges to come up slightly to form a cup.
- Step 3 In a medium saucepan, combine the whole milk, granulated sugar, all-purpose flour, lemon zest, and cinnamon stick. Whisk constantly over medium heat until the mixture thickens and just comes to a gentle boil. Remove from heat and discard the cinnamon stick and lemon zest.
- Step 4 In a separate small bowl, whisk the 6 egg yolks until smooth. Slowly stream about half a cup of the hot milk mixture into the egg yolks while whisking continuously. This is tempering and prevents the yolks from scrambling. Once tempered, pour the egg yolk mixture back into the saucepan with the remaining milk mixture.
- Step 5 Return the saucepan to low heat and whisk for another 1-2 minutes until the custard thickens slightly more. Do not boil. Remove from heat.
- Step 6 Strain the custard through a fine-mesh sieve into a clean bowl to ensure a perfectly smooth and silky consistency. Let cool for about 5-10 minutes.
- Step 7 Pour the warm custard evenly into the prepared puff pastry shells, filling each about two-thirds full.
- Step 8 Bake for 15-20 minutes, or until the pastry is golden brown and flaky, and the tops of the tarts are beautifully caramelized with dark, blistered spots. Keep a close eye on them as caramelization can happen quickly!
- Step 9 Carefully remove the muffin tin from the oven and let the tarts cool in the tin for 5-10 minutes before gently transferring them to a wire rack to cool completely. Serve warm or at room temperature, optionally dusted with extra cinnamon or powdered sugar.
