
Zesty & Crisp: How to Make Pickled Carrots – 4 Quick & Easy Canning Recipes!
My grandmother always had a jar of something wonderful pickling on her counter. It was her secret weapon for adding a burst of flavor to any meal, a culinary magic trick she performed with effortless grace. I still remember the sweet-tangy aroma filling her kitchen on a warm summer afternoon, a scent that instantly brings back cherished memories of family gatherings and laughter. She taught me the joy of preserving, and how a simple vegetable could transform into something truly extraordinary, packed with incredible taste and a satisfying crunch.
Today, I’m thrilled to share her wisdom (and a few of my own modern twists!) with you. If you’ve been looking for a way to add a vibrant side dish, a crunchy snack, or a unique garnish to your everyday meals, then learning How to Make Pickled Carrots – 4 Quick & Easy Canning Recipes! is exactly what you need. This comprehensive guide is packed with tried-and-true methods that make simple canning approachable and fun, even for beginners, ensuring you get perfect results every time.
These recipes have been tested countless times in my own kitchen, meticulously refined, and shared with friends and family, always receiving rave reviews for their irresistible flavor and satisfying texture. They’re a fantastic way to enjoy garden-fresh carrots long after harvest season, offering a delightful pop of flavor that can brighten up any plate and elevate any meal. Get ready to fall in love with homemade pickled carrots – your taste buds will thank you!

Why You’ll Love This Recipe
❤️ Here are all the reasons you’ll adore making and eating these incredible pickled carrots:
- Incredible Flavor Burst: These pickled carrots boast an irresistible balance of sweet, sour, and savory, with a satisfying, refreshing crunch. Each bite delivers a vibrant explosion of taste that will awaken your palate and leave you craving more, making them a standout addition to any meal.
- Unmatched Versatility: From being a perfect zesty side dish to a crunchy salad topping, a tangy sandwich addition, or simply a delicious snack straight from the jar, their uses are endless. They can elevate a simple lunch or complement a hearty dinner, proving their worth in any culinary scenario.
- Surprisingly Easy Canning: My recipes are specifically designed to be quick and incredibly simple, making the home canning process less intimidating and more accessible for everyone. Even if you’re new to canning, you’ll find these instructions straightforward and rewarding, demystifying the art of preservation.
- Endlessly Customizable: You have complete freedom to easily adapt the spices, herbs, and heat level to perfectly suit your unique taste preferences. Want more garlic? Add it! Craving a spicy kick? Throw in some extra chili flakes. The possibilities for personalization are truly limitless.
- Extended Long Shelf Life: Enjoy the deliciousness of these perfectly preserved carrots for months on end, thanks to the magic of proper canning techniques. This makes them ideal for stocking your pantry, ensuring you always have a healthy, flavorful option readily available for meal prepping or last-minute additions.
- Budget-Friendly & Economical: This is a fantastic and smart way to utilize an abundance of fresh carrots, whether they’re from your garden, a farmer’s market haul, or a sale at the grocery store. Preserving them yourself saves money compared to store-bought options and reduces food waste, making it a win-win for your wallet and the environment.
- Healthy & Guilt-Free Snack: Low in calories and absolutely packed with essential vitamins and nutrients, these pickled carrots are a truly guilt-free indulgence. They offer a satisfying crunch and a burst of flavor without compromising your healthy eating goals, making them an excellent choice for any time of day.
- Thoughtful & Impressive Gift Idea: Beautifully jarred homemade pickled carrots make incredibly thoughtful, personalized, and impressive gifts for friends, family, or neighbors. A hand-prepared gift shows care and effort, and everyone appreciates a delicious, edible present made with love.
What You Need
You only need a few simple, everyday pantry staples to create these delicious pickled carrots! The beauty of this recipe lies in its simplicity, proving that incredible flavor doesn’t require a long list of obscure ingredients. Check the full printable recipe card below for detailed measurements and exact ingredient quantities.
Expert Tips
💡 Unlock the secrets to perfect pickled carrots every time with these essential expert tips:
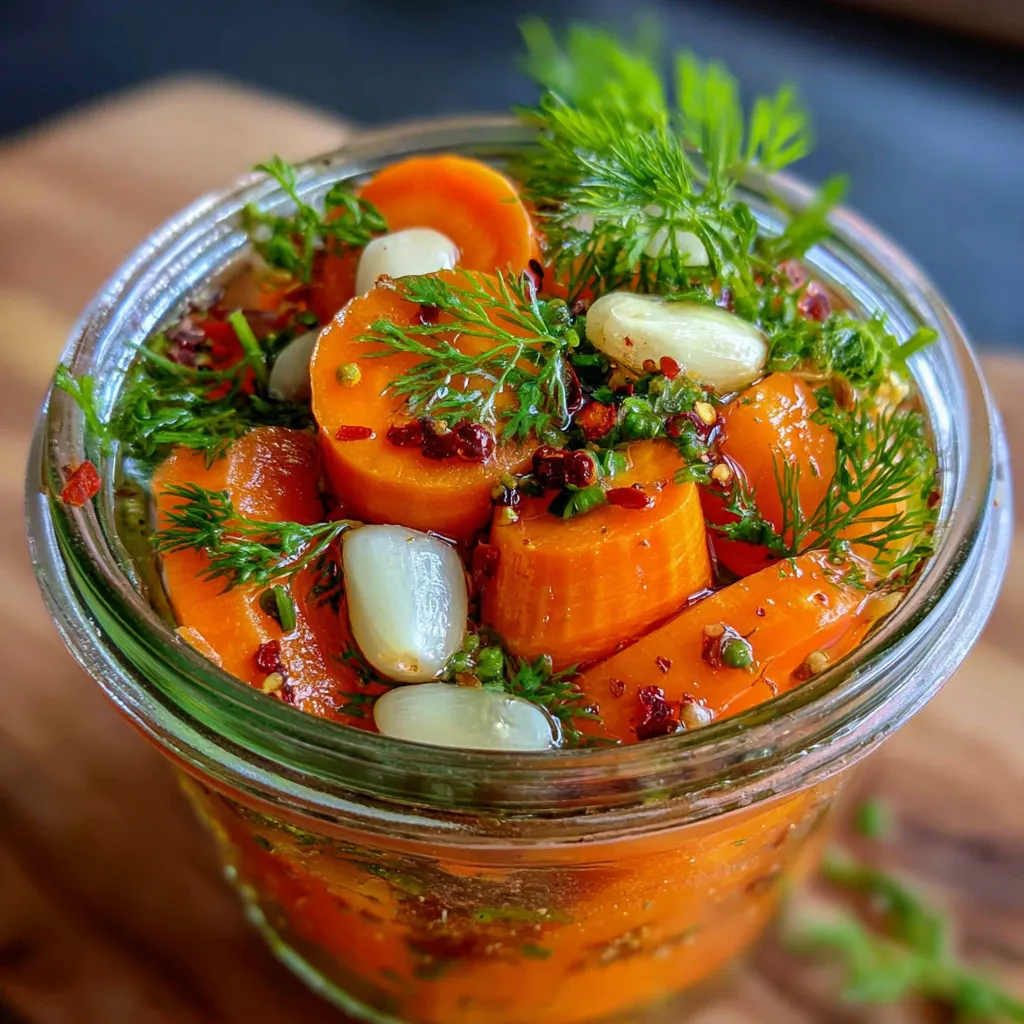
- Select the Freshest Carrots: Always start with crisp, firm, and vibrant carrots for the best texture and flavor. Smaller, younger carrots are often naturally sweeter and more tender, providing an ideal base for pickling. Avoid any soft or limp carrots, as they won’t yield that satisfying crunch.
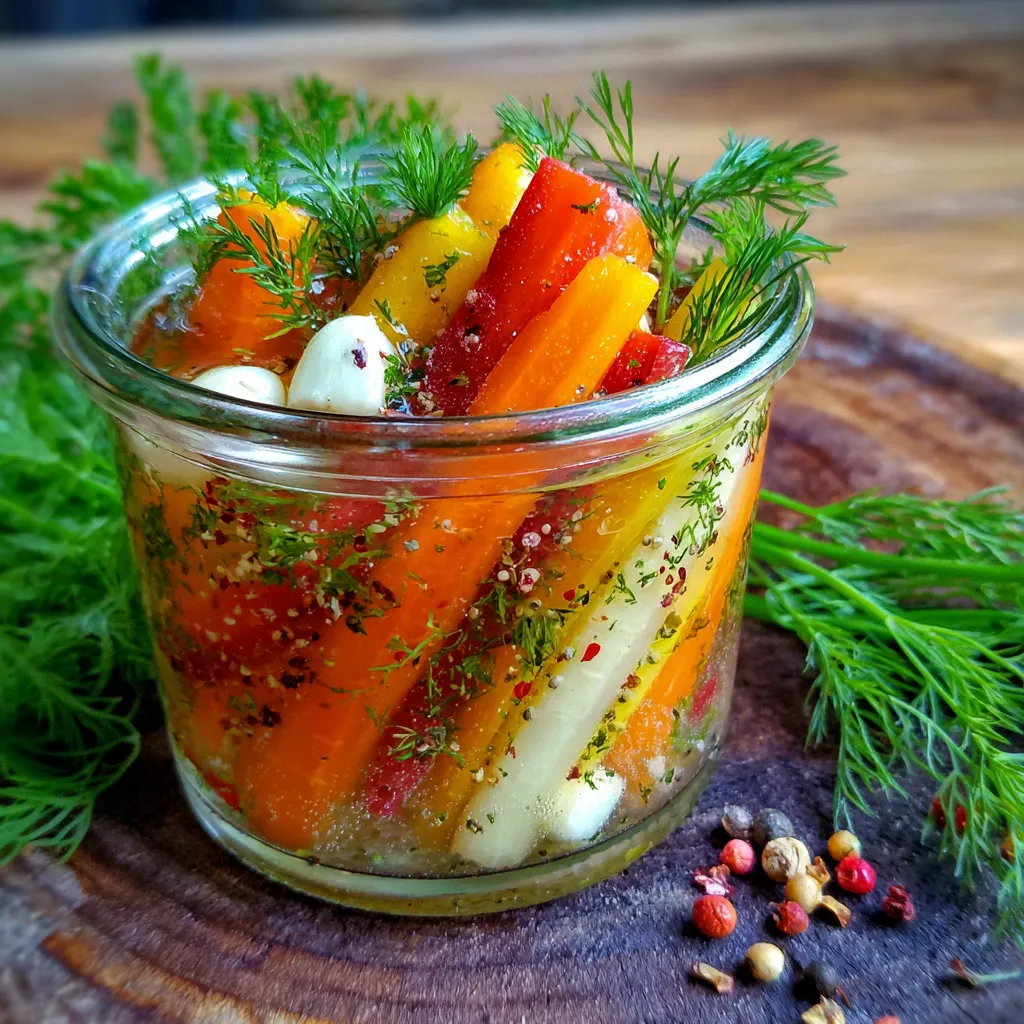
- Ensure Uniform Sizing: Cut your carrots into uniform sizes – whether sticks, rounds, or coins – to ensure even pickling and consistent texture. This also helps them cook evenly during the canning process and looks much more appealing in the jar.
- Meticulous Jar Sterilization: This step is absolutely crucial for food safety and achieving a long, stable shelf life. Follow recommended canning guidelines carefully for sterilizing your jars and lids; proper hygiene prevents spoilage and ensures your hard work lasts.
- Respect Headspace Requirements: Always leave about ½ inch of headspace in your jars. This allows for proper expansion during the processing phase and creates a strong, reliable seal, which is vital for safe home canning.
- Embrace the Hot Pack Method: For optimal results and to help prevent spoilage, pour hot pickling brine over hot carrots in hot, sterilized jars. This method minimizes temperature shock and helps to create a better vacuum seal.
- Efficiently Vent Air Bubbles: After filling your jars with carrots and brine, gently use a non-metallic utensil (like a chopstick or plastic knife) to release any trapped air bubbles. This ensures the brine fully surrounds the carrots and aids in achieving a proper seal.
- Adhere to Processing Times: Strictly adhere to the recommended water bath canning times specified in the recipe. These times are crucial for destroying harmful bacteria and ensuring the safety of your preserved goods. Never shorten the processing time.
- Allow for Slow Cooling: After processing, allow your jars to cool undisturbed on a clean towel or cooling rack for 12-24 hours. Resist the urge to touch or tighten the lids during this critical cooling period, as it allows for the seals to properly form.
- Verify Jar Seals: Once completely cool, check the seals by pressing on the center of each lid. The lid should be concave and not flex or pop when pressed. If a jar doesn’t seal, simply refrigerate it and consume its contents within a few weeks.
- Label and Store Thoughtfully: Clearly label each jar with the date of canning and its contents. Store your sealed jars in a cool, dark, and dry pantry away from direct sunlight for optimal preservation and to maintain quality over time.
- Patience is Your Best Ingredient: While it’s incredibly tempting to dive in immediately, wait at least 2-4 weeks before opening your first jar. This resting period allows the flavors to fully meld, infuse, and develop, resulting in the most delicious and perfectly pickled carrots.
Variations & Substitutions
One of the joys of making homemade pickled carrots is how easily you can customize them to suit your palate or whatever ingredients you have on hand. Don’t be afraid to get creative!
- Spicy Kick: For those who love a bit of heat, simply add a pinch of red pepper flakes, a few slices of fresh jalapeño, or even a dash of cayenne pepper directly to the brine or into each jar before pouring the brine. Adjust to your desired level of spice.
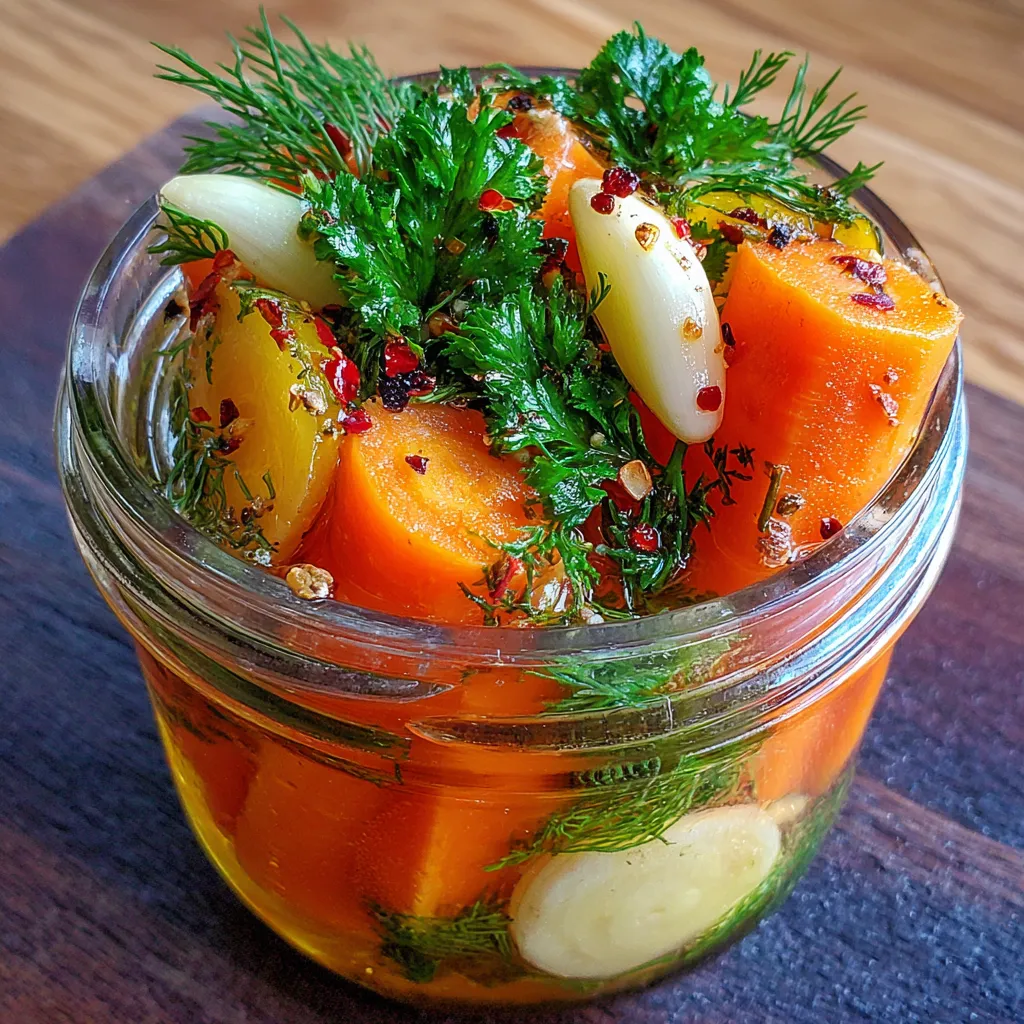
- Garlic & Dill Classic: Infuse your brine with several fresh garlic cloves and generous sprigs of fresh dill for that timeless, classic pickle flavor profile that many adore. This combination is always a crowd-pleaser and pairs beautifully with the sweetness of carrots.
- Ginger & Turmeric Twist: For an intriguing Asian-inspired flavor profile, add thin slices of fresh ginger root and a teaspoon of ground turmeric to your brine. This not only imparts a unique taste but also gives your carrots a beautiful golden hue.
- Sweet & Savory Balance: If you prefer a slightly sweeter pickle, you can balance the tang by adding a touch more granulated sugar or even a hint of maple syrup to your pickling brine. This creates a delightful contrast that enhances the carrot’s natural sweetness.
- Herbaceous Infusion: Experiment with different fresh herbs like rosemary, thyme, or bay leaves for unique aromatic nuances. A sprig of fresh rosemary in each jar can add a sophisticated, woodsy note, while bay leaves offer a subtle, savory depth.
- Alternative Vinegars: While distilled white vinegar (5% acidity) is the standard for canning due to its clear color and neutral flavor, you can also try apple cider vinegar for a fruitier, milder note. Ensure it also has 5% acidity for safe canning.
- Quick Pickling Option: If you’re not ready for full canning, you can skip the water bath processing and simply refrigerate your jars after filling. These ‘refrigerator pickles’ will be ready to eat sooner but must be stored in the fridge and consumed within 3-4 weeks.
Storage & Freezing
Proper storage is key to enjoying your homemade pickled carrots safely and for as long as possible. Understanding the best methods will ensure their vibrant flavor and crisp texture endure.
- Canned Carrots: Properly processed and sealed water bath canned carrots can be stored in a cool, dark, and dry pantry for up to one year. Once a jar has been opened, it must be refrigerated and its contents should be consumed within 2-3 weeks to maintain freshness and prevent spoilage. Always check for signs of spoilage before consuming.
- Refrigerator Pickles: If you opted for the quick pickling method without the water bath canning process, your pickled carrots are considered refrigerator pickles. These must always be stored in the refrigerator and are best consumed within 3-4 weeks. The texture might soften slightly over time, but the flavors will continue to meld beautifully.
- Freezing Pickled Carrots: Pickled carrots generally do not freeze well. The freezing and thawing process can cause their cellular structure to break down significantly, leading to a mushy, undesirable texture due to their high water content and the pickling process. It is strongly recommended to enjoy them fresh or canned rather than attempting to freeze them.
FAQ
There you have it – everything you need to know and all the expert tips to create your own batches of irresistible pickled carrots! Whether you’re a seasoned canner or just starting your preserving journey, these recipes are designed to bring immense joy and vibrant flavor to your table. Imagine the satisfaction of reaching for a jar of your homemade, perfectly preserved carrots, knowing they’ll add a zesty crunch and a burst of freshness to any meal. Don’t forget to pin this recipe for later and share your beautiful pickled carrot creations with me in the comments below! Happy pickling, friends!
Zesty Pickled Carrots: 4 Easy Canning Recipes | Homemade
Ingredients
- 2 lbs carrots, peeled and sliced
- 2 cups white vinegar (5% acidity)
- 2 cups water
- 2 tbsp canning salt
- 1/4 cup granulated sugar
- 1 tsp mustard seeds
- 1 tsp dill seeds
- 2 cloves garlic, sliced (per pint)
- Optional: red pepper flakes, fresh dill sprigs
Instructions
- Step 1 Prepare canning jars and lids by sterilizing them according to manufacturer's instructions.
- Step 2 Pack the prepared carrots tightly into the hot, sterilized jars, leaving a 1/2 inch headspace at the top.
- Step 3 In a medium saucepan, combine white vinegar, water, canning salt, granulated sugar, mustard seeds, and dill seeds. Bring the mixture to a rolling boil over medium-high heat, stirring until the salt and sugar are fully dissolved.
- Step 4 Add the sliced garlic and any other optional spices (like red pepper flakes or fresh dill sprigs) to each jar on top of the carrots.
- Step 5 Carefully pour the hot pickling brine over the carrots in each jar, ensuring they are fully submerged and maintaining the 1/2 inch headspace. Use a non-metallic utensil to remove any trapped air bubbles.
- Step 6 Wipe the rims of the jars clean with a damp cloth. Center the hot lids on the jars and apply the bands fingertip tight.
- Step 7 Process the jars in a boiling water canner for 15 minutes (adjusting time for your altitude as necessary).
- Step 8 Turn off the heat, remove the canner lid, and let the jars sit in the hot water for 5 minutes. Carefully remove the jars and place them on a clean towel or wire rack to cool undisturbed for 12-24 hours.
- Step 9 After cooling, check the seals. Lids should be concave and not flex when pressed. Any unsealed jars should be refrigerated and consumed within a few weeks.
- Step 10 Label your sealed jars with the date and contents. Store in a cool, dark pantry for 2-4 weeks before opening to allow the flavors to fully develop. Once opened, refrigerate.
