
Crispy Baked Chicken Tenders: The Ultimate Family Favorite
Oh, the magic of a simple weeknight meal! I can still vividly recall those hectic school nights when my own mother, a true kitchen wizard, would pull out her secret weapon: homemade chicken tenders. The aroma of them baking would fill our home, turning a regular Tuesday into a mini-celebration. It was a dish that always brought a smile, a moment of comfort amidst the joyful chaos of family life.
That cherished memory is exactly what inspired my quest to perfect the ultimate batch of Crispy Baked Chicken Tenders (Family Favorite). This isn’t just any recipe; it’s a tested, tried, and true winner that consistently delivers a perfectly golden, undeniably crispy exterior with a tender, juicy interior, all without the mess and added fat of deep frying. It’s truly the definition of an easy dinner and pure comfort food.
You’re about to discover how simple it is to whip up a batch of these mouth-watering tenders that will have everyone at your table asking for seconds. Get ready to create new, delicious memories with a dish that’s destined to become a staple in your culinary repertoire!
Why You’ll Love This Recipe
❤️ Here’s why these Crispy Baked Chicken Tenders are about to become your family’s new obsession:
- Unbelievably Crispy Without Frying: Forget greasy deep-fried tenders! Our secret panko coating, combined with a crucial baking technique, yields an incredibly satisfying crunch that rivals your favorite takeout, all baked in the oven.
- Healthier & Lighter: By baking instead of frying, you significantly reduce the amount of added fat and calories, making this a lighter option you can feel good about serving regularly. It’s guilt-free deliciousness!
- Quick & Easy Prep: From start to finish, this recipe is designed for busy schedules. With minimal hands-on time, you can have a wholesome, delicious meal on the table in under an hour, perfect for frantic weeknights.
- Kid-Friendly Perfection: Let’s be honest, chicken tenders are universally loved by kids of all ages. This recipe makes them even better, ensuring a dinner that disappears quickly from plates without any fuss or complaints.
- Versatile for Meal Prep: Make a bigger batch and enjoy them throughout the week! These tenders reheat beautifully, making them excellent for packed lunches, quick salads, or even a protein boost in wraps.
- Customizable Flavor Profile: The basic recipe is fantastic, but it’s also a blank canvas. Easily adjust the seasonings to your family’s taste – add a touch of spice, more herbs, or a sprinkle of Parmesan for endless variations.
- Minimal Mess, Maximum Flavor: Baking means no splattering oil or messy cleanup from a deep fryer. Just a few baking sheets and bowls, making post-dinner tidying a breeze, leaving you more time to enjoy your evening.
- Budget-Friendly: Chicken tenders are an economical protein, and this recipe uses common pantry staples, making it a cost-effective choice for feeding a crowd or a growing family without breaking the bank.
- Allergen-Friendly Adaptations: With simple swaps, these tenders can easily be made gluten-free, ensuring everyone at your table can enjoy this fantastic dish without compromise.
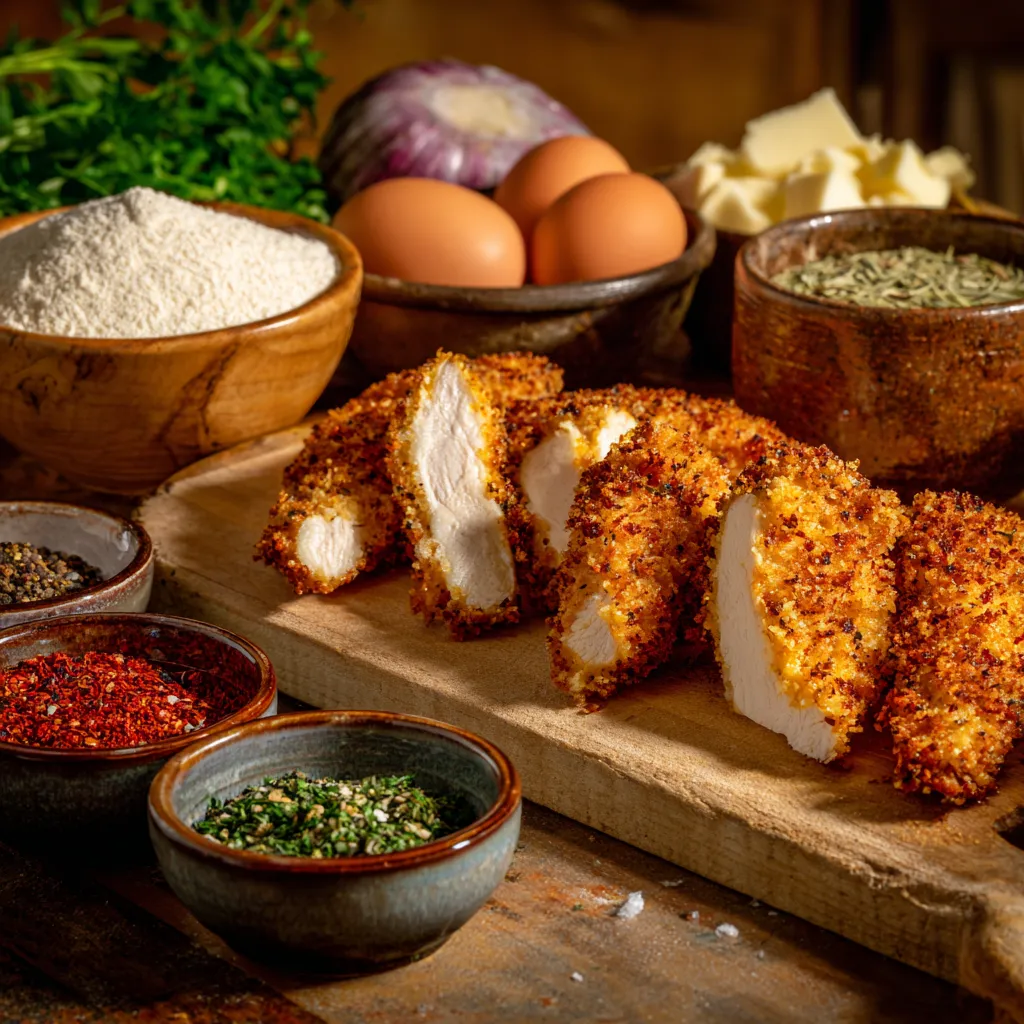
What You Need
You only need a few simple pantry staples for this recipe to create truly spectacular Crispy Baked Chicken Tenders! The magic comes from combining the right ingredients with smart baking techniques. Check the full printable recipe card below for detailed measurements and a complete list.
Expert Tips
💡 Elevate your baked chicken tender game with these pro tips for ultimate crispiness and flavor:
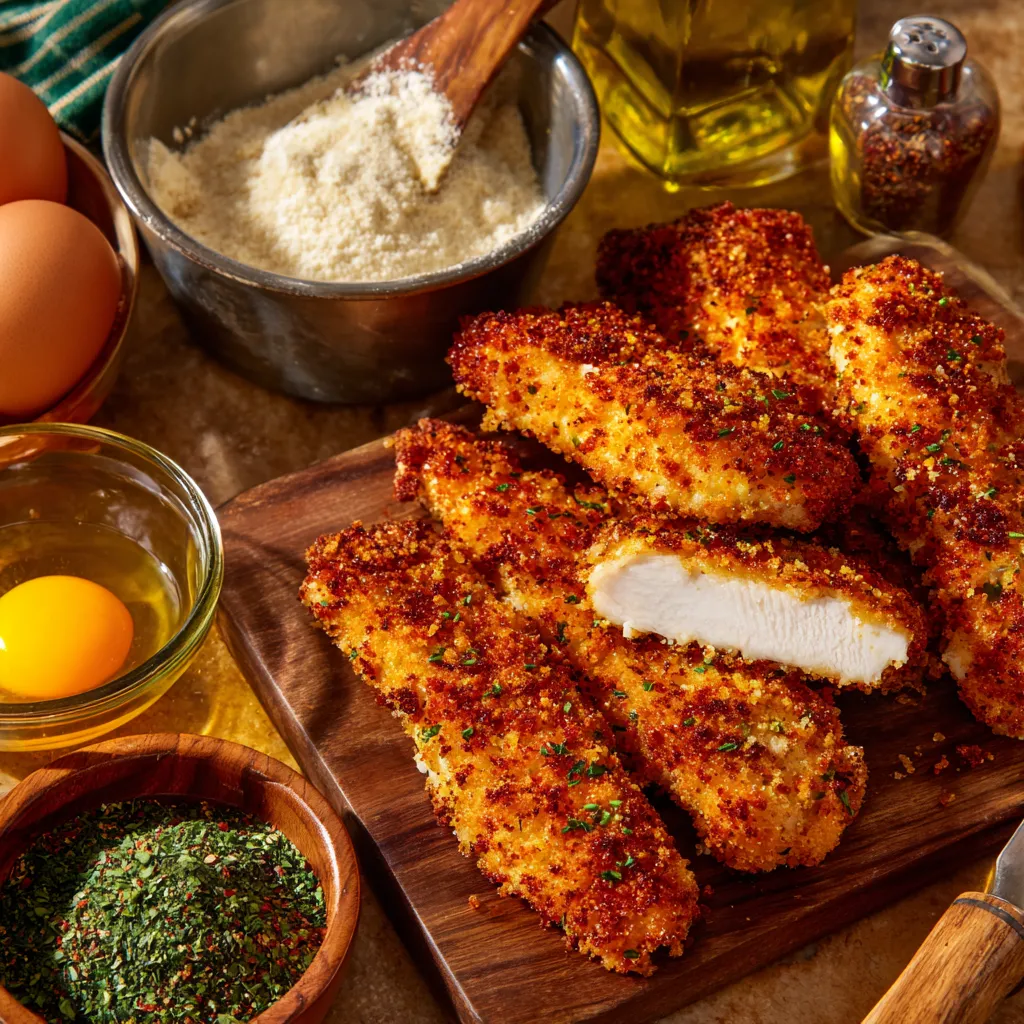
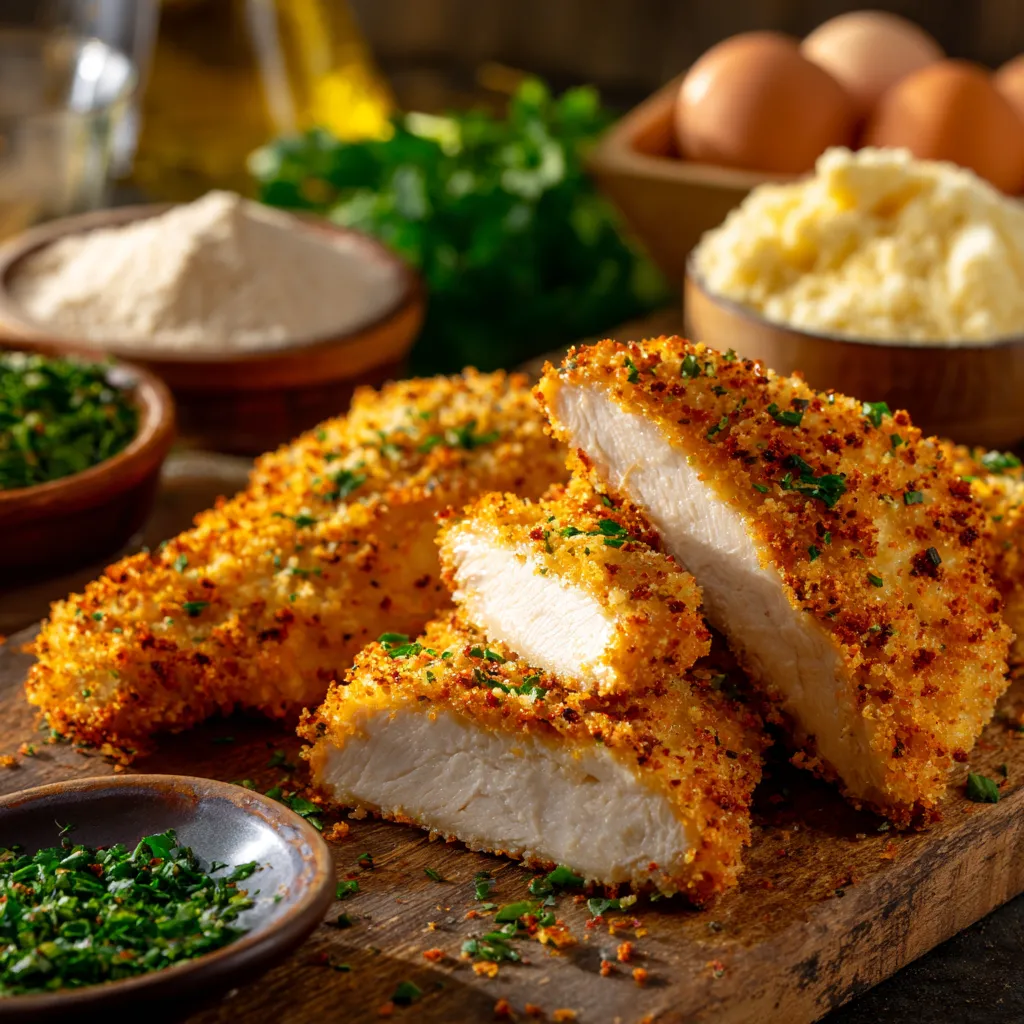
- Choose Your Breading Wisely: Panko is King! While regular breadcrumbs work, Panko breadcrumbs are far superior for creating that signature crispiness. Their larger, flakier texture absorbs less oil and provides a lighter, airier crunch that regular breadcrumbs simply can’t match. Don’t skip this for the best results!
- Pat Your Chicken Dry: This might seem like a small step, but it’s crucial. Excess moisture on the chicken tenderloins will create steam, preventing a truly crispy coating. Use paper towels to pat each piece thoroughly dry before dredging.
- The Perfect Dredging Station: Set up your assembly line efficiently. One bowl for flour (seasoned!), one for whisked eggs (a splash of milk or water helps here), and one for your seasoned Panko breadcrumbs. This makes the process smooth and keeps your hands cleaner.
- Don’t Forget to Season Every Layer: For maximum flavor, season the flour, the egg wash, and especially the Panko breadcrumbs. A pinch of salt, pepper, garlic powder, and paprika in each layer builds flavor from the inside out.
- The Power of the Baking Rack: For truly crispy tenders all around, bake them on a wire rack placed over a baking sheet. This allows hot air to circulate underneath the chicken, ensuring both sides get perfectly golden and crunchy. If you don’t have one, just use parchment paper on a baking sheet.
- Give Them Space: Do not overcrowd your baking sheet! Tenders need room to breathe and crisp up. If they’re too close, they’ll steam instead of bake, leading to a soggy coating. Use two baking sheets if necessary.
- Oil Spray is Your Friend: A light, even mist of cooking spray (like olive oil or avocado oil spray) over the breaded tenders before baking is essential. This helps the Panko turn that beautiful golden brown and develop an irresistible crunch.
- Flip for Even Crispness (Optional but Recommended): While the rack helps, a gentle flip halfway through the baking time can promote even browning and crispiness on both sides. Be quick and gentle to avoid losing too much breading.
- Monitor Temperature for Doneness: The safest way to ensure your chicken is cooked through is to use an instant-read thermometer. Chicken should reach an internal temperature of 165°F (74°C). This ensures juicy meat without overcooking.
- Rest Before Serving: Just like with a roast chicken, letting your tenders rest for 5-10 minutes after baking allows the juices to redistribute, resulting in more tender and flavorful chicken.
- Serving Suggestions: These tenders are fantastic on their own, but they truly shine with a great dipping sauce! Think homemade honey mustard, creamy ranch, tangy BBQ sauce, or even a spicy sriracha mayo. Pair them with a simple side salad, roasted vegetables, or sweet potato fries for a complete meal.
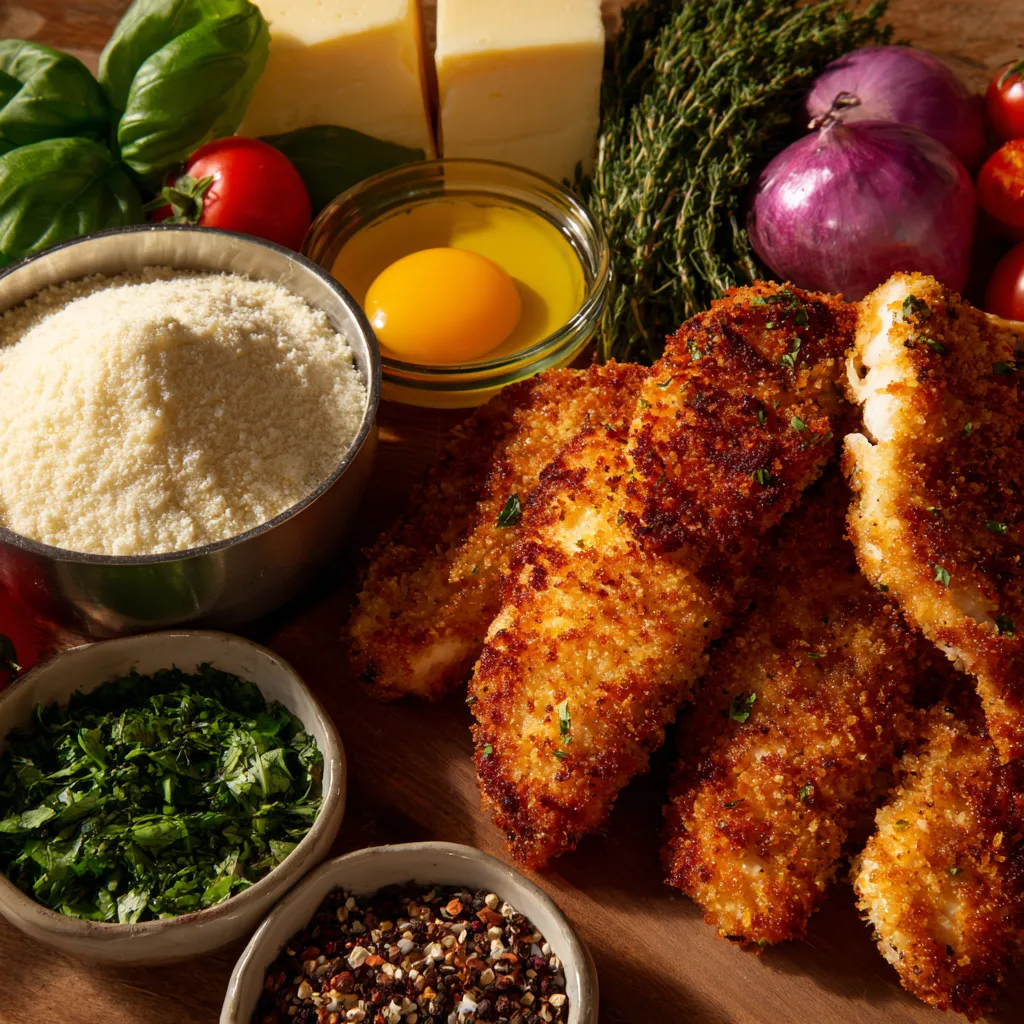
Variations & Substitutions
While the classic Crispy Baked Chicken Tenders are a masterpiece, don’t hesitate to get creative! Here are a few ideas to customize them to your liking:
- Gluten-Free Goodness: Easily make this recipe gluten-free by swapping out regular all-purpose flour for a gluten-free all-purpose blend (like a 1:1 cup-for-cup blend) and using gluten-free Panko breadcrumbs. The results are just as crispy and delicious!
- Spice It Up: For those who love a little heat, add a pinch of cayenne pepper, chili powder, or smoked paprika to your flour or Panko mixture. You can also incorporate a dash of your favorite hot sauce into the egg wash for an extra kick.
- Herb-Crusted Elegance: Mix finely chopped fresh herbs like rosemary, thyme, or oregano into your Panko breadcrumbs for an aromatic twist. Dried herbs work well too – just use about a third of the amount of fresh.
- Cheesy Delight: Stir a tablespoon or two of finely grated Parmesan cheese into your Panko mixture for a savory, cheesy crust that adds an extra layer of flavor and crispiness.
- Dairy-Free Option: If you’re avoiding dairy, you can use a plant-based milk alternative (like unsweetened almond milk) in your egg wash instead of traditional milk, or simply use water.
- Lemon Pepper Zest: Add a tablespoon of lemon pepper seasoning to your flour and Panko for a bright, tangy flavor that’s especially delicious with a squeeze of fresh lemon juice after baking.
Storage & Freezing
These Crispy Baked Chicken Tenders are so good, you might not have leftovers! But if you do, here’s how to keep them fresh:
- Refrigeration: Allow cooked tenders to cool completely. Store them in an airtight container in the refrigerator for up to 3-4 days. For best results, place a paper towel at the bottom of the container to absorb any excess moisture.
- Reheating: To restore their crispiness, reheat tenders in a preheated oven (375°F/190°C) or an air fryer for 5-10 minutes, or until heated through and re-crisped. Microwaving is not recommended as it will make them soggy.
- Freezing Cooked Tenders: Once fully cooked and cooled, arrange tenders in a single layer on a baking sheet and flash freeze for 1-2 hours until solid. Transfer the frozen tenders to a freezer-safe bag or container, removing as much air as possible. They will keep well for up to 2-3 months. Reheat directly from frozen in the oven or air fryer.
FAQ
Conclusion
There you have it – the ultimate guide to creating the most delicious, perfectly crispy, and effortlessly baked chicken tenders right in your own kitchen! This “Family Favorite” recipe truly lives up to its name, bringing smiles and satisfaction to every meal. Whether it’s a quick weeknight dinner, a party appetizer, or a comforting weekend treat, these tenders are guaranteed to be a hit.
Don’t wait to make these incredible Crispy Baked Chicken Tenders. Pin this recipe for later, gather your ingredients, and get ready to enjoy a healthier take on a beloved classic. Happy cooking!
Crispy Baked Chicken Tenders: The Ultimate Family Favorite
Ingredients
- 1.5 lbs chicken tenderloins
- 1 cup all-purpose flour
- 1 tsp garlic powder
- 1 tsp onion powder
- 1/2 tsp paprika
- 1/2 tsp salt
- 1/4 tsp black pepper
- 2 large eggs
- 1 tbsp milk (or water)
- 2 cups Panko breadcrumbs
- Olive oil cooking spray
Instructions
- Step 1 Preheat oven to 400°F (200°C). Place a wire rack on a baking sheet and spray lightly with olive oil.
- Step 2 Pat chicken tenderloins completely dry with paper towels.
- Step 3 Set up a dredging station: In shallow dish 1, mix flour, garlic powder, onion powder, paprika, salt, and pepper. In shallow dish 2, whisk eggs and milk. In shallow dish 3, add Panko breadcrumbs.
- Step 4 Dredge each chicken tenderloin: first in the flour mixture (shake off excess), then dip in egg mixture (let excess drip off), and finally coat generously in Panko breadcrumbs, pressing gently to adhere.
- Step 5 Place breaded tenders in a single layer on the prepared wire rack, ensuring they do not touch. Lightly spray the tops of the tenders with olive oil cooking spray.
- Step 6 Bake for 12-15 minutes, then carefully flip the tenders. Continue baking for another 10-12 minutes, or until golden brown, crispy, and cooked through (internal temperature reaches 165°F/74°C).
- Step 7 Remove from oven and let rest for 5 minutes before serving with your favorite dipping sauces. Enjoy!
