
The Ultimate Homemade Chicken Pot Pie: Flaky Crust Perfection
There are some dishes that just wrap you in a warm hug, no matter the weather outside. For me, that dish has always been chicken pot pie. I still remember rainy Sunday afternoons at my grandmother’s house, the smell of her baking wafting through the air, and the promise of a golden, bubbling pie waiting for us. It was a simple pleasure, but those memories are etched in my heart.
That cherished feeling of cozy comfort is exactly what I’ve poured into this recipe for Homemade Chicken Pot Pie with Flaky Golden Crust. This isn’t just any pot pie; it’s a labor of love, perfected over countless family dinners, ensuring every bite is a delightful journey back to simpler times. It’s the ultimate family meal and an easy dinner recipe that delivers on both flavor and nostalgia.
This tested and truly favorite recipe brings together a luscious, savory filling with an unbelievably flaky, golden crust that crackles with every forkful. Get ready to create new memories around your own table, because once you make this comfort food classic, it’s bound to become a staple in your home too!
Why You’ll Love This Recipe
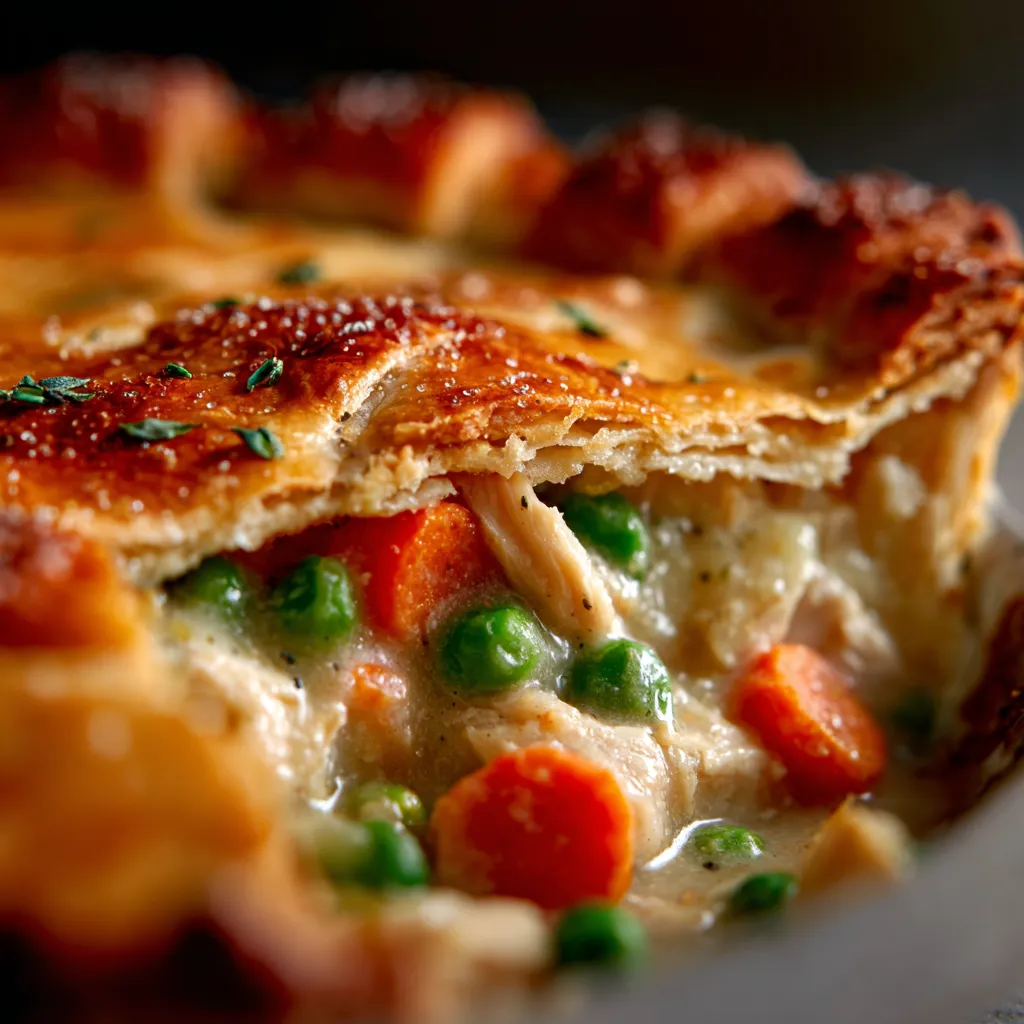
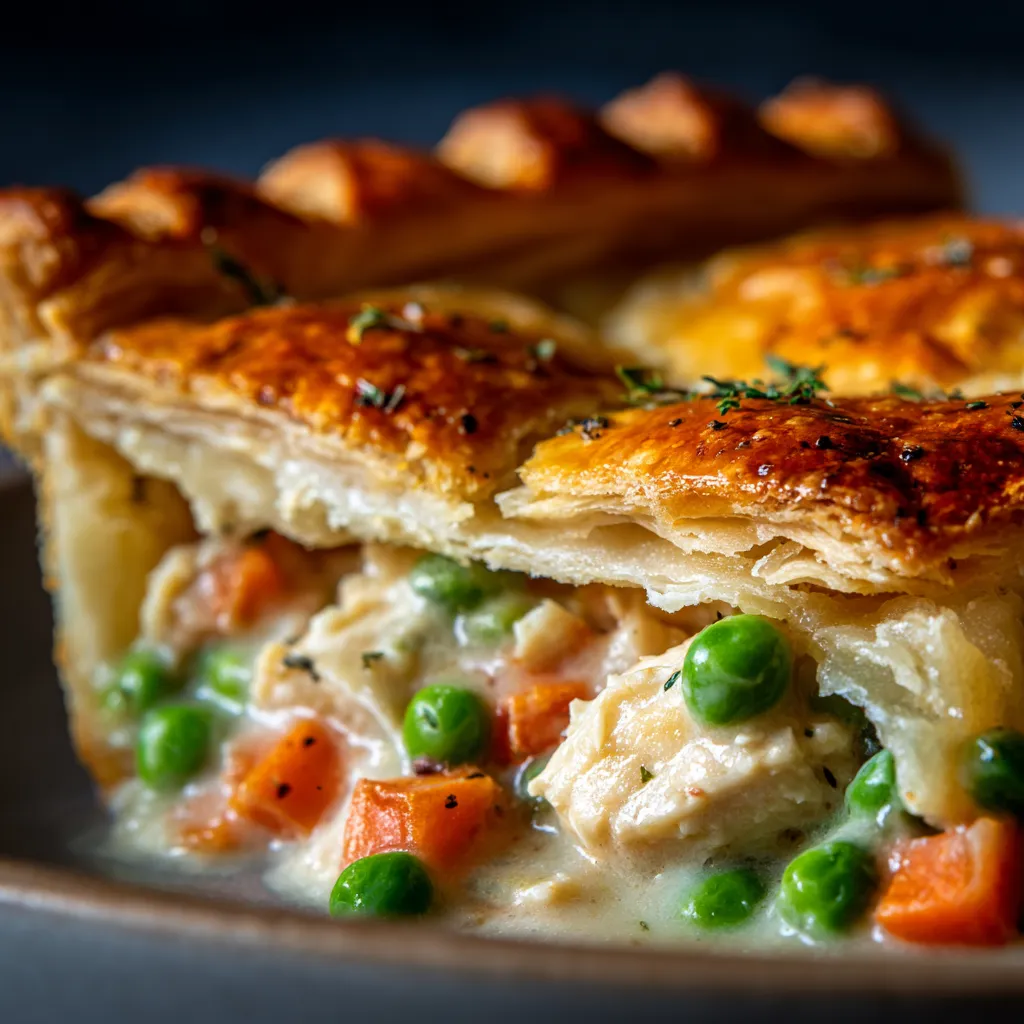
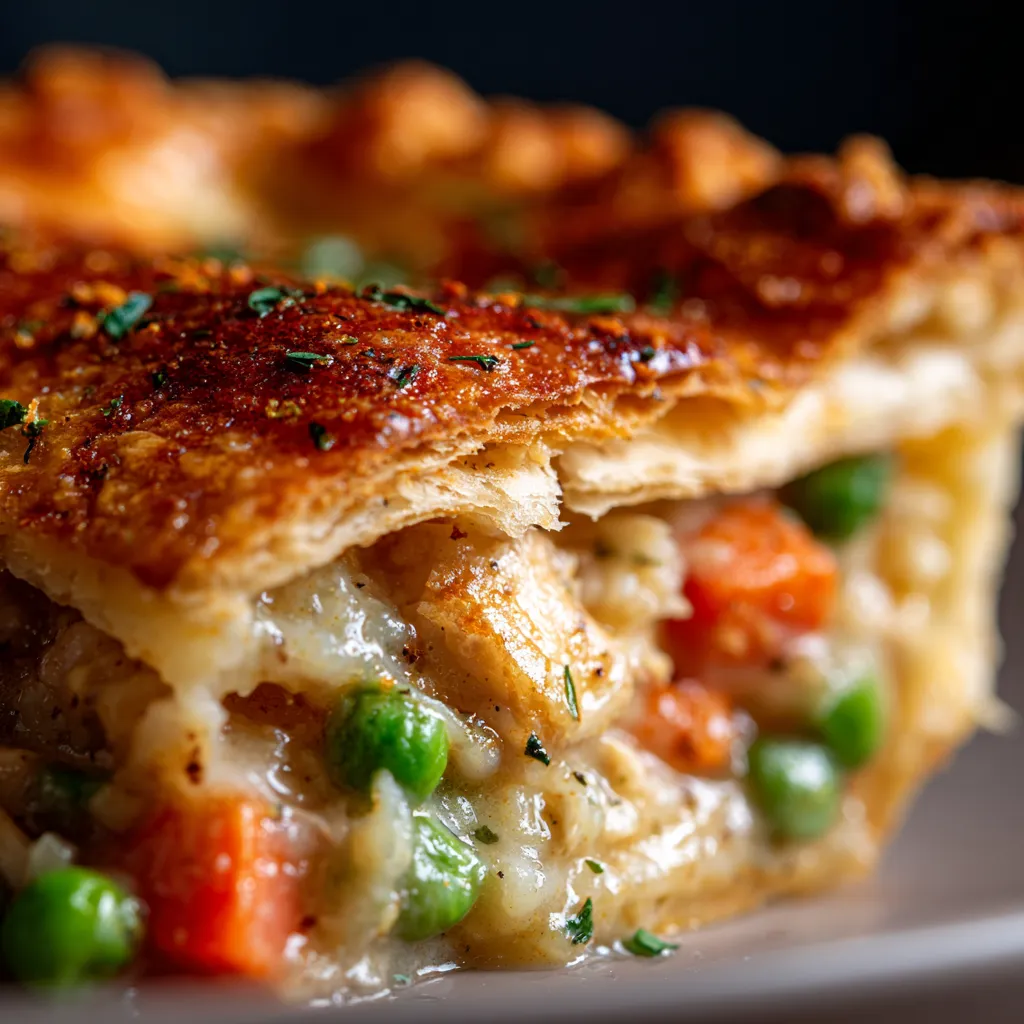
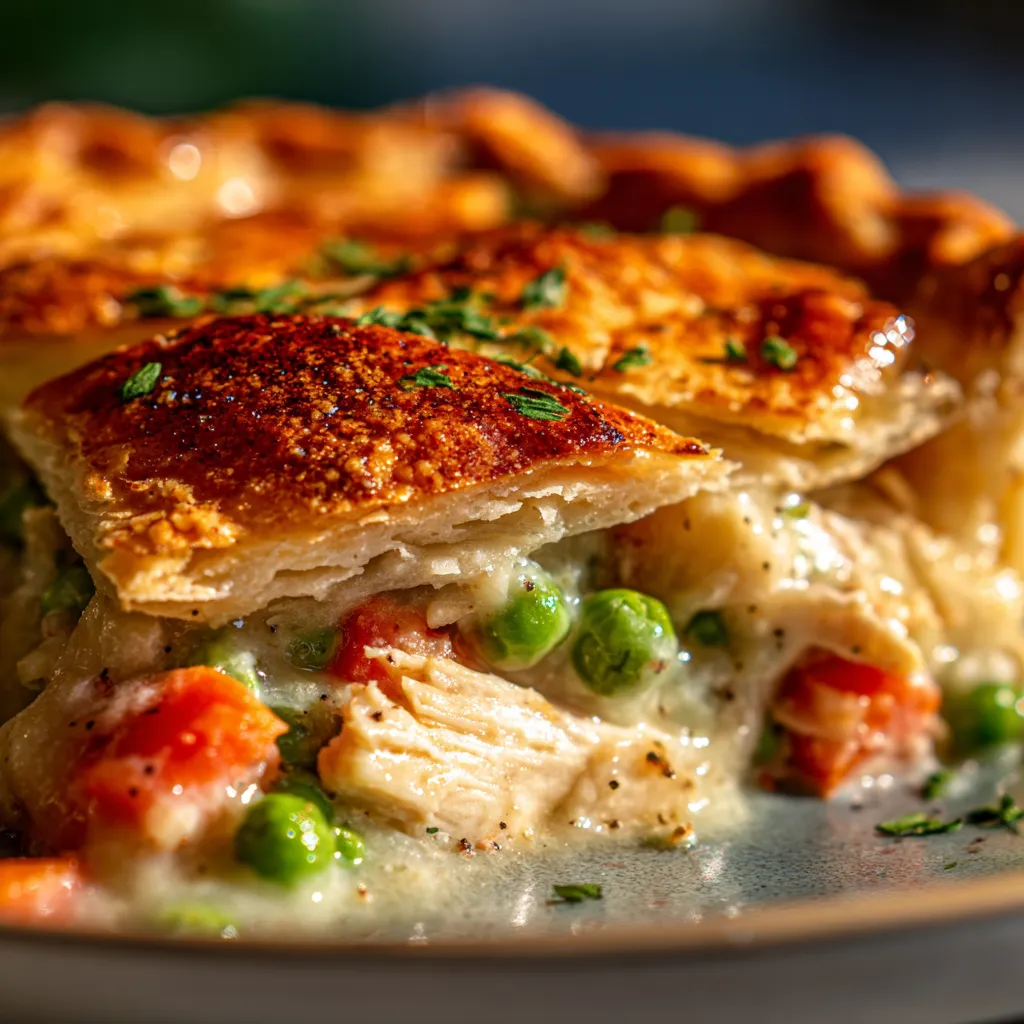
- ❤️ Unrivaled Flaky Golden Crust: This isn’t just a lid; it’s a masterpiece! We’re talking layers upon layers of buttery, golden perfection that shatter delicately with each spoonful. The contrast between the crisp crust and the creamy filling is pure magic, making it utterly irresistible.
- ❤️ Rich, Creamy, & Savory Filling: Imagine tender pieces of chicken, bright garden vegetables like peas and carrots, and often potatoes, all swimming in a velvety, herb-infused sauce. It’s incredibly flavorful, seasoned to perfection, and never watery. Every bite is a burst of savory goodness that satisfies the soul.
- ❤️ Hearty & Satisfying: This pot pie is a complete meal in itself, designed to fill you up and leave you feeling utterly content. It’s the perfect antidote to chilly evenings or a long day, providing warmth and sustenance that few other dishes can match.
- ❤️ A True Family Favorite: This recipe consistently gets rave reviews from kids and adults alike. It’s that comforting, universally loved dish that brings everyone to the table, making it ideal for busy weeknights, special Sunday dinners, or even holiday gatherings.
- ❤️ Surprisingly Versatile: While perfect as written, this recipe is incredibly adaptable. You can easily swap out vegetables, use leftover turkey, or even add different herbs to suit your family’s preferences. It’s a forgiving recipe that encourages creativity in the kitchen.
- ❤️ Looks Impressive, Yet Easy to Master: Don’t let its elegant appearance fool you! While a homemade pot pie might seem daunting, my step-by-step instructions make it entirely approachable for home cooks of all skill levels. You’ll be amazed at the professional-looking results you can achieve.
- ❤️ Nostalgia & Comfort in Every Bite: More than just food, this pot pie is an experience. It evokes feelings of home, tradition, and unconditional love. It’s the kind of dish that warms you from the inside out, reminding you of simpler times and cherished moments.
- ❤️ Make-Ahead Friendly: For those busy days, you can prepare components of this pot pie in advance, or even assemble the whole thing and freeze it. This makes it a fantastic option for meal prepping, ensuring a delicious homemade dinner is always within reach.
What You Need
You only need a few simple pantry staples and fresh ingredients for this recipe! The beauty of a classic dish like this lies in its accessible components, transformed into something truly extraordinary. Check the full printable recipe card below for detailed measurements and a complete list of everything you’ll need to create this comforting masterpiece.
Expert Tips for Pot Pie Perfection
- 💡 Mastering the Flaky Crust: Whether you’re making your own or using store-bought, chilling your pie dough is paramount. Cold butter in the dough prevents gluten from developing too quickly, leading to those coveted flaky layers. Roll your dough evenly and handle it minimally to keep it tender. For a golden sheen and crispier texture, don’t skip the egg wash before baking! Remember to cut several slits in the top crust; these vents are crucial for steam to escape, preventing a soggy crust and ensuring even cooking.
- 💡 Perfect Chicken Prep: For the most tender chicken, use cooked chicken. Leftover roasted chicken or rotisserie chicken works beautifully, saving you time. If cooking fresh, poach or bake boneless, skinless chicken pieces until just cooked through, then shred or dice them. Avoid overcooking at this stage, as it will continue to cook in the pie. Season the chicken lightly before adding it to the filling for an extra layer of flavor.
- 💡 Roux Mastery for a Thick Filling: The roux (a mixture of butter and flour) is your secret weapon for a perfectly thick and creamy filling. Cook the flour with the butter for at least 1-2 minutes, stirring constantly, to cook out the raw flour taste. Add your liquids (broth, milk, cream) gradually, whisking constantly to prevent lumps. A smooth, well-made roux ensures your filling is luscious and never thin or grainy.
- 💡 Sautéing Vegetables Right: Start with the harder vegetables like carrots and onions, sautéing them until they begin to soften. This ensures they’re tender by the time the pie is baked. Add softer vegetables like peas and corn towards the end of the filling preparation, as they only need to heat through and retain their vibrant color and slight crunch. Don’t overcrowd the pan, as this can steam the vegetables instead of sautéing them, making them mushy.
- 💡 Layering Flavors: Don’t just rely on salt and pepper! Fresh herbs like thyme, rosemary, and sage elevate the pot pie’s aroma and taste. Add them with the liquids so their flavors can meld. A pinch of nutmeg can also add a subtle warmth and complexity to creamy sauces. Always taste and adjust seasoning before pouring the filling into the crust.
- 💡 Preventing a Soggy Bottom: If you’re using a very moist filling or want extra insurance against a soggy bottom crust, consider blind baking your bottom crust for 10-15 minutes before adding the filling. Alternatively, baking the pie at a slightly higher temperature for the first 15 minutes can help the bottom crust set before the filling’s moisture has a chance to soak in.
- 💡 Even Baking & Golden Finish: Bake your pot pie on a lower rack if your oven tends to brown the top too quickly. If the crust starts to get too dark before the filling is bubbly, loosely tent the edges or the entire pie with aluminum foil. This protects the crust while allowing the filling to finish cooking through.
- 💡 Resting is Key: It’s tempting to dive right in, but allowing the pot pie to rest for 10-15 minutes after baking is crucial. This time allows the hot, bubbly filling to set and thicken further, preventing it from oozing out when you cut into it. The flavors also have a chance to meld even more.
Variations & Substitutions
One of the joys of cooking is making a recipe truly your own! This chicken pot pie is wonderfully versatile, offering many ways to adapt it to dietary needs or personal preferences:
- Gluten-Free: Easily make this GF by using a gluten-free all-purpose flour blend for the roux and a store-bought gluten-free pie crust, or make your own GF pastry.
- Dairy-Free: Swap butter for a plant-based butter alternative, and use unsweetened plant-based milk (like almond or oat milk) and dairy-free cream or full-fat coconut milk (for richness) in the filling.
- Vegetarian/Vegan: Omit the chicken. You can substitute with hearty chopped mushrooms (cremini or shiitake add great umami), lentils, chickpeas, or simply double up on the vegetables like potatoes, sweet potatoes, green beans, or leeks. For a vegan version, also follow the dairy-free substitutions.
- Different Meats: Leftover cooked turkey is a fantastic substitute for chicken, especially after Thanksgiving! You could also use cooked pork, beef, or even a mix of seafood for a different spin.
- Herb Variations: Experiment with different fresh or dried herbs. Sage and rosemary pair beautifully with chicken, especially in the cooler months. A touch of marjoram or a bay leaf can also add depth.
- Add Cheese: For an extra layer of indulgence, stir in a handful of shredded cheddar, Gruyère, or Parmesan cheese into the filling just before pouring it into the crust.
- Extra Veggies: Feel free to add diced potatoes, sweet potatoes, green beans, mushrooms, or even spinach (stirred in at the very end) to boost the nutritional content and flavor.
Storage & Freezing
This Homemade Chicken Pot Pie is almost as good the next day, and it freezes wonderfully, making it a perfect meal prep candidate!
- Refrigerator: Leftover pot pie can be stored in an airtight container in the refrigerator for up to 3-4 days. Reheat individual servings in the microwave, or cover the entire pie loosely with foil and reheat in a preheated oven at 300°F (150°C) until warmed through, about 20-25 minutes.
- Freezing Baked Pot Pie: Allow the baked pot pie to cool completely. You can freeze the entire pie or individual slices. Wrap tightly in plastic wrap, then in aluminum foil, or place slices in freezer-safe containers. It will keep for up to 2-3 months. To reheat, thaw overnight in the refrigerator (for a whole pie) or reheat from frozen (for slices) in an oven at 350°F (175°C) until hot and bubbly, covering with foil if the crust starts to brown too much.
- Freezing Unbaked Pot Pie: Assemble the pot pie in an oven-safe dish (preferably a disposable foil pan for easy transfer). Wrap the unbaked pie tightly with plastic wrap and then with aluminum foil. Freeze for up to 3 months. To bake from frozen, remove plastic wrap, cover loosely with foil, and bake at 375°F (190°C) for about 60-75 minutes, removing the foil for the last 15-20 minutes to allow the crust to brown. An egg wash can be applied just before baking.
FAQ
Can I use store-bought pie crust?
Absolutely! Using a good quality store-bought pie crust is a fantastic time-saver and works wonderfully for this recipe. Just be sure to get two crusts (one for the bottom and one for the top) and follow the package directions for handling.
How do I prevent a watery filling?
The key to a thick, creamy filling is a properly made roux (butter and flour cooked together). Make sure to cook the flour for a minute or two before adding liquids, and then gradually whisk in the liquids until the mixture thickens. Also, avoid adding too many high-moisture vegetables; if you do, lightly sauté them beforehand to release some water.
Can I use leftover chicken or turkey?
Yes, absolutely! This recipe is perfect for using up leftover cooked chicken or turkey. Shredded rotisserie chicken is also a great shortcut. Just ensure your meat is already cooked and cooled before adding it to the filling.
What side dishes pair well with chicken pot pie?
Chicken pot pie is quite hearty on its own, but a simple green salad with a light vinaigrette makes a perfect complement. You could also serve it with steamed green beans, roasted asparagus, or even some cranberry sauce for a touch of tartness, especially if using turkey.
There’s truly nothing quite like the comforting aroma and satisfying taste of a homemade chicken pot pie. It’s a dish that nourishes the body and soul, bringing a little extra warmth and happiness to any meal. I hope this recipe brings as much joy and deliciousness to your home as it has to mine.
Happy baking, and don’t forget to pin this recipe for later so you can revisit this classic comfort food again and again!
Ultimate Homemade Chicken Pot Pie with Flaky Crust
Ingredients
- 2 cups cooked chicken, shredded or diced
- 1 pie crust recipe (for double crust), or 2 store-bought pie crusts
- 1/2 cup unsalted butter
- 1 large yellow onion, finely diced
- 2 medium carrots, peeled and diced
- 2 celery stalks, diced
- 1/2 cup all-purpose flour
- 2 cups chicken broth (low sodium)
- 1 cup whole milk
- 1/2 cup heavy cream
- 1 cup frozen peas
- 1 cup frozen corn
- 1 tsp dried thyme
- 1/2 tsp dried rosemary, crushed
- 1/4 tsp ground black pepper
- Salt to taste
- 1 large egg, beaten (for egg wash)
Instructions
- Step 1 Preheat your oven to 400°F (200°C). If using store-bought crusts, let them come to room temperature.
- Step 2 In a large pot or Dutch oven, melt the butter over medium heat. Add the diced onion, carrots, and celery. Sautu00e9 for 5-7 minutes, or until the vegetables begin to soften.
- Step 3 Stir in the all-purpose flour and cook for 1-2 minutes, stirring constantly, to create a roux. This helps cook out the raw flour taste.
- Step 4 Gradually whisk in the chicken broth, then the milk and heavy cream, ensuring there are no lumps. Bring the mixture to a gentle simmer, stirring continuously until the sauce thickens.
- Step 5 Stir in the cooked chicken, frozen peas, frozen corn, dried thyme, and crushed rosemary. Season generously with salt and freshly ground black pepper to taste. Remove the filling from the heat.
- Step 6 If using homemade pie crust, divide the dough in half. Roll out one half and carefully place it into a 9-inch pie dish, allowing for a slight overhang.
- Step 7 Pour the warm chicken and vegetable mixture evenly into the prepared bottom pie crust.
- Step 8 Roll out the second pie crust and gently place it over the filling. Trim the edges and crimp them securely to seal the top and bottom crusts together.
- Step 9 Cut several slits or a decorative design in the top crust using a sharp knife. This allows steam to escape during baking, preventing a soggy crust.
- Step 10 Brush the top crust with the beaten egg wash. This will give your pie that beautiful, flaky golden-brown finish.
- Step 11 Bake the pot pie for 35-45 minutes, or until the crust is deeply golden brown and the filling is visibly bubbly. If the crust starts to brown too quickly, loosely tent the edges or the entire pie with aluminum foil.
- Step 12 Once baked, remove the pot pie from the oven and let it rest for 10-15 minutes before slicing and serving. This allows the filling to set and prevents it from being too runny.
