
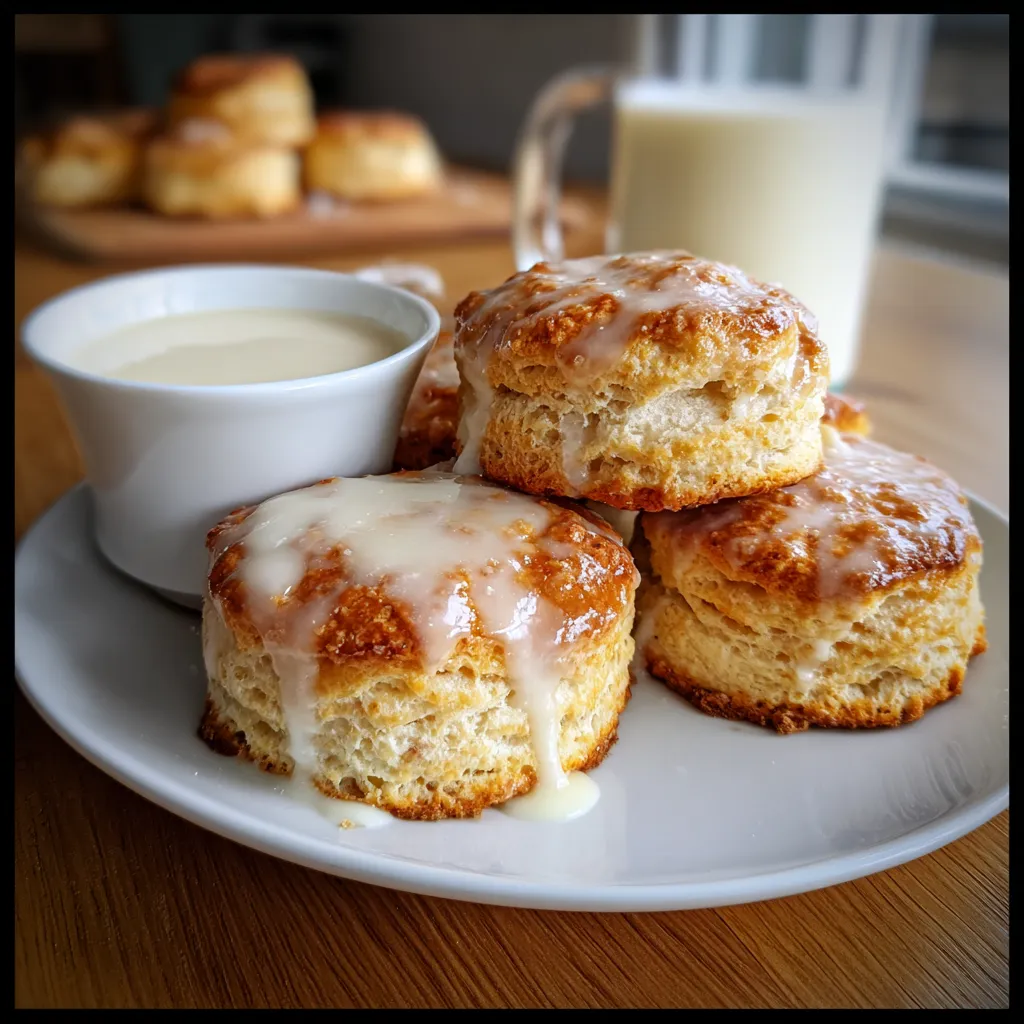
The Best Fluffy Biscuit Recipe with Dreamy Creamy Vanilla Icing
There’s a special magic that happens in the kitchen when classic comfort food meets a touch of sweet indulgence. I remember my grandma, bless her heart, always said the secret to a happy home was the smell of freshly baked goods. For me, that warmth often came from her famous biscuit recipe. It wasn’t just any biscuit; it was the Biscuit Recipe with Creamy Vanilla Icing, a dish that instantly transports me back to those cozy, rainy Sunday afternoons where family gathered, laughter filled the air, and every bite felt like a hug.
This particular recipe is more than just a sweet treat; it’s a testament to simple, delicious baking. It’s an easy dessert that brings pure joy, perfect for breakfast, brunch, or an after-dinner delight. Over the years, I’ve refined her method, creating what I believe are the absolute best fluffy biscuits, crowned with the most luscious, creamy vanilla icing imaginable. This tried-and-true recipe has been tested countless times, bringing smiles to every single person who tries it.
Get ready to create some kitchen magic of your own. You’re just a few steps away from experiencing this comforting classic. Trust me, your taste buds (and your family!) will thank you.
Why You’ll Love This Recipe
- ❤️ Melt-in-Your-Mouth Texture: These aren’t just biscuits; they’re incredibly light, tender, and impossibly fluffy. Each bite melts away, leaving a delicate buttery goodness that’s simply irresistible. You’ll wonder how something so simple can be so soft!
- ❤️ Perfectly Balanced Sweetness: The homemade creamy vanilla icing adds just the right amount of sweetness without being cloying. It complements the subtle richness of the biscuit beautifully, creating a harmonious flavor profile that’s utterly delightful. It’s that sweet spot everyone craves.
- ❤️ Surprisingly Simple to Make: Don’t let the gourmet taste fool you! This recipe uses common pantry staples and straightforward techniques. Even beginner bakers will find success with these easy-to-follow steps, yielding impressive results every time. No fancy equipment needed!
- ❤️ Versatile for Any Occasion: Whether you’re hosting a leisurely Sunday brunch, need an afternoon pick-me-up, or want a comforting dessert after dinner, these biscuits fit the bill. They’re fantastic with a cup of coffee, tea, or even a tall glass of milk. They’re also a stunning addition to any holiday table.
- ❤️ A True Crowd-Pleaser: Prepare for rave reviews! These biscuits with their dreamy vanilla icing are always a huge hit. They disappear quickly at potlucks, family gatherings, and office events. Everyone asks for the recipe, making you the star baker!
- ❤️ Nostalgic Comfort Food: There’s something inherently comforting about a warm, freshly baked biscuit. This recipe taps into that deep-seated feeling of home and happiness. It’s more than just food; it’s an experience that evokes cherished memories and creates new ones.
- ❤️ Customizable for Your Taste: While the classic vanilla is divine, the base recipe is incredibly flexible. You can easily adapt the icing flavor or add mix-ins to the biscuit dough, allowing you to tailor it to your preferences or seasonal ingredients.
What You Need
You only need a few simple pantry staples for this recipe! Flour, butter, milk, sugar, and vanilla are the stars of the show, coming together to create something truly magical. Check the full printable recipe card below for detailed measurements of everything you’ll need to bring these incredible biscuits to life.
Expert Tips
- 💡 Keep Ingredients COLD: The secret to truly fluffy biscuits is using very cold butter and cold milk. Cold butter creates pockets of steam as it bakes, leading to those signature flaky layers. If your kitchen is warm, you can even chill your flour!
- 💡 Don’t Overmix: Overworking the dough develops gluten, which results in tough biscuits. Mix just until combined, and then gently bring the dough together. A few lumps are perfectly fine and even desired for tenderness. Handle with a light touch!
- 💡 Gentle Handling is Key: When patting out the dough, avoid pressing too hard. Use a light hand to maintain the airiness. For cutting, press straight down with your biscuit cutter—don’t twist it. Twisting seals the edges, preventing the biscuits from rising as high.
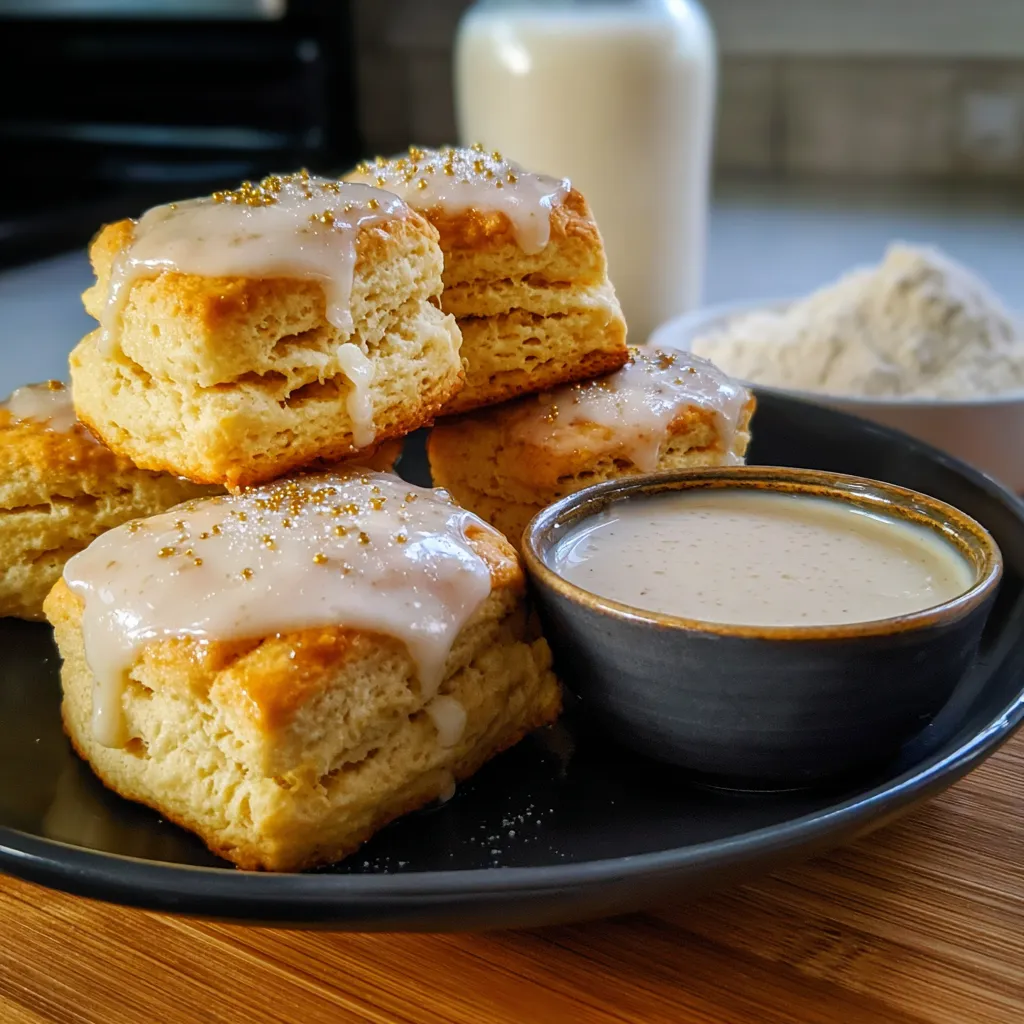
- 💡 Sift Your Powdered Sugar: For the silkiest, lump-free vanilla icing, always sift your powdered sugar before mixing. This simple step makes an enormous difference in the texture and ensures a smooth, glossy finish that beautifully coats each biscuit.
- 💡 Adjust Icing Consistency: Add the milk or cream for the icing one teaspoon at a time until you reach your desired consistency. You want it thick enough to coat a spoon but still pourable. Too thick, and it’s hard to spread; too thin, and it just runs off.
- 💡 Bake Until Golden: Keep an eye on your biscuits as they bake. They should be beautifully golden brown on top and bottom, indicating they’re fully cooked through. Don’t pull them out too early, or they might be doughy in the middle.
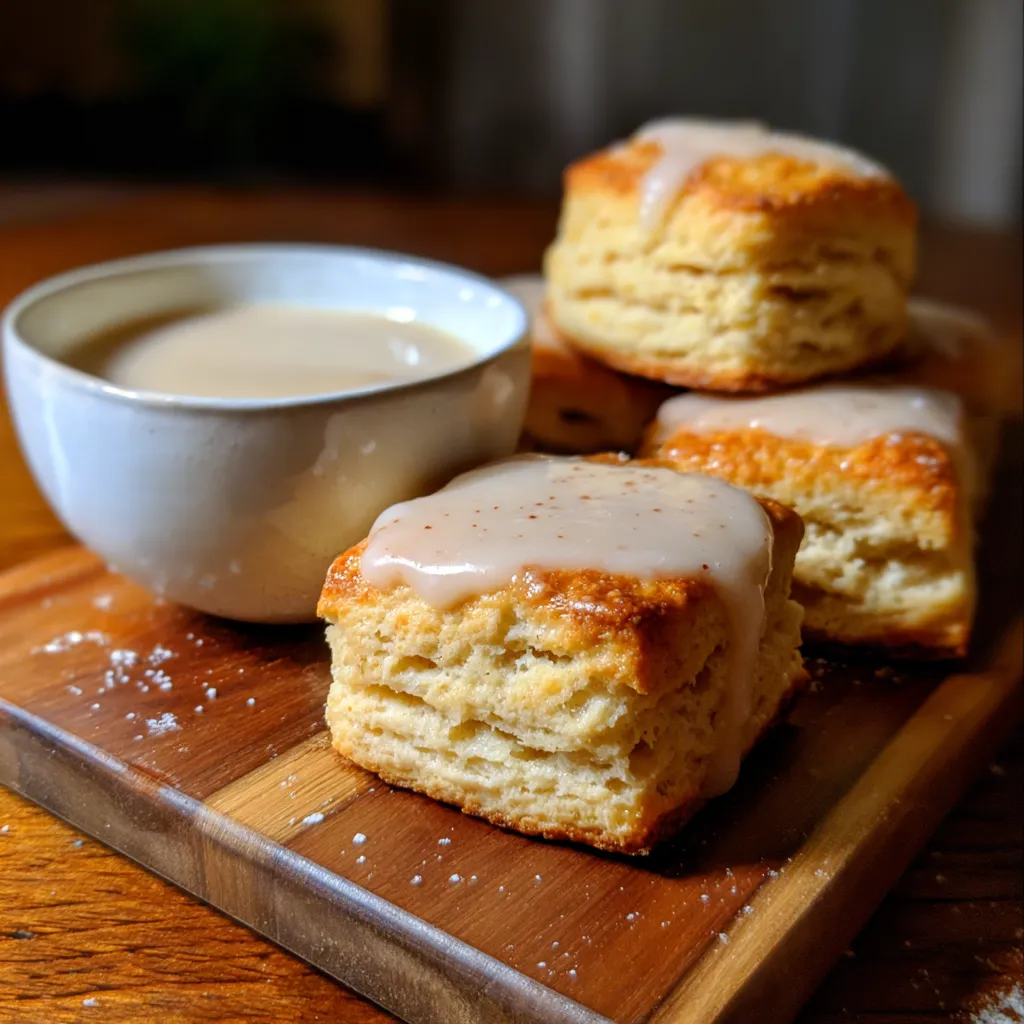
- 💡 Brush with Melted Butter (Optional but Recommended): For an extra touch of richness and a beautiful shine, brush the tops of your hot, freshly baked biscuits with a little melted butter right as they come out of the oven, before they cool. It adds incredible flavor!
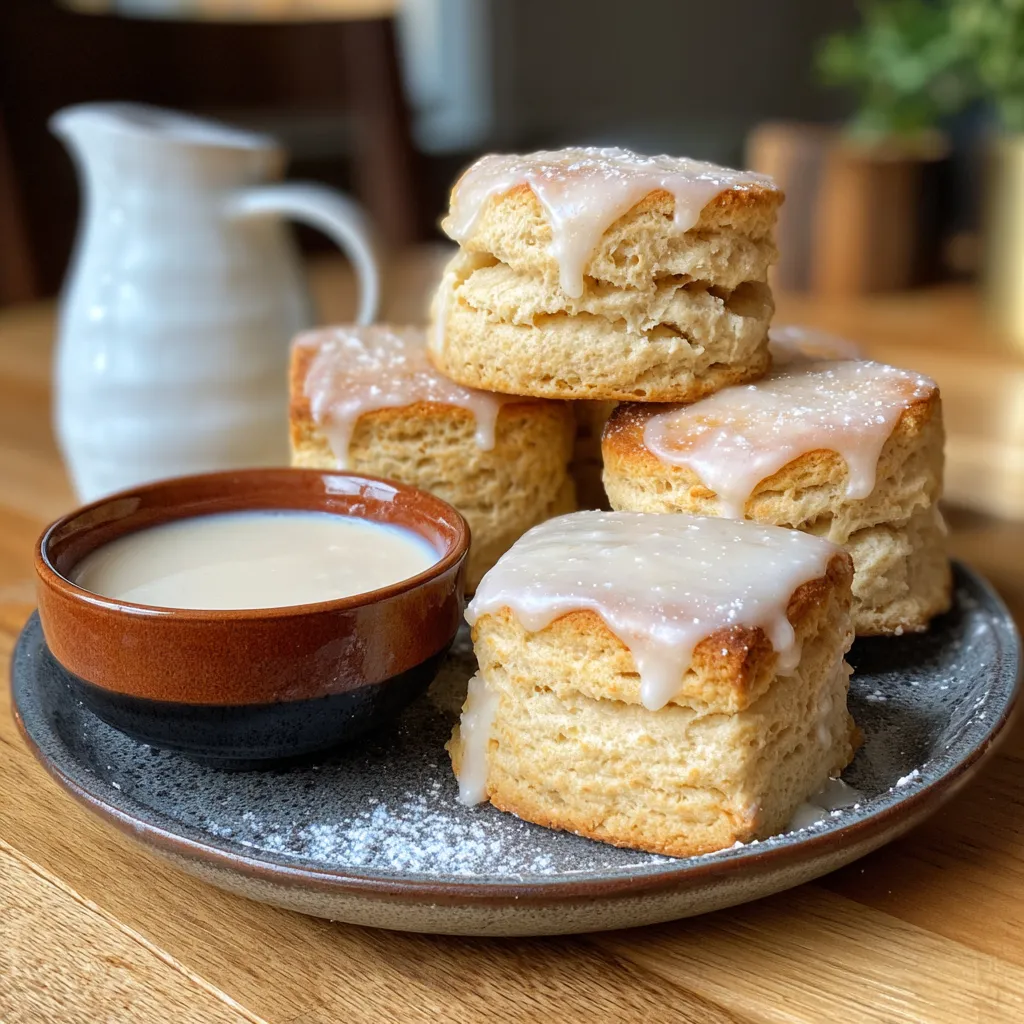
- 💡 Let Biscuits Cool Slightly Before Icing: While it’s tempting to ice them immediately, let the biscuits cool for 5-10 minutes. This allows the icing to set beautifully without melting completely off. A slightly warm biscuit will help the icing adhere and gently soften it.
- 💡 Use Quality Vanilla Extract: Since vanilla is a star flavor in the icing, use the best quality pure vanilla extract you can find. A good vanilla makes all the difference in the depth and aroma of your sweet glaze.
Variations & Substitutions
- Gluten-Free Option: For a gluten-free version, substitute an equal amount of your favorite 1:1 gluten-free all-purpose flour blend. Be aware that GF doughs can be a bit stickier, so you might need a touch more flour for dusting.
- Dairy-Free Delight: You can easily make this recipe dairy-free by swapping traditional butter for a high-quality plant-based butter alternative and using your favorite unsweetened dairy-free milk (almond, soy, or oat milk work wonderfully) in both the biscuits and the icing.
- Flavorful Icing Twists:
- Lemon Glaze: Add 1-2 teaspoons of fresh lemon zest and replace some of the milk with fresh lemon juice for a bright, tangy icing.
- Almond Kiss: Swap vanilla extract for almond extract for a delicate, nutty flavor profile.
- Orange Zest: A teaspoon of finely grated orange zest in the icing provides a lovely citrusy aroma.
- Cinnamon Sugar Swirl: Before baking, brush the rolled-out biscuit dough with melted butter and sprinkle with cinnamon sugar, then fold and cut as usual.
- Add-ins for Biscuits:
- Chocolate Chip: Fold in a handful of mini chocolate chips for a sweet surprise.
- Dried Fruit: Incorporate finely chopped dried cranberries or raisins for extra chewiness.
Storage & Freezing
- Storing Baked Biscuits: Once the icing has set, store leftover biscuits in an airtight container at room temperature for up to 2-3 days. For longer freshness, you can refrigerate them for up to 5 days, though they are best enjoyed fresh.
- Freezing Baked Biscuits (without icing): Baked biscuits can be frozen for up to 2-3 months. Allow them to cool completely, then place them in a single layer on a baking sheet to freeze solid. Once frozen, transfer them to a freezer-safe bag or container. Thaw at room temperature or warm gently in the oven.
- Freezing Icing: The vanilla icing can be made ahead and stored in an airtight container in the refrigerator for up to a week. If it becomes too thick, whisk in a tiny bit of milk or cream until it reaches the desired consistency. It’s not recommended to freeze the icing once made.
- Freezing Unbaked Dough: You can prepare the biscuit dough, cut out the shapes, and freeze the raw biscuits on a baking sheet until solid. Transfer to a freezer-safe bag and bake from frozen, adding a few extra minutes to the baking time. This is perfect for fresh-baked biscuits anytime!
FAQ
Q: Can I use self-rising flour for this biscuit recipe?
A: Yes, you can! If using self-rising flour, omit the baking powder and salt from the recipe, as these are already included in self-rising flour. You might need to adjust the liquid slightly as self-rising flour can absorb moisture differently.
Q: How do I ensure my biscuits are extra fluffy and flaky?
A: The key lies in using very cold butter (cut into small pieces), not overmixing the dough, and handling it gently. Also, make sure your baking powder is fresh. These factors contribute to the steam pockets that create that incredible light and airy texture.
Q: Can I prepare the biscuit dough ahead of time?
A: Absolutely! You can mix the dough, cut out the biscuits, and then refrigerate them on a baking sheet for up to 24 hours before baking. This is a great tip for morning prep! Alternatively, you can freeze them as described in the storage section.
Q: Why did my vanilla icing turn out too thin or too thick?
A: The consistency of your icing is all about the liquid-to-powdered sugar ratio. If it’s too thin, add more sifted powdered sugar a tablespoon at a time. If it’s too thick, add a tiny splash (half a teaspoon) of milk or cream until it reaches your desired drizzling consistency.
Q: What if I don’t have a biscuit cutter?
A: No problem! You can use the rim of a drinking glass (about 2.5-3 inches in diameter) to cut your biscuits. Just dip the rim in flour between each cut to prevent sticking. You can also simply cut the dough into squares with a sharp knife for “drop biscuits.”
Conclusion
There you have it – your new go-to Biscuit Recipe with Creamy Vanilla Icing! This recipe is truly a labor of love, designed to bring warmth, comfort, and irresistible sweetness to your home. Whether you’re making them for a special occasion or just because, each bite is a pure delight. Don’t forget to Pin this recipe for later and share your baking creations with me on social media!
Fluffy Biscuits with Dreamy Creamy Vanilla Icing | Easy Recipe
Ingredients
- 2 cups all-purpose flour, plus more for dusting
- 1 tablespoon baking powder
- 1/2 teaspoon baking soda
- 1/2 teaspoon salt
- 1/4 cup granulated sugar
- 1/2 cup (1 stick) unsalted butter, very cold and cut into small cubes
- 3/4 cup cold buttermilk (or milk + 1 tsp lemon juice)
- 2 cups powdered sugar, sifted
- 1/4 cup unsalted butter, softened
- 1/2 teaspoon pure vanilla extract
- 2-3 tablespoons milk or heavy cream
Instructions
- Step 1 Preheat oven to 425°F (220°C). Line a baking sheet with parchment paper.
- Step 2 In a large bowl, whisk together flour, baking powder, baking soda, salt, and granulated sugar.
- Step 3 Cut in the cold butter using a pastry blender, two knives, or your fingertips until the mixture resembles coarse crumbs with some pea-sized pieces of butter remaining.
- Step 4 Make a well in the center and pour in the cold buttermilk. Mix with a spoon or your hands just until a shaggy dough forms and no dry spots remain. Do not overmix.
- Step 5 Turn the dough out onto a lightly floured surface. Gently pat or roll the dough to about 3/4-inch thickness.
- Step 6 Using a 2.5-inch biscuit cutter, cut out biscuits. Rework scraps only once or twice, pressing them gently together.
- Step 7 Place biscuits on the prepared baking sheet, about 1 inch apart.
- Step 8 Bake for 12-15 minutes, or until golden brown on top and bottom.
- Step 9 Remove from oven and let cool on a wire rack for 5-10 minutes before icing.
- Step 10 In a medium bowl, combine the sifted powdered sugar, softened butter, and vanilla extract.
- Step 11 Gradually add milk or cream, 1 tablespoon at a time, whisking until smooth and creamy. The consistency should be thick enough to coat a spoon but still pourable.
- Step 12 Spoon or drizzle the icing generously over the slightly warm biscuits. Let the icing set for a few minutes before serving.
