
Best Ever Banana Peanut Butter Waffle Recipe
There’s nothing quite like a lazy Saturday morning, the kind where the sunlight streams through the window, and the only item on the agenda is pure, unadulterated comfort. For me, those mornings often involve the comforting sizzle and sweet aroma of freshly made waffles. My earliest memory of the perfect waffle wasn’t from a fancy brunch spot, but from my grandmother’s kitchen. She had a knack for turning simple ingredients into pure magic, and this Banana Peanut Butter Waffle Recipe reminds me so much of her philosophy: delicious food made with love and a little creativity. It’s the ultimate easy breakfast that always hits the spot.
This recipe started as a playful experiment one rainy afternoon, blending two of my all-time favorite ingredients: ripe bananas and creamy peanut butter. What emerged from the waffle iron was a revelation – golden, crispy on the outside, incredibly fluffy on the inside, and bursting with a harmonious blend of sweet banana and savory peanut butter. It quickly became a family favorite, a dish we now look forward to every week. It’s a testament to how simple, wholesome ingredients can create truly unforgettable comfort food that brings everyone to the table.
Whether you’re looking for a special weekend brunch or a delightful weekday treat, this tested and true Banana Peanut Butter Waffle Recipe is guaranteed to bring smiles. It’s incredibly straightforward to make, and the results are consistently perfect every single time. Get ready to elevate your breakfast game!

Why You’ll Love This Recipe
❤️ Here’s why these Banana Peanut Butter Waffles will become your new go-to:
- Unbeatable Flavor Combo: The natural sweetness of ripe bananas perfectly complements the rich, nutty flavor of peanut butter. It’s a match made in breakfast heaven, creating a taste profile that’s both comforting and exciting.
- Crispy Edges, Fluffy Centers: We’ve perfected the batter to ensure your waffles come out with that coveted golden-brown crisp exterior while remaining incredibly light and airy on the inside. Every bite is a delightful texture journey.
- Super Easy to Make: Don’t let the gourmet taste fool you! This recipe uses simple pantry staples and comes together quickly, making it ideal for busy mornings or relaxed weekends alike. No complicated techniques or obscure ingredients required.
- Customizable Fun: These waffles are a fantastic canvas for creativity! Load them up with extra banana slices, a dollop of whipped cream, a sprinkle of chocolate chips, or an extra drizzle of maple syrup or honey. Everyone can personalize their perfect plate.
- Kid-Friendly & Family Approved: Both adults and children adore these waffles. They’re a fantastic way to sneak some fruit into a delicious breakfast, and the fun shapes of waffles always make mealtime more exciting for little ones.
- Great for Meal Prep: Make a big batch and freeze the leftovers! They reheat beautifully in a toaster or oven, giving you a quick and delicious breakfast option for hectic weekdays. Say goodbye to boring breakfasts!
- Satisfying & Wholesome: Packed with the goodness of bananas and the protein from peanut butter, these waffles are more than just a treat; they’re a satisfying meal that will keep you fueled and happy throughout your morning.
- Perfect for Any Occasion: From a casual Sunday brunch with loved ones to a special holiday breakfast, these waffles elevate any meal. They’re impressive enough for guests but simple enough for everyday enjoyment.
What You Need
You only need a few simple pantry staples for this recipe! Most of these ingredients you likely already have on hand, making these waffles incredibly accessible. You’ll combine all-purpose flour for that perfect waffle structure, baking powder and baking soda for maximum fluffiness, a touch of brown sugar for warmth, and, of course, ripe bananas and your favorite peanut butter to give them their signature flavor. Check the full printable recipe card below for detailed measurements and a complete list of everything required to create these magical morning treats!
Expert Tips
💡 Master your waffle game with these pro tips:
- Don’t Overmix the Batter: This is crucial for tender, fluffy waffles. Mix the wet and dry ingredients just until combined. A few lumps are perfectly fine! Overmixing develops the gluten, leading to tough waffles.
- Use Ripe Bananas: The riper your bananas are (think brown spots!), the sweeter and more flavorful your waffles will be. They also mash more easily and integrate better into the batter, adding natural moisture.
- Preheat Your Waffle Iron Properly: Ensure your waffle iron is fully preheated before pouring in the batter. A hot iron guarantees a crispy exterior and even cooking. Most irons have a light indicator for this.
- Grease the Waffle Iron (Even Non-Stick!): While many waffle irons are non-stick, a light spray of cooking oil or a brush of melted butter ensures the waffles won’t stick and helps create that beautiful golden-brown crust.
- Don’t Peek Too Soon: Resist the urge to open your waffle iron while the waffles are cooking. Opening it too early can cause them to deflate or stick. Wait for the steam to significantly reduce or for your iron’s indicator light to signal they’re done.
- For Extra Crispy Waffles: After cooking, place finished waffles directly onto a wire rack set over a baking sheet in a warm oven (around 200°F or 95°C). This keeps them warm and prevents them from getting soggy while you cook the rest of the batch.
- Temperature of Ingredients: Ensure your eggs and milk are at room temperature. This helps them incorporate more smoothly into the batter, creating a more uniform and well-emulsified mixture.
- Peanut Butter Swirl: For a more distinct peanut butter flavor and texture, you can dollop small amounts of extra peanut butter directly onto the batter in the waffle iron just before closing it. This creates delightful pockets of molten peanut butter.
- Consider Your Waffle Iron Type: Different waffle irons (Belgian vs. classic, round vs. square) will require slightly different cook times and batter amounts. Adjust accordingly. Belgian waffles are thicker and may need a minute or two longer.
Variations & Substitutions
Looking to switch things up or accommodate dietary needs? These Banana Peanut Butter Waffles are incredibly versatile!
- Gluten-Free: Easily swap out the all-purpose flour for a 1:1 gluten-free baking flour blend. Make sure your blend contains xanthan gum for the best texture.
- Dairy-Free/Vegan: Use a plant-based milk (almond, soy, oat work great) and a plant-based butter alternative. For eggs, a flax egg (1 tbsp ground flaxseed + 3 tbsp water, let sit for 5 mins) or a mashed ripe banana can often replace one egg, but for multiple eggs, you might need a commercial egg replacer. Ensure your peanut butter is dairy-free.
- Keto/Low-Carb: This recipe would require more significant changes, as bananas and flour are high in carbs. You’d need to use almond flour or coconut flour, a sugar substitute, and likely an egg replacer or more eggs for structure. This would be a completely different recipe, but a fantastic challenge for an experienced keto baker!
- Add-ins: Stir in a handful of mini chocolate chips, chopped nuts (walnuts or pecans are great), or even a dash of cinnamon or nutmeg to the batter for extra flavor.
- Different Nut Butters: Not a peanut butter fan? Almond butter, cashew butter, or even sunbutter for a nut-free option would work beautifully! Adjust sweetness as needed, as some nut butters are less sweet than others.
Storage & Freezing
Making a big batch of these waffles is always a good idea because they store and reheat wonderfully, ensuring you can enjoy a delicious breakfast any day of the week!
- Refrigerator: Store leftover waffles in an airtight container or a Ziploc bag in the refrigerator for up to 3-4 days. Allow them to cool completely before storing to prevent sogginess.
- Freezing: This is my favorite method! Once the waffles have cooled completely, flash freeze them in a single layer on a baking sheet for about 30 minutes to prevent them from sticking together. Then, transfer the frozen waffles to a freezer-safe bag or airtight container. They will keep well in the freezer for up to 2-3 months.
- Reheating:
- Toaster: The best way to reheat frozen or refrigerated waffles! Pop them into your toaster on a medium setting until heated through and crispy.
- Oven/Toaster Oven: Preheat to 350°F (175°C). Place waffles directly on the oven rack (or a baking sheet) and heat for 5-10 minutes, or until warm and slightly crispy.
- Microwave: While quick, this method can make waffles a bit soft. Heat for 30-60 seconds, then finish in a toaster for a bit of crispness if desired.
FAQ
Q: Can I use overripe bananas?
A: Absolutely! Overripe bananas (with lots of brown spots) are actually ideal for this recipe. They are sweeter, softer, and mash more easily, contributing a richer banana flavor and natural moisture to the waffles.
Q: My waffles aren’t crispy enough, what went wrong?
A: Several factors can affect crispness. Ensure your waffle iron is fully preheated before adding batter. Also, avoid overmixing the batter, as this can develop gluten and lead to tougher, less crispy waffles. Placing cooked waffles on a wire rack in a warm oven for a few minutes can also help them crisp up and stay warm.
Q: Can I make the batter ahead of time?
A: Yes, you can! You can prepare the wet and dry ingredients separately and combine them just before cooking. If you mix the full batter ahead of time, the baking powder will lose some of its leavening power. If you absolutely must mix it, it can be stored in an airtight container in the fridge for up to 12 hours, but for best results (fluffiest waffles), fresh batter is always recommended.
Q: What are the best toppings for these waffles?
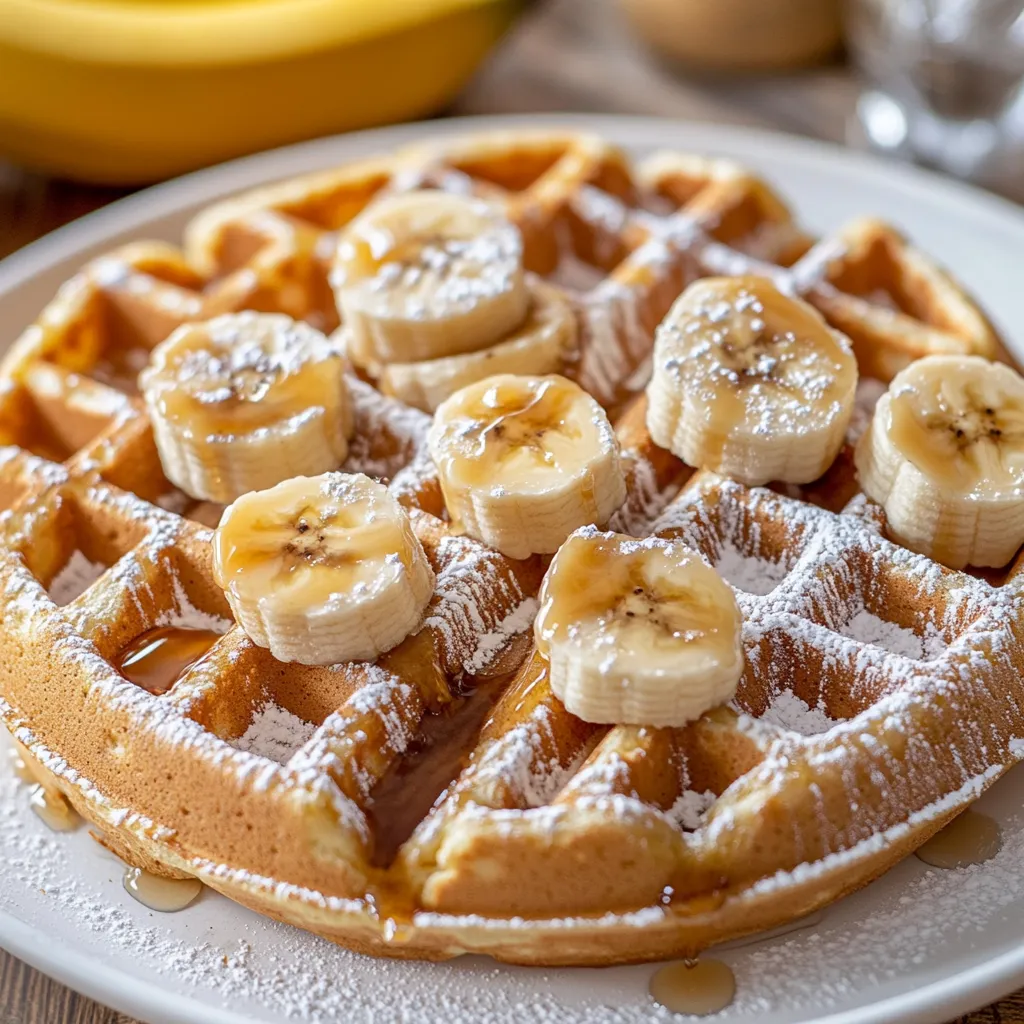
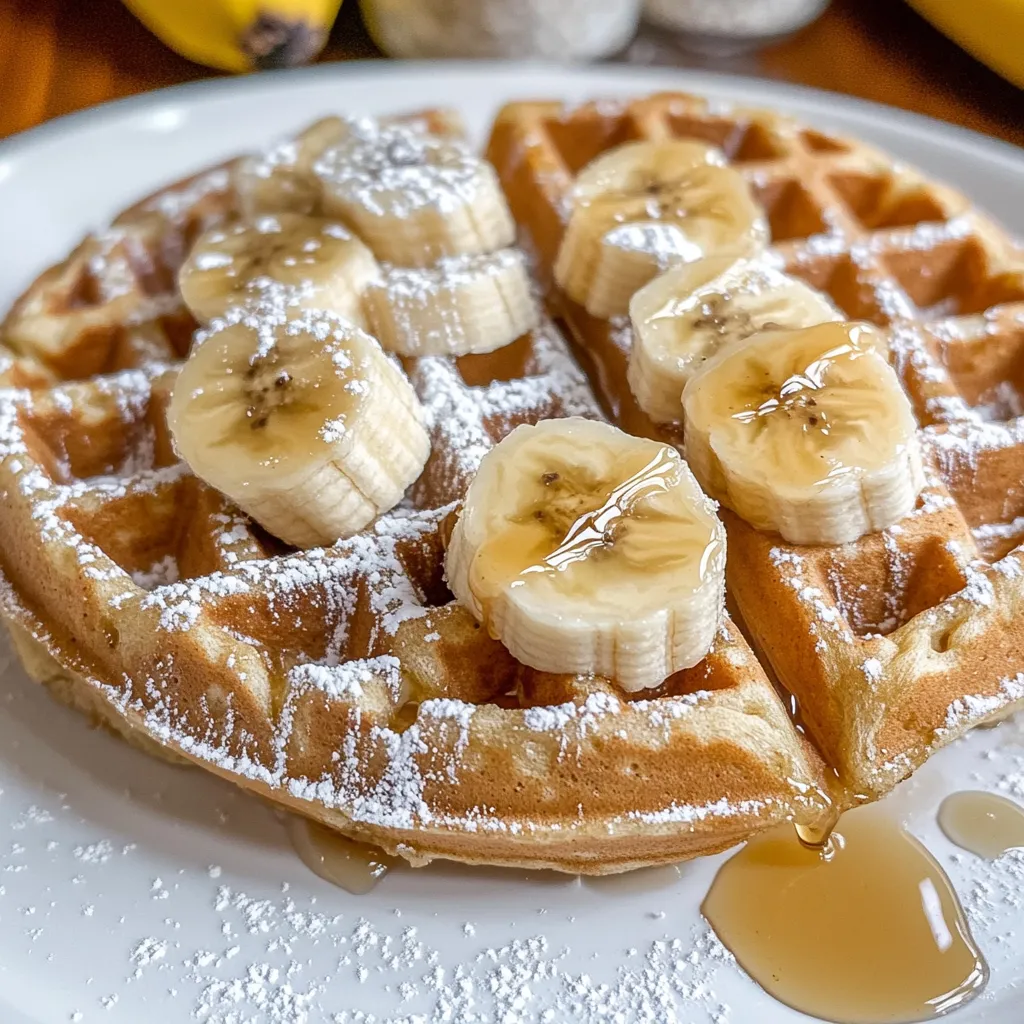
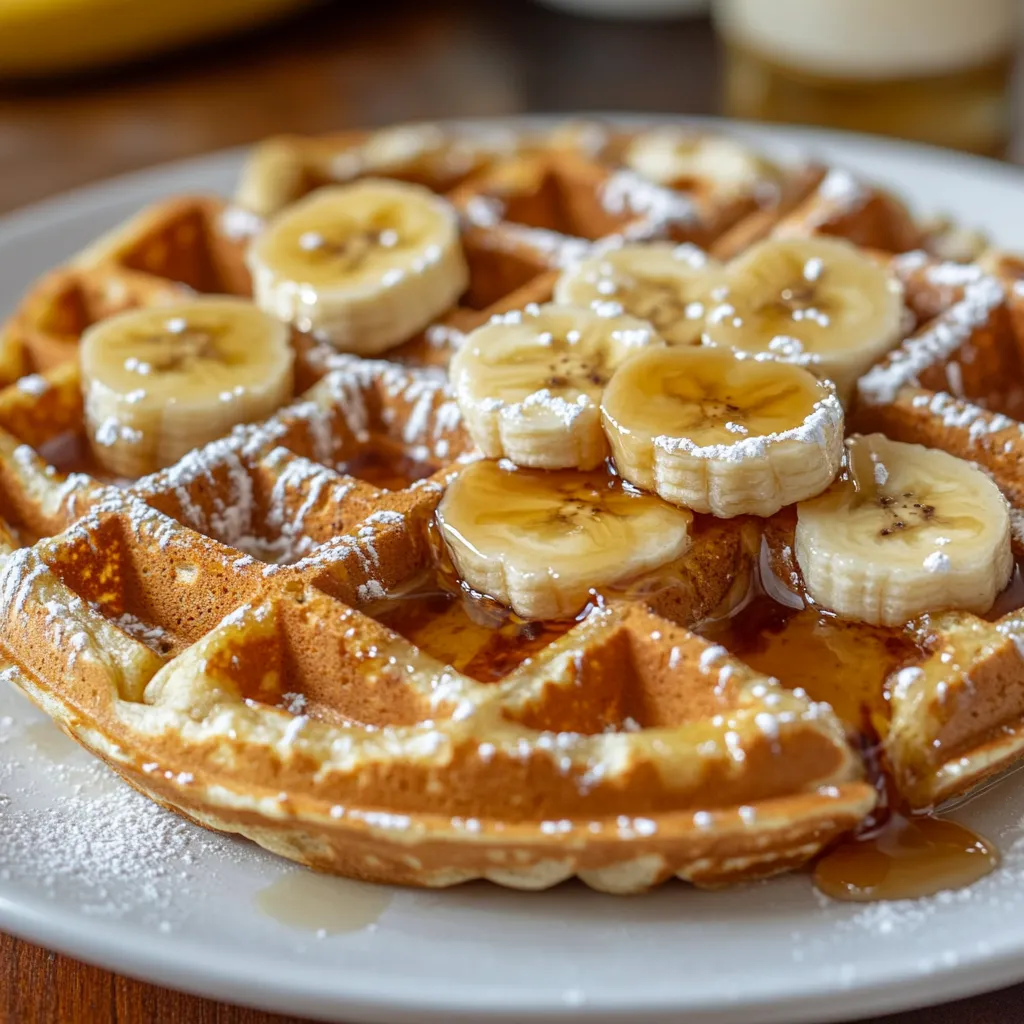
A: The possibilities are endless! Beyond the classic maple syrup, try extra banana slices, a drizzle of warm peanut butter, chocolate syrup, whipped cream, a sprinkle of mini chocolate chips, chopped nuts, a scoop of vanilla ice cream for a decadent treat, or even a berry compote for a touch of tartness.
There you have it – your new favorite breakfast recipe! These Banana Peanut Butter Waffles are more than just a meal; they’re an experience, bringing warmth, comfort, and deliciousness to your table. Don’t hesitate to whip up a batch this weekend and create some delicious memories with your loved ones. Once you try them, you’ll wonder how you ever lived without them. Happy waffling, my friends!
Pin this recipe for later and share your creations with me!
Best Banana Peanut Butter Waffles: Easy, Fluffy & Delicious!
Ingredients
- 1 ½ cups all-purpose flour
- 2 tsp baking powder
- ½ tsp baking soda
- ¼ tsp salt
- 2 ripe medium bananas, mashed
- ½ cup creamy peanut butter
- 2 large eggs, at room temperature
- 1 cup milk (dairy or non-dairy), at room temperature
- ¼ cup brown sugar, packed
- ¼ cup unsalted butter, melted and cooled
- 1 tsp vanilla extract
Instructions
- Step 1 In a large bowl, whisk together the flour, baking powder, baking soda, and salt. Set aside.
- Step 2 In a separate medium bowl, whisk together the mashed bananas, peanut butter, eggs, milk, brown sugar, melted butter, and vanilla extract until well combined.
- Step 3 Pour the wet ingredients into the dry ingredients. Mix gently with a spoon or spatula until just combined. A few lumps are okay; do not overmix.
- Step 4 Preheat your waffle iron according to the manufacturer's instructions. Lightly grease if necessary.
- Step 5 Pour about ½ to ¾ cup of batter (depending on your waffle iron size) onto the hot waffle iron. Close the lid and cook for 3-5 minutes, or until golden brown and crispy.
- Step 6 Remove the cooked waffle and place it on a wire rack in a warm oven (200°F/95°C) to keep warm while you cook the remaining batter.
- Step 7 Serve warm with your favorite toppings like extra banana slices, a drizzle of maple syrup, or a dollop of whipped cream.
