
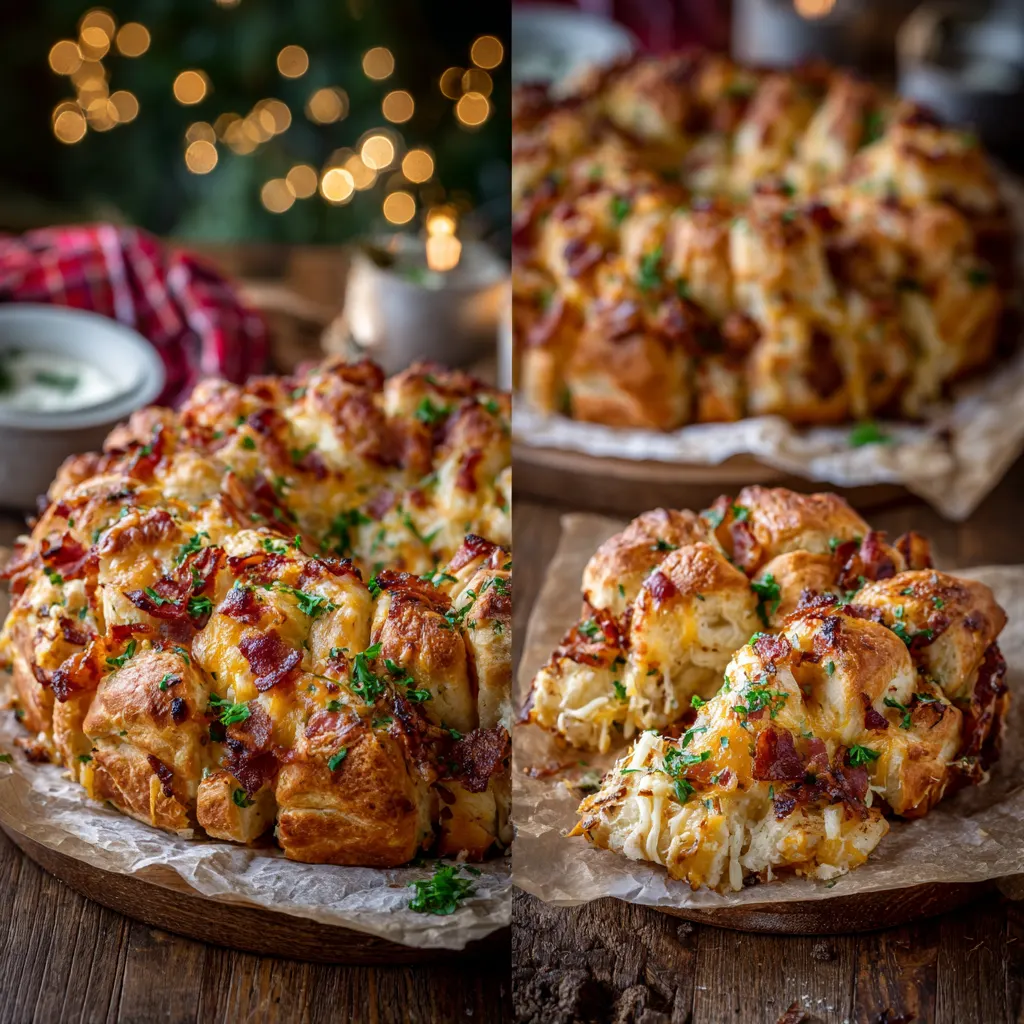
Few recipes capture the spirit of cozy, decadent holiday mornings quite like the Christmas Cheesy Bacon Pull-Apart Biscuits. This dish transforms simple canned biscuit dough into a glorious, savory centerpiece—a tender, cheesy, and deeply flavorful pull-apart bread studded with crisp bacon and fresh green onions. Perfect for brunch, an appetizer spread, or a satisfying side dish, this recipe is beloved not only for its irresistible flavor but also for its sheer ease of preparation, ensuring that holiday hosting remains joyful and stress-free. The beauty lies in the communal experience; serving a hot, golden tray of biscuits invites family and friends to gather close, tear off a piece, and share in the festive warmth.
Ingredients
-
1 (16.3 oz) can refrigerated flaky biscuits (such as Pillsbury Grands Flaky Layers, 8 count)
-
1 cup shredded sharp cheddar cheese (freshly shredded recommended)
-
6–8 slices thick-cut bacon, cooked until crispy and crumbled
-
1/4 cup chopped green onions (scallions), divided (plus extra for garnish)
-
1 large egg
-
2 tablespoons whole milk or buttermilk
-
1/2 teaspoon black pepper
-
1/4 teaspoon garlic powder (optional, for extra depth)
-
2 tablespoons melted unsalted butter (for finishing)

Instructions
Step 1: Preparation and Preheat
Preheat your oven to 350°F (175°C). Lightly grease an 11×7-inch or 9×13-inch (for a thinner layer) baking dish or casserole pan with cooking spray. Ensure your bacon is cooked until perfectly crisp and crumbled, and all ingredients are prepped.
Step 2: Cut and Bind the Biscuits
Separate the refrigerated biscuit dough into 8 individual biscuits. Using a sharp knife or kitchen scissors, cut each biscuit into quarters, resulting in 32 pieces of dough. In a large mixing bowl, whisk together the egg, milk, black pepper, and optional garlic powder until well combined.
Step 3: Combine the Mix-Ins
Gently stir the biscuit quarters into the egg and milk mixture until all pieces are evenly coated. Add the crumbled bacon, shredded cheddar cheese, and approximately 3 tablespoons of the chopped green onions. Using a spatula, fold the ingredients together gently—avoid over-mixing to keep the dough light.
Step 4: Arrange and Bake
Spoon the coated biscuit mixture into the prepared baking dish. Arrange the pieces as evenly as possible in a single layer or slightly clustered mound. This clustering is what encourages the biscuits to rise together into a magnificent, tear-apart loaf. Bake for 23 to 30 minutes, or until the top is deeply golden brown, the cheese is bubbly, and a biscuit pulled from the center is fully cooked and fluffy.
Step 5: Finish and Serve
Once removed from the oven, immediately brush the top of the biscuits with the 2 tablespoons of melted butter. Sprinkle with the remaining chopped green onions for color and freshness. Allow the dish to cool slightly for 5 minutes before serving warm directly from the pan, allowing guests to pull apart the individual, cheesy-bacon bites.
The Anatomy of a Perfect Pull-Apart: Ingredient Selection and Technique
The difference between a good pull-apart biscuit and a truly extraordinary holiday masterpiece lies in the intentional selection of ingredients and precise execution of the mixing technique.
The Biscuit Foundation
The success of this recipe hinges on using flaky refrigerated biscuits. Varieties labeled “Grands” or “Flaky Layers” are ideal. These biscuits are designed to separate into layers during baking, which is crucial for achieving that signature pull-apart texture. When cut into quarters, the separate pieces bake together but retain enough structure to tear apart easily. The layers also create crevices that capture and hold the melted cheese and bacon binder, maximizing flavor in every bite.
Optimal Flavor Layering: Bacon and Cheese
While pre-shredded cheese is convenient, shredding your own sharp cheddar is highly recommended. Pre-shredded cheese contains anti-caking agents that prevent it from melting as smoothly. Freshly shredded cheese melts beautifully, creating those long, satisfying cheese pulls and ensuring the biscuits are thoroughly coated in rich dairy flavor.
For the bacon, use a quality thick-cut variety. Cook it until very crisp so it maintains texture when baked into the moist dough. The fat from the bacon is essential; while the recipe primarily uses an egg-milk binder, many expert bakers reserve a teaspoon of the cooled bacon grease and mix it with the melted butter finishing glaze. This adds an extra layer of smoky depth to the final product.
The Art of the Toss
The mixing technique is critical for a fluffy biscuit. Since we are cutting the biscuits, the goal is to coat the dough without overworking the gluten, which would result in tough biscuits. The egg and milk mixture acts as a binder, ensuring the savory mix-ins stick to the dough pieces.
-
Coat First: Toss the cut biscuits in the egg mixture first.
-
Fold Last: Gently fold the cheese, bacon, and onions in last. A light, fast hand ensures the pieces are combined but still distinct, preserving the biscuit’s ability to rise. The mixture should look shaggy and slightly messy, not uniform.
Achieving Holiday Perfection: Festive Variations and Presentation
To earn the “Christmas” title, the pull-apart biscuits should incorporate seasonal presentation and subtle flavor enhancements that evoke holiday cheer.
Festive Shape and Serving Vessels
While a traditional casserole dish works perfectly, changing the baking vessel can elevate the presentation:
-
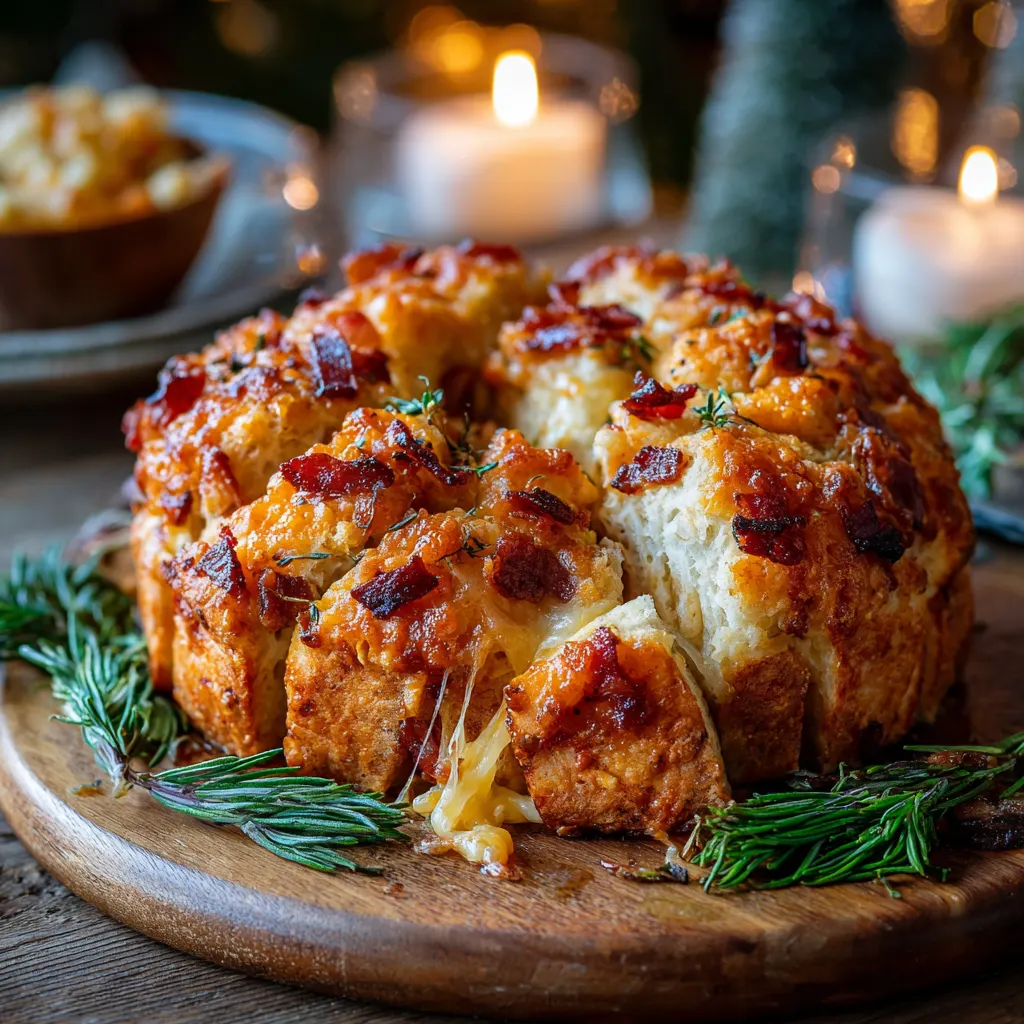
The Pull-Apart Wreath (Bundt Pan): Baking the mixture in a Bundt pan creates a beautiful ring shape, ideal for a holiday buffet centerpiece. This requires thoroughly greasing the pan (or using a non-stick version) and may increase the baking time to 35–40 minutes to ensure the center is cooked through. Once baked, invert the loaf onto a platter and garnish the center hole with small sprigs of rosemary or a small bowl of dipping sauce to mimic a wreath.
-
The Christmas Tree (Sheet Pan): For a playful appetizer, arrange the dough pieces into the shape of a Christmas tree on a parchment-lined baking sheet. Start with one biscuit at the top for the star, followed by progressively longer rows below, finishing with a small square piece at the bottom for the trunk. This method bakes faster (closer to 15–20 minutes) and makes for easy, individual pulling.
Seasonal Flavor Swaps
To deepen the holiday profile beyond the core bacon and cheese:
-
Herbs: Incorporate seasonal herbs. A finely minced tablespoon of fresh thyme or rosemary adds an immediate aromatic, woodsy note perfect for winter. Mix these directly into the egg wash or sprinkle them on top with the final butter glaze.
-
Cheese Variety: Swap out half the cheddar for Gruyère or Smoked Gouda. Gruyère offers a nutty complexity that pairs excellently with bacon, while Smoked Gouda provides a cozy, fireside flavor.
-
Spice and Color: Add a pinch of smoked paprika to the egg wash for color and warmth, or incorporate finely diced, pre-sautéed red bell pepper alongside the green onions to introduce the traditional Christmas red and green palette.
Make-Ahead Mastery and Holiday Brunch Pairings
The ease of preparation is what makes this recipe a holiday staple. Mastering the make-ahead technique allows hosts to focus on guests rather than last-minute cooking.
The Overnight Prep Method
The best way to prepare this dish in advance is to complete the full assembly right up to the point of baking.
-
Assemble: Follow Steps 1 through 3 completely, combining the cut biscuits with the savory mixture in the egg wash.
-
Refrigerate: Spoon the entire mixture into the prepared baking dish, cover tightly with plastic wrap, and refrigerate overnight (up to 12 hours).
-
Bake: In the morning, remove the dish from the refrigerator while the oven preheats. Baking cold dough may require an additional 5–10 minutes in the oven, but the result is often a taller, fluffier biscuit due to the chill setting the butter and layers.
Storage and Reheating
If you have leftovers, they can be stored in an airtight container in the refrigerator for 2–3 days.
-
Reheating (Oven): This is the best method for restoring texture. Place the biscuits on a foil-lined baking sheet and reheat at 300°F (150°C) for 10–15 minutes, or until warmed through and the outer crust is slightly revived.
-
Freezing (Baked): Once completely cool, wrap the loaf tightly in plastic wrap, then foil. Freeze for up to 3 months. Thaw overnight in the refrigerator and reheat as directed above.
Serving Suggestions
These savory biscuits are robust enough to stand alone but also pair beautifully with a variety of Christmas meal components:
-
Brunch: Serve alongside a classic frittata, a bowl of fresh fruit, or sweet glazed ham slices for a full holiday breakfast spread.
-
Appetizer: Present with a simple, contrasting dip. Options include a creamy Honey-Mustard Glaze for sweetness, or a side of Sriracha Ranch for a spicy kick.
-
Dinner Side: They serve as a comforting, bread-like replacement for dinner rolls, perfect for soaking up gravy from a roast turkey or prime rib.
Troubleshooting and Expert Tips for Texture
Even using canned dough, a few expert adjustments can ensure your pull-apart biscuits are light, flaky, and beautifully golden every time.
Preventing a Doughy Center
The most common issue with pull-apart bread is an undercooked, doughy center, particularly when using a deep pan like a Bundt pan or when doubling the recipe in a small dish.
-
Monitor Internal Temperature: The surest way to guarantee doneness is to use a digital thermometer. The center of the biscuits should register 190–200°F (88–93°C) when fully cooked.
-
Use Foil: If the edges are browning too quickly before the center is done (usually around the 20-minute mark), gently place a sheet of aluminum foil over the top of the pan (tenting). This shields the crust from further browning while allowing the inside to finish cooking.
-
Use Flaky Layers: As noted, the quality of the flaky biscuits allows heat to penetrate the layers more effectively than traditional dough, promoting even cooking.
Maximizing Crust and Flavor
The final touch is what seals in the flavor and gives the biscuits their attractive sheen.
-
The Butter Glaze: Brushing with melted butter immediately upon removing the biscuits from the oven helps keep the crust tender and introduces a rich, nutty flavor.
-
Flaky Salt Finish: After the butter and green onions are applied, a small sprinkle of flaky sea salt (like Maldon) on the exposed biscuit tops is highly recommended. The pops of salinity provide a perfect contrast to the rich cheese and bacon, enhancing the overall savory profile.
-
Baking Placement: When using a casserole dish, try to arrange the cut pieces so they are all touching. This prevents the exposed edges from crisping too hard and instead encourages the pieces to rise upwards and stay soft, facilitating the true “pull-apart” effect.
The Ultimate Communal Holiday Starter
The Christmas Cheesy Bacon Pull-Apart Biscuits are more than just a recipe; they are an embodiment of holiday hospitality. They offer the warm comfort of homemade baking without the stress of kneading and proofing yeast. In a season often characterized by complicated menus and lengthy preparation, this dish provides immediate, satisfying gratification.
Whether baked into a festive wreath, arranged as a casual tray for game day appetizers, or served as the star alongside scrambled eggs on Christmas morning, these savory biscuits deliver a perfect blend of smoky, salty, and cheesy goodness. They are designed for sharing, celebrating the season’s focus on togetherness, making them a delicious and unforgettable part of any winter gathering. This is the must-have, quick-fix recipe that tastes like you spent hours crafting it, allowing you to spend less time in the kitchen and more time enjoying the magic of the holidays.
