
Introduction to Peanut Butter & Chocolate No-Bake Cookies
No-bake cookies have become a beloved staple in kitchens everywhere. These simple yet satisfying treats don’t require an oven, which makes them perfect for quick indulgence. Typically made by combining ingredients like oats, sugar, butter, and milk, no-bake cookies are mixed together, chilled, and ready to enjoy in just a short time. Their ease and versatility have earned them a special place in the dessert world, especially when you’re craving something sweet without the fuss of baking.
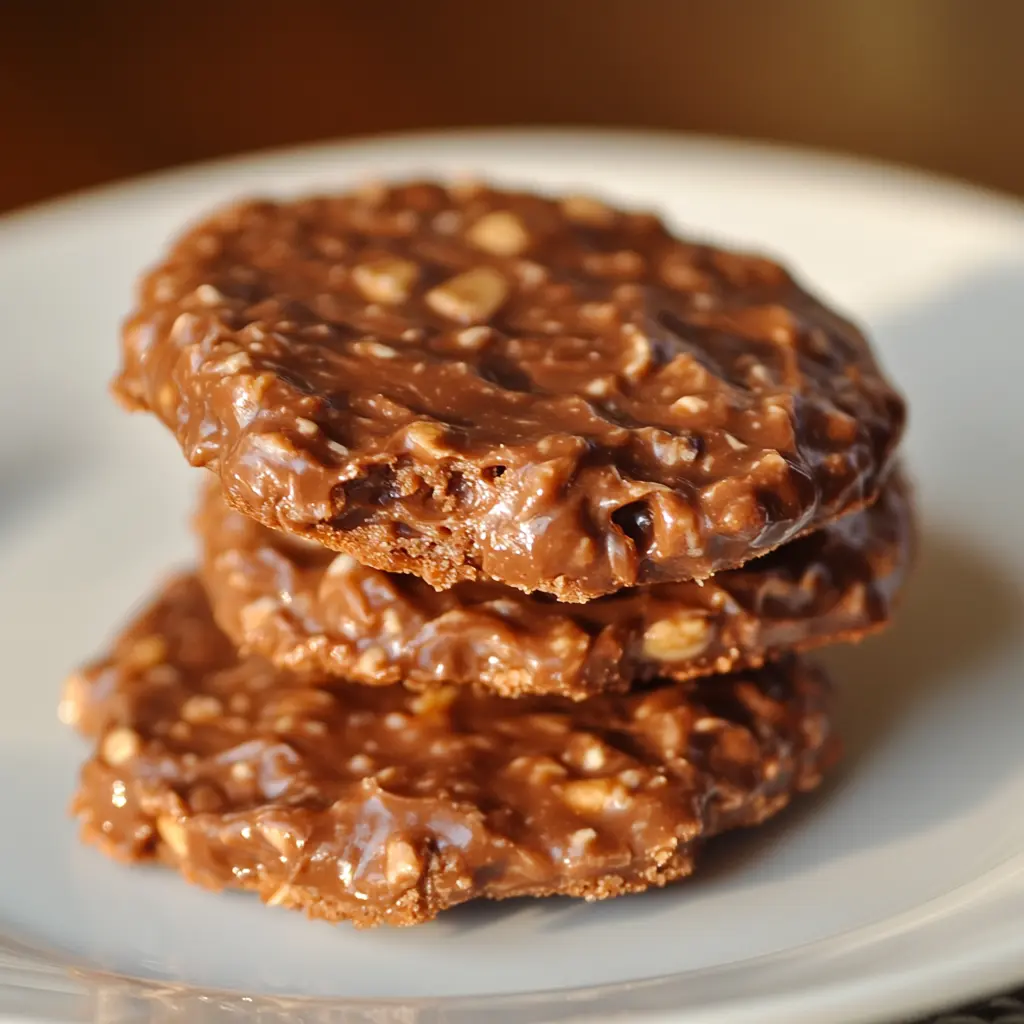
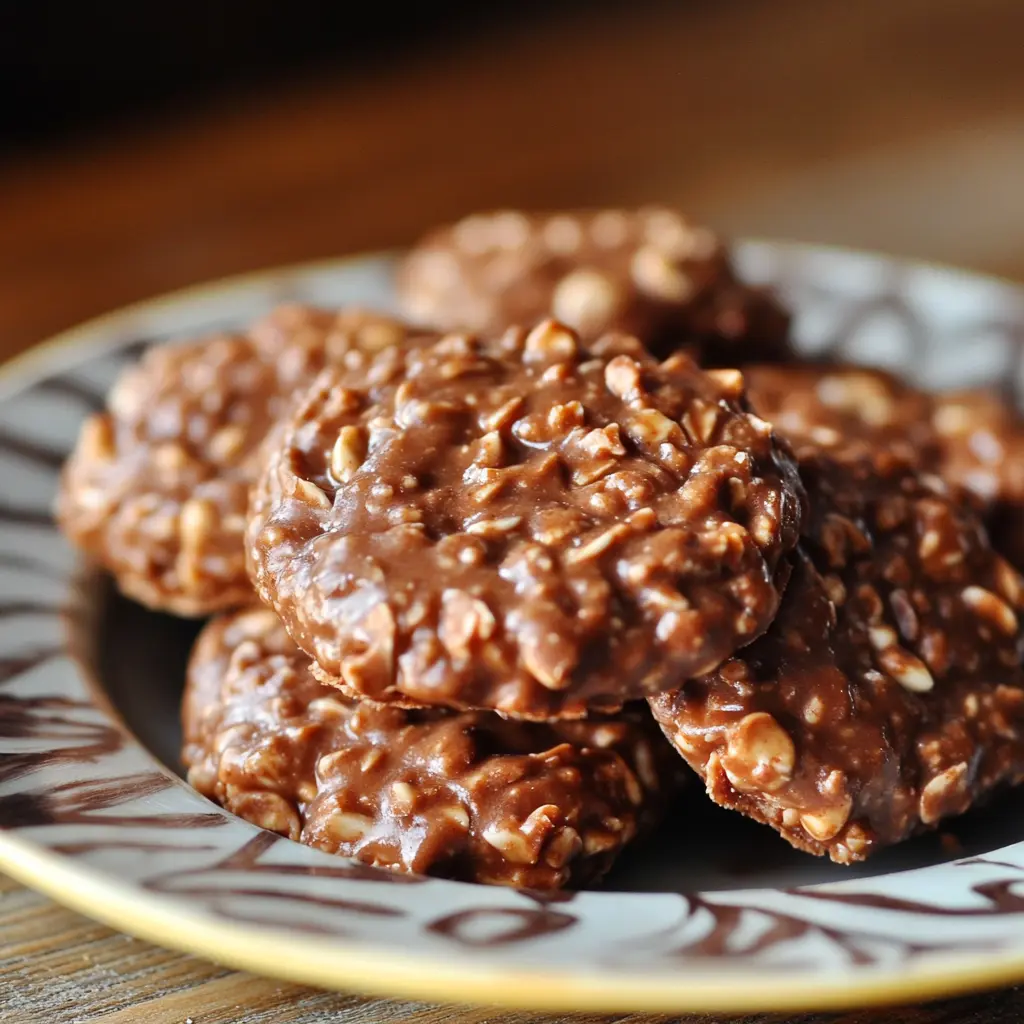
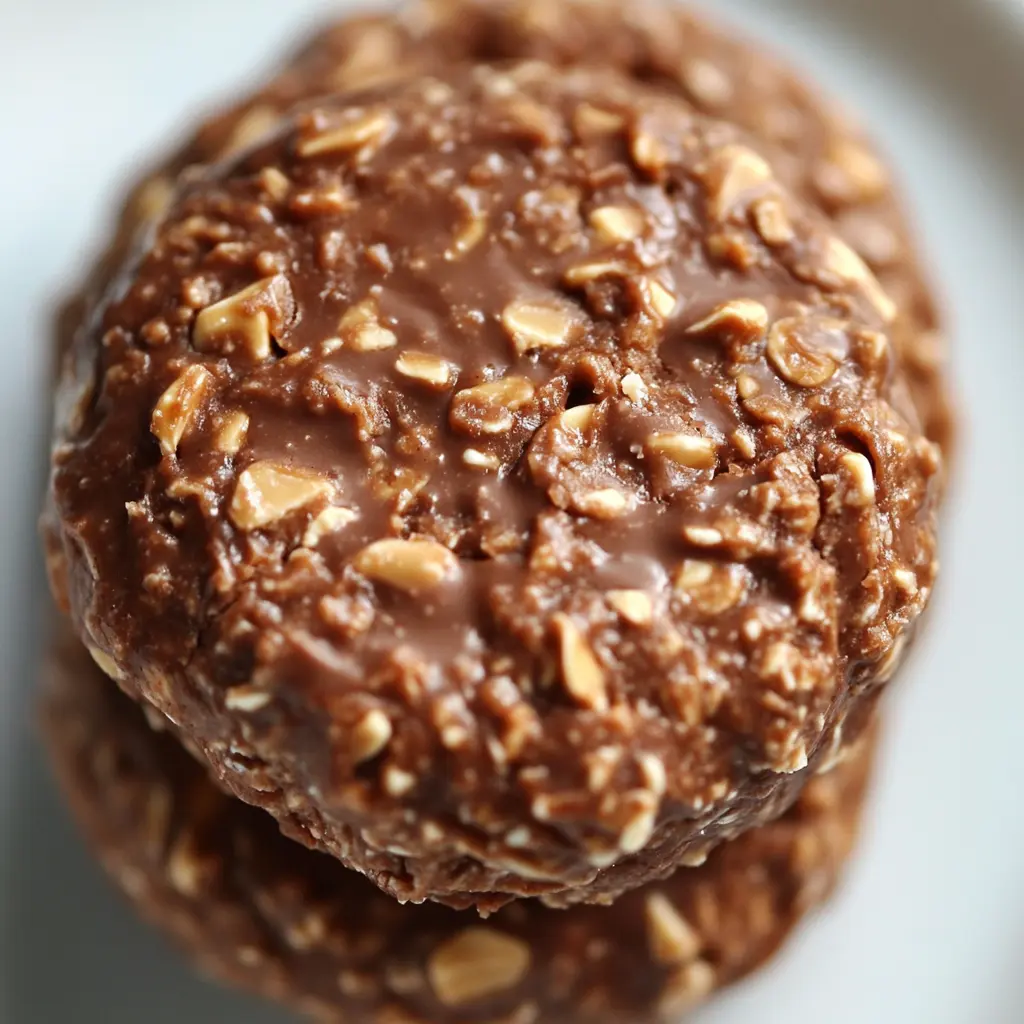
Among the many no-bake variations, Peanut Butter & Chocolate No-Bake Cookies stand out. This specific recipe pairs two timeless flavors: creamy peanut butter and rich chocolate. It’s not just about the taste but the texture—a perfect balance of chewiness from the oats and a smooth, chocolaty richness that comes from the cocoa. This combination is beloved for its nostalgic charm and its ability to satisfy both sweet and salty cravings in one bite. Whether you’re making them for a quick treat or as a dessert for guests, Peanut Butter & Chocolate No-Bake Cookies always hit the mark.
The purpose of this article is clear: to guide you step-by-step in making these irresistible cookies. From gathering the ingredients to troubleshooting common issues, we’ve got you covered. With this comprehensive guide, you’ll become an expert in crafting Peanut Butter & Chocolate No-Bake Cookies, ensuring they turn out perfectly every time. We’ll also answer the most frequently asked questions to help you avoid common pitfalls. Let’s dive in!
Ingredients and Equipment
When it comes to Peanut Butter & Chocolate No-Bake Cookies, the ingredients you choose play a key role in the final result. Here’s a breakdown of what you’ll need, along with tips on how to get the best out of each one.
Essential Ingredients
- Granulated Sugar: This ingredient provides the necessary sweetness and helps achieve the chewy texture of the cookies. Its fine texture dissolves easily, ensuring your cookies will hold together once chilled. Without it, the cookies would lack the right balance of flavor and consistency.
- Unsalted Butter: Opting for unsalted butter is crucial. It allows you to control the level of salt in the recipe. Butter also contributes to the creamy texture and rich flavor, making it a foundational ingredient in these no-bake cookies.
- Whole Milk: While whole milk creates a rich base for the chocolate mixture, you can substitute it with almond milk or oat milk if you’re looking for a dairy-free version. However, these alternatives may alter the flavor and consistency slightly, so use them with care.
- Unsweetened Cocoa Powder: When choosing cocoa powder, go for a high-quality unsweetened variety to get that deep chocolate flavor. Avoid sweetened cocoa powder as it will throw off the balance of sweetness in the cookies.
- Quick-Cooking Oats: Quick-cooking oats are the ideal choice for this recipe. They absorb the chocolate mixture better and help the cookies set quickly. Old-fashioned oats, though similar, may create a slightly chewier texture and take longer to set, making them less ideal for no-bake cookies.
- Creamy Peanut Butter: This is the star of the show, providing the signature flavor and smooth texture that complements the chocolate. Opt for creamy peanut butter rather than chunky, as it mixes better into the chocolate base and creates a uniform texture.
- Vanilla Extract: A splash of vanilla enhances the overall flavor profile, bringing a subtle sweetness that complements both the peanut butter and chocolate. Don’t skip this ingredient—it’s essential for rounding out the taste.
- Salt: A pinch of salt helps balance the sweetness and brings out the rich flavors of both the chocolate and peanut butter. Don’t overdo it; just a little is enough to make a big impact on the flavor.
Optional Additions
- Chopped Nuts: Chopped peanuts, almonds, or cashews can add a crunchy contrast to the smoothness of the peanut butter and chocolate. Nuts also enhance the flavor with their natural oils and toasty notes.
- Shredded Coconut: If you enjoy coconut, shredded coconut adds a tropical flair and texture to your cookies. It pairs beautifully with peanut butter and chocolate, giving the cookies a slight chewiness and an additional flavor layer.
- Chocolate Chips: For an extra burst of chocolate, add chocolate chips. You can stir them into the mixture right before spooning the cookies onto the parchment paper or sprinkle them on top once they’ve set for a decorative touch.
Necessary Equipment
- Medium Saucepan: A medium saucepan is the perfect size for heating the butter, milk, sugar, and cocoa. It should be large enough to stir the mixture without overflowing, ensuring the ingredients are well combined.
- Wooden Spoon or Silicone Spatula: These tools are essential for mixing the ingredients together. A wooden spoon allows for even stirring without damaging the pan, while a silicone spatula ensures you can scrape every bit of the mixture out of the pan.
- Measuring Cups and Spoons: Accuracy is important for the perfect texture and flavor. Make sure to measure your ingredients precisely, especially the oats and cocoa powder, to maintain the balance of flavors.
- Parchment Paper or Wax Paper: To prevent sticking and make cleanup easier, line your surface with parchment or wax paper. These papers also provide a clean surface for the cookies to cool and set properly without sticking.
- Cooling Rack or Flat Surface: A cooling rack is ideal for setting the cookies as it allows air to circulate around them, helping them cool evenly. If you don’t have a rack, a flat surface works just as well—just be sure to leave space between each cookie to prevent them from sticking together.
With the right ingredients and tools, you’ll be able to make the perfect batch of Peanut Butter & Chocolate No-Bake Cookies every time!
Step-by-Step Preparation
Making Peanut Butter & Chocolate No-Bake Cookies is a simple yet rewarding process. Let’s break it down step by step to ensure you get perfect results every time.
Preparing the Mixture
- Combining Sugar, Butter, Milk, and Cocoa: Heating Instructions and Tips
Start by placing your granulated sugar, butter, whole milk, and unsweetened cocoa powder into a medium saucepan. Set the pan over medium heat. Stir the ingredients constantly to ensure the sugar dissolves fully and the butter melts without burning. This mixture should be smooth and well-combined before moving to the next step. Keep a close eye on the heat to avoid scalding the milk or overcooking the cocoa. Patience is key here—don’t rush the process, as achieving the right consistency relies on gentle heating. - Achieving the Boil: Importance of Boiling for the Correct Texture
Once the butter and sugar are completely dissolved, allow the mixture to come to a rolling boil. This is a crucial step: let it boil for exactly 1 minute. Boiling activates the sugar’s binding properties, helping to create the chewy texture that no-bake cookies are known for. If the mixture doesn’t boil long enough, the cookies may turn out too soft and won’t hold together. Boil it for a full minute, stirring continuously to avoid any burnt spots at the bottom. - Removing from Heat and Adding Peanut Butter and Vanilla: Ensuring Smooth Incorporation
After the mixture has boiled for 1 minute, immediately remove the saucepan from the heat. Stir in the creamy peanut butter and vanilla extract. The peanut butter should melt smoothly into the chocolate mixture, adding that rich, nutty flavor and creamy texture. Make sure everything is evenly combined. If you notice any lumps of peanut butter, continue stirring until the mixture is completely smooth and uniform. This step is essential for creating the perfect consistency.
Incorporating Oats and Optional Additions
- Mixing Oats Thoroughly: Ensuring Even Distribution
Once the peanut butter and vanilla are fully incorporated, it’s time to add the oats. Stir in the quick-cooking oats, one cup at a time, ensuring they’re evenly coated with the chocolate-peanut butter mixture. This step is key for the texture of your cookies, as the oats will help them set and form their chewy consistency. Stir well to ensure that each oat is covered with the chocolate mixture for even flavor and texture throughout. - Adding Nuts, Coconut, or Chocolate Chips: Timing and Techniques
If you’re adding any optional ingredients like chopped nuts, shredded coconut, or chocolate chips, now is the time to do it. Add them after the oats, once everything is thoroughly mixed. Be gentle when folding in these additions to avoid breaking up the oats. You can mix them into the batter or sprinkle them on top of the cookies after they’re shaped. The key is to distribute them evenly, so each bite offers a bit of crunch or sweetness depending on what you choose.
Forming the Cookies
- Spoon Method: Size and Spacing of Cookies
Using a spoon, scoop out portions of the mixture and drop them onto a sheet of parchment or wax paper. For uniform cookies, aim for about 1 tablespoon of dough per cookie. Space the scoops about 1 inch apart to allow room for the cookies to set without sticking together. Be sure to work quickly as the mixture will start to cool and firm up. - Alternative Methods: Using Cookie Scoops or Hands
If you have a cookie scoop, this can help make the process even quicker and ensure uniform-sized cookies. Alternatively, you can use your hands to shape the cookies into balls or discs if you prefer. Just be cautious as the mixture will be warm, so use a spoon to transfer the mixture onto your hands if it’s too hot to handle directly. The goal is to create compact, even portions that will hold together once they cool.
Setting and Cooling
- Optimal Cooling Time: Ensuring Proper Setting Without Over-Hardening
Once your cookies are formed, allow them to cool at room temperature for at least 30 minutes. This will give them time to firm up without becoming too hard. Avoid placing them in the refrigerator during the first cooling stage, as this could cause them to set too quickly and lose their chewy texture. If you’re in a hurry, you can place them in the fridge for a few minutes after the initial 30 minutes of cooling. - Storage Instructions: Best Practices for Freshness
Once your cookies have fully cooled and set, it’s important to store them properly to maintain their freshness. Store them in an airtight container at room temperature for up to a week. If you’d like to keep them fresh for longer, you can refrigerate them or freeze them. To freeze, place the cookies in a single layer on a baking sheet and freeze for 1 hour. After that, transfer them to a freezer-safe bag or container. This method will help preserve the texture and flavor for up to 3 months.
With these easy-to-follow steps, you’ll have a batch of delicious Peanut Butter & Chocolate No-Bake Cookies ready to enjoy in no time. Whether you’re treating yourself or sharing with others, these cookies are a guaranteed crowd-pleaser!
Troubleshooting Common Issues
While Peanut Butter & Chocolate No-Bake Cookies are simple to make, sometimes issues arise during the preparation process. Let’s walk through some common problems and how to fix them, ensuring your cookies come out perfect every time.
Cookies Too Soft or Runny
Possible Causes:
- Under-boiling the mixture: If the sugar and cocoa mixture doesn’t reach a rolling boil or isn’t boiled long enough, it won’t thicken properly. The cookies may remain too soft and runny after cooling.
Solutions:
- Adjusting boiling time and temperature: Be sure to allow the mixture to come to a full rolling boil and maintain that boil for exactly 1 minute. Boiling for less than a minute won’t activate the sugar and won’t set the cookies. Also, make sure your stove’s heat is at a medium-high setting—too low, and the mixture won’t boil correctly. If you notice that the mixture is too thin, you can boil it a bit longer, but keep a close eye on it to avoid over-boiling.
Cookies Too Hard or Crumbly
Possible Causes:
- Over-boiling the mixture: If the mixture boils for too long, the sugar may crystallize, making the cookies overly hard and crumbly.
Solutions:
- Monitoring boiling time closely: To prevent this, make sure to only boil the mixture for 1 minute. Any longer, and the mixture may become too thick and dry, leading to hard cookies. If you suspect you’ve over-boiled the mixture, try reducing the heat and stirring gently to smooth it out before proceeding.
Cookies Sticking to Paper
Possible Causes:
- Insufficient cooling time: If you try to remove the cookies from the paper before they have cooled and set completely, they may stick and fall apart.
Solutions:
- Allowing adequate cooling before removing: Be patient and allow the cookies to cool for at least 30 minutes at room temperature before attempting to remove them from the parchment or wax paper. If you are in a hurry, you can refrigerate them for a few minutes after they’ve cooled slightly. This will help them set without becoming too sticky.
Uneven Texture or Clumps
Possible Causes:
- Inconsistent mixing: If the ingredients, especially the oats or peanut butter, are not mixed thoroughly, you may end up with clumps or uneven texture in the cookies.
Solutions:
- Ensuring thorough and even mixing: Take your time when stirring the mixture to ensure all the ingredients are evenly incorporated. When adding the oats, make sure each oat is coated with the chocolate-peanut butter mixture. Stir the mixture until you see no dry oats or pockets of peanut butter left—everything should be evenly distributed before scooping out the cookies.
Flavor Imbalances
Possible Causes:
- Incorrect ingredient ratios: If the proportions of sugar, peanut butter, or cocoa are off, the flavor balance can become skewed. Too much sugar can make the cookies overly sweet, while too little peanut butter can make them taste bland.
Solutions:
- Following the recipe measurements precisely: For the best flavor, follow the recipe’s ingredient ratios carefully. Measuring your ingredients accurately will ensure that the sweetness of the sugar, the richness of the peanut butter, and the depth of the cocoa are perfectly balanced. If you’re making adjustments (such as using an alternative ingredient), keep in mind that substitutions can alter the overall flavor.
By troubleshooting these common issues, you can ensure your Peanut Butter & Chocolate No-Bake Cookies come out just right every time. Keep these tips in mind as you bake, and you’ll be able to fix any mishaps along the way. Happy baking!
Frequently Asked Questions (FAQs)
Can I Use Old-Fashioned Oats Instead of Quick-Cooking Oats?
Differences in texture and setting time:
Old-fashioned oats are thicker and chewier than quick-cooking oats, which can result in a denser, chewier texture for your cookies. The cookies may also take a bit longer to set properly. Quick-cooking oats are preferred for this recipe as they absorb the chocolate mixture better and allow the cookies to firm up more quickly. If you do use old-fashioned oats, expect a slightly different texture and longer setting time.
Can I Substitute Almond Butter for Peanut Butter?
Flavor and consistency considerations:
Almond butter can be substituted for peanut butter, but the flavor will change. Almond butter has a more subtle, slightly nuttier taste compared to peanut butter, which may affect the overall flavor profile of the cookies. Additionally, almond butter can sometimes be a bit runnier than peanut butter, so you might need to use a little less to maintain the correct consistency. The cookies will still taste great, but the flavor will differ from the classic peanut butter version.
How Long Do These Cookies Last?
Storage duration and conditions:
Peanut Butter & Chocolate No-Bake Cookies can last up to one week when stored in an airtight container at room temperature. If you want them to stay fresher for longer, store them in the refrigerator, where they will last for up to 2 weeks. Be sure to separate layers with parchment paper to prevent them from sticking together.
Can I Freeze These Cookies?
Freezing methods and thawing instructions:
Yes, you can freeze Peanut Butter & Chocolate No-Bake Cookies. To freeze them, place the cookies in a single layer on a baking sheet and freeze for about an hour. Then, transfer them to a freezer-safe container or bag. They will stay fresh for up to 3 months. To thaw, simply leave them at room temperature for about 10-15 minutes before enjoying.
Why Are My Cookies Too Soft?
Common causes and preventive measures:
If your cookies are too soft, it may be because the mixture wasn’t boiled for long enough. Make sure the mixture reaches a rolling boil and is allowed to boil for 1 full minute. This step helps activate the sugar, which gives the cookies their chewy texture. If the mixture isn’t boiled long enough, the cookies will lack the proper structure and remain soft.
Can I Add Other Mix-ins Like Raisins or Pretzels?
Compatibility and texture considerations:
Yes, you can add other mix-ins like raisins, pretzels, or even dried cranberries to personalize your cookies. Raisins will add a touch of sweetness, while pretzels will bring a salty crunch. Keep in mind that adding too many mix-ins could alter the texture, making the cookies harder to set. Be sure to balance the amount of mix-ins with the amount of oats to maintain a good structure.
Why Are My Cookies Too Hard?
Over-boiling and its effects:
If your cookies are too hard, it is likely due to over-boiling the sugar and cocoa mixture. Boiling for more than 1 minute can cause the sugar to overcook, making the cookies dry and crumbly. Always keep a close eye on the timer and remove the pan from heat as soon as the mixture reaches a rolling boil for 1 minute.
Can I Use Non-Dairy Milk Alternatives?
Impact on flavor and texture:
Non-dairy milk alternatives like almond milk, oat milk, or coconut milk can be used as substitutes for whole milk. However, be aware that they may slightly alter the flavor and texture of the cookies. Almond milk, for example, has a lighter, nuttier flavor, while oat milk may give a creamier texture. These alternatives work well, but the final result may differ from the traditional version.
How Do I Know When the Mixture Has Boiled Long Enough?
Visual and textural cues:
The mixture should come to a full, rolling boil, meaning you should see continuous bubbling across the surface. After 1 minute of boiling, the mixture should have thickened slightly and should coat the back of a spoon. If it’s too thin, you may need to boil it a little longer next time. If it’s too thick or starting to harden, reduce the boiling time.
Can I Double the Recipe?
Adjustments and considerations for larger batches:
Yes, you can easily double the recipe to make a larger batch. The process remains the same, but make sure you have a large enough saucepan to accommodate the increased volume. Additionally, check the texture of the mixture as you combine the ingredients—larger batches may require slightly more stirring to ensure everything is evenly incorporated.
Conclusion
Peanut Butter & Chocolate No-Bake Cookies are a simple, versatile, and delicious treat that anyone can make. Whether you stick to the classic recipe or experiment with your own mix-ins, these cookies are sure to satisfy your sweet cravings. Don’t hesitate to try different variations and enjoy the fun and satisfaction of creating this timeless dessert!
